Printing Issues After Software Update

When your prints come out looking completely different than last time, it makes for a frustrating morning. 

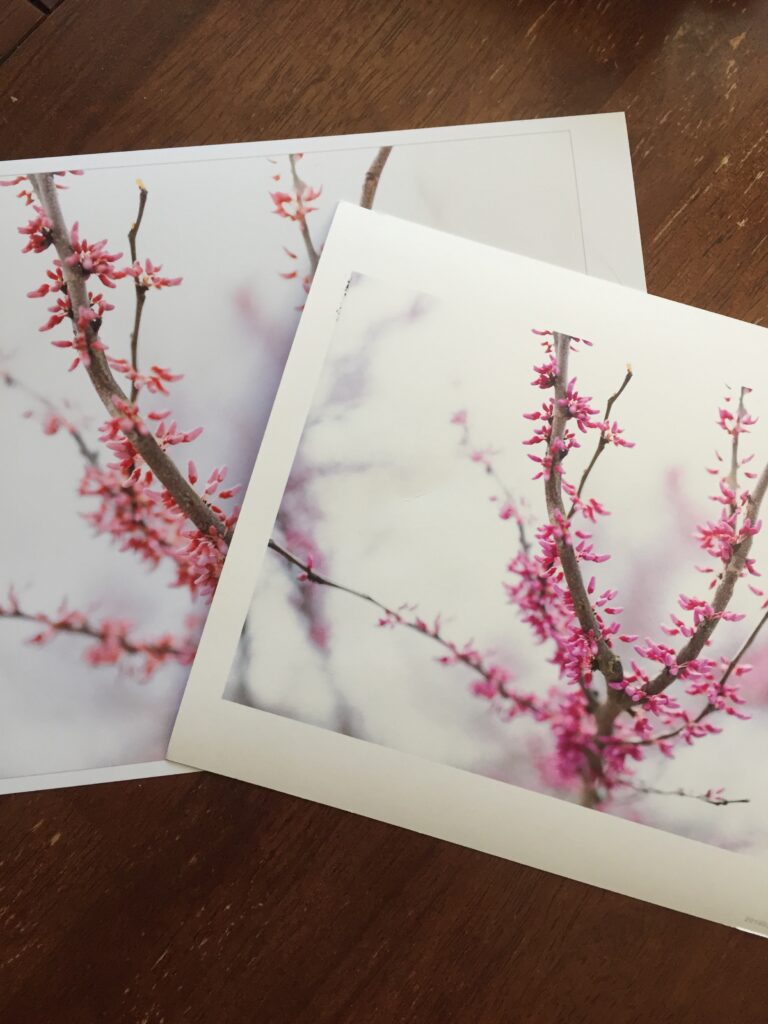
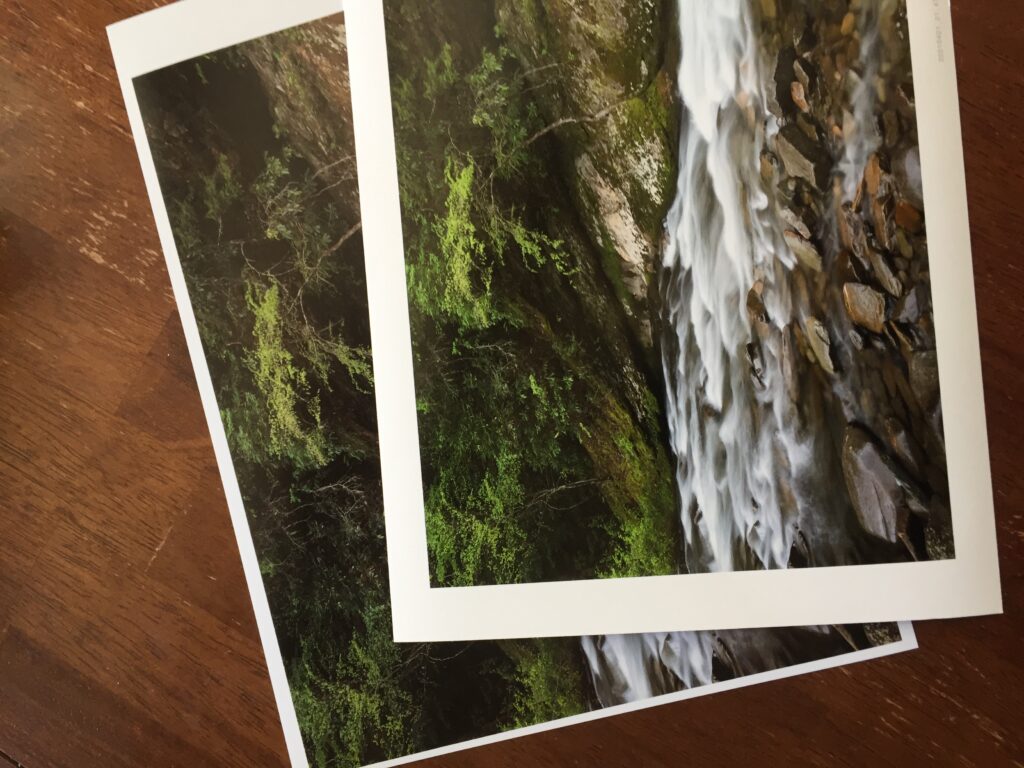
This morning I tried to print with my MacBook Pro fresh of an update to Catalina, the latest software it can run. The first print came out looking odd. So I compared it to a previous print, and my color memory was correct, it did not print properly. 

Time to start troubleshooting. I picked a second photo and printing it, triple checking that I chose all the correct settings.  Same problem. So I print it again with a different profile to see if the profile is the problem. Still wrong. SO I try it on a completely different paper and profile. Still wrong. Possible root causes are going through my mind this whole time. 
Maybe it’s the ink starvation issue I had when this printer was new that caused one of the colors to drop out? So I pulled out the special test sheet made specifically for this purpose. The colors didn’t match, but they all printed. So probably not that. Another sheet of paper burned with no fix. 
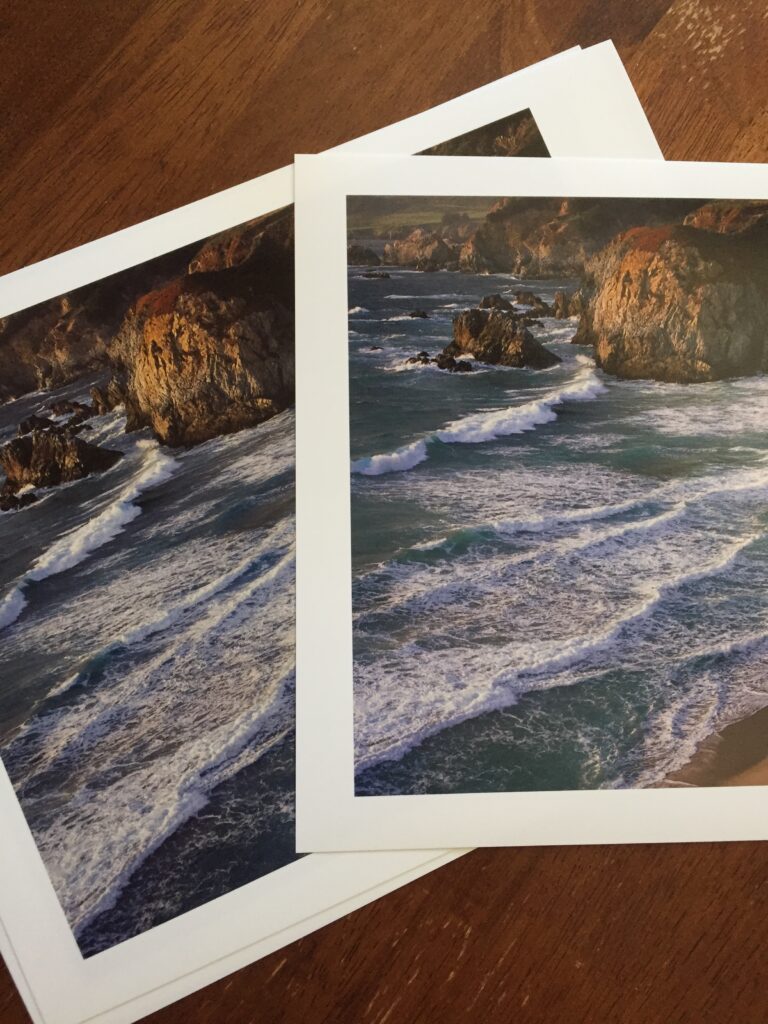
I’m about six sheets of paper in at this point, and that is always frustrating because I hate wasting paper and money. But burning paper is part of troubleshooting a printer so I fordge ahead. And my heart rate is going up as I think about at best spending the next day or so remaking profiles, or at worst dropping $800+ on a new print head and the ink needed to install it. 

With this latest piece of data, I realize I’m chasing my tail, and before I go down the road of more involved solutions, I need to try printing from a different computer to isolate if this is software or hardware related. Time to fire up the mac mini that I had validated last week as “working.”

Eureka! That fixed it. My heart rate goes down, no need to buy an expensive print head to fix it, or reprofile all my papers.

So what happened? Likely a software issue when I updated my MacBook Pro, probably the print driver. A reinstall of the print driver with the latest version should fix it. But that can wait for another day when I’m not trying to make Christmas presents. 

Today’s difficulties are one of the reasons I am very cautious about major updates to my computers. Updates cause issues and deviations from the carefully controlled environment needed to make consistent, accurate prints. 

Furthermore, my printer and monitor rely on third party apps to work correctly, and it’s common  for vendors to take months after a major software update to write new ones that are compatible. NEC had to write the Spectraview app I use to calibrate my monitor, and IIRC it was months after OS 11 came out. Not good…I couldn’t go without my calibrated monitor for even a few days. 

So some takeaways from this. 

1. Software changes and or updates can cause changes to how your printer prints color, so only update when you have time to troubleshoot the problems it can cause. Expect problems and the need to revalidate your printing setup after updating system software or print drivers. In general, it is best to wait at least six months after a major system software update to upgrade to give time for the bugs to be worked out. Identify all mission critical software and ensure it works properly with the OS you are updating to. And it helps to have a way to be able to “roll back” to your old system software if the new version doesn’t work. 

2. Diagnosing problems is much easier if you have test prints that validate previous printer settings so you can compare your new setup to your previous approved setup. I find few people do this, but it’s a vital part of my workflow. And a reminder that I need to finish the curriculum for my color management workshop. 

3.It’s helpful to have two different computers you can print from to test if a problem is printer or computer related. This also helps during software updates because it gives you a way to continue printing from a known setup while troubleshooting issues. This helped save my bacon today. 

Had I not had a second computer to print from, I might have started more invasive fixes that still wouldn’t have worked because I’m working from a fault tree that is in my head. So maybe my next step is to create a printed fault tree to help me solve these problems instead of having to tease out the answer every time and risk missing a critical fault finding step.
New Workshop! Mastering Manual Exposure

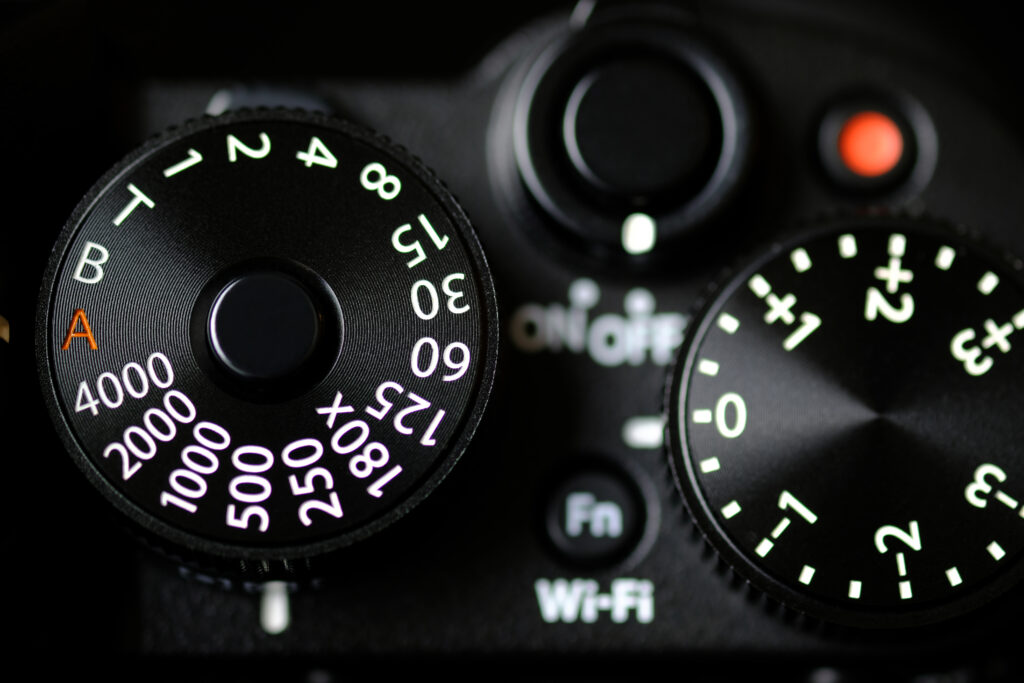
How would you feel if every time you ordered at a restaurant, they only gave you half the portion you paid for?  Believe it or not, that’s what’s happening with most of your photos. That’s because if you are like most people, you are underexposing whether you realize it or not.

With as little as 1/2 stop of underexposure, you’re only capturing about 58% of your sensor’s full potential. And at one stop under, you’re only getting about 36% of its potential.  If I’m spending thousands on my camera and lenses, not to mention travel, I don’t want to get cheated out of half  (or more!) of my camera’s potential, and neither do you. And I can help. 

Ok, now that I’ve got your attention, let’s get into the details. Even small amounts of underexposure have a big impact on our photos. And despite all the technology built into our cameras, even if you are reading the histogram, they still don’t make a “perfect” exposure every the time.  Fortunately there is a better way.  I’ve come up with a process that will let you manually expose to within 1/3 stop of optimum in most situations, and I want to show you how to do it. With my process you’ll make better exposures, and do it with speed and confidence so you won’t miss  those “once-in-a-lifetime” pictures. 

I’ve spent the last three years digging into the issue of exposure obsessively, and I can honestly say what I’ve discovered has changed my photography like few things have in my 30+ years of making pictures. It’s knowledge I use every time I click the shutter.

Most importantly, I’m getting better results, and my photos have a quality or “glow” that better reflects what I saw and felt, the things that made me want to take a photo in the first place. But it’s also made photographing easier and quicker when I’m in the field. Instead of the uncertainty I used to experience, and the time consuming multi-frame bracketed exposures I used to make, I can quickly determine the exact exposure for optimum results AND take my photo knowing that I nailed the shot. Instead of walking away thinking “I hope I got it,” I know with confidence that I did. That certainty and confidence has made me more creative as I work a subject or location, and helped me make more “good” photos. 

But what surprised me most is how all this affected my processing. If I’m in “good” light that works with the latitude of my sensor, my processing is easier than every. I’m not fighting the photo just to get it to look the way I remember it. Instead I’m able to spend more time making the small, refined moves that bring out more of the photograph instead of trying to correct my errors.

But what about program exposure modes?The class is titled Mastering Manual Exposure, what about when I need to shoot in Aperture or Shutter Priority? The truth is that mastering manual exposure is the key to getting the most out of program modes, so mastering manual is the key to getting more out of those modes as well.

The good news is that it’s easier than you think. On workshop after workshop, students have been surprised by how simple my process is, and how it frees them to think more creatively and achieve better results. 

This class is for photographers of any skill level who want a tested-and-proven approach. We’ll cover a lot of ground, and you’ll gain real world, tested, practical knowledge that will grow your skill set. 

This four lessons class will meet at 7:00 PM Central Time, on January 10th, 17th, 24th, and 31st. Recordings will be available for four weeks after each class. So if you miss a class, need to time shift, or want to watch it again, you can. 

This is knowledge you will use every time you click the shutter! If you are ready to transform your photograpy, then this is the workshop for you!

Sign up today, and get ready to change the way you photograph!

Keep chasing the light!

– Rich Seiling

Color Processing Fundamentals – Online Workshop

Looking forward to my next online class with Paul’s Photo and Better Photo Academy. Sign up for the free introduction talk on October 25, then join me for four sessions where I’ll share the tools that I use to create color processing success!

Color Processing Fundamentals

Introduction to Color Processing – FREE

October 25, 2021 @ 5PM

Is your color processing a hit-and-miss guessing game that leaves you frustrated and wanting for more?

Beautiful color photos come from understanding and controlling the fundamentals. Join Creative Photo Academy and Rich Seiling for this inspiring evening that will show you the techniques and thought processes Rich uses to create museum quality color photographs.

Good Color Part 1 – Exposure, RAW Processing, and Contrast

November 1, 2021 @ 5PM

Every adjustment affects color. Rich will teach you how to build a solid foundation for your processing that solves, and doesn’t create problems.

Good Color Part 2 – Refining Your Vision and Color Correction

November 8, 2021 @ 5PM

Learning to see the difference between “good” and “bad” color will make it easier to process your photos and get better results. Rich will show you how to evaluate and correct the most common problems.

Local Control & Brushing

November 15, 2021 @ 5PM

Brushing can sometimes create problems as quickly as it can solve them. Learn how to apply the principles of good color to solve problems and better capture the viewer’s eye.

Printing & Color Management

November 22, 2021 @ 5PM

Getting a print that looks like your screen can be challenging. We’ll give you a set of tools that will improve your results and create confidence in your process.

My Experiences at Blackwater Falls

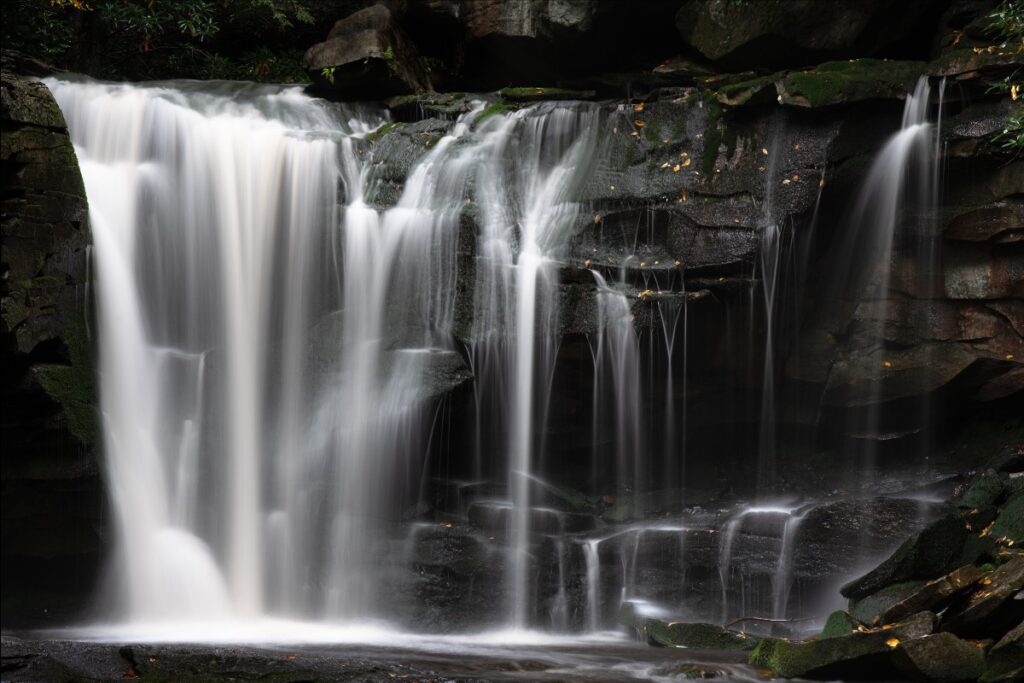
Elakala Fall, Blackwater Falls State Park

One of the great rewards of nature photography is finding a new and unexpectedly beautiful place to photograph and explore. Imagine my surprise to discover one of these treasures at Blackwater Falls State Park, tucked away in the often-overlooked wilds of West Virginia. I made some of my favorite photographs of 2020 there, and I’m excited to share this spectacular location with a new group of students through my Visionary Wild Workshop, which takes place September 27 to October 1, 2021. 

I hope you can join me as we explore, photograph, and enjoy this beautiful autumn wilderness, just a three hour drive from Washington DC. It is a perfect workshop location, with its accessibility and a wide variety of inspiring photographic opportunities. Our workshop is timed to take place during peak fall color, which happens earlier than some other autumn foliage locations. Register now to join us, and we’ll help you discover this spectacular place for yourself.

Blackwater Falls has the size and freedom a nature photographer needs to wander and explore, as they discover both the landscape and themselves. Its details, intricacy, and textures keep the mind and spirit engaged and stimulated. It’s the kind of location that will draw me in, again and again, and I think you’ll feel the same.

In 2020, when I signed on to teach with Visionary Wild at Blackwater Falls State Park, I thought I knew what to expect…and I couldn’t have been more wrong. From my research, parts of it looked like the western slope of the Appalachians, which I explored during my college days as I was honing my craft. I saw some similar scenes and photographic opportunities, and a chance to help the class make some very solid work in a beautiful location. But I wasn’t prepared for just how unique and stunning the Blackwater Falls / Dolly Sods region is. 

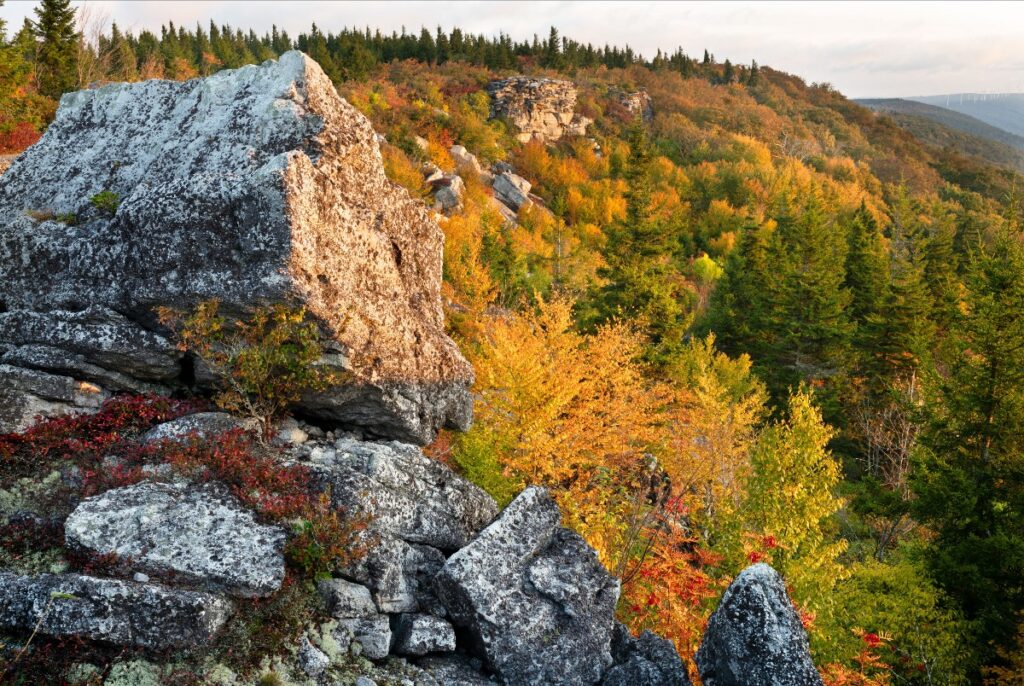
Bear Rocks, Dolly Sods Wilderness

On a high plateau in the Allegheny, with elevations reaching 4,000 feet, I entered an ecosystem unique from what I expected. Temperature, climate, and flora conspired to make it feel like the Upper Peninsula of Michigan. In fact, it’s called “Little Canada,” because it has species that are not found outside of the near-arctic tundra of Canada. Standing in the quiet wilderness, you would never suspect this place was within a half-day drive of several major Eastern U.S. cities. 

After checking into the lodge at Blackwater Falls State Park that first night, I discovered it was perched on the edge of a deep river gorge, with spectacular views across and down the canyon, its walls peppered with fall color from the dominant red maples as well as the yellow of other trees. I’ll admit that I can be a bit hard to impress, after living 20+ years on the edge of the Yosemite wilderness, but I was truly awed, and I couldn’t wait to explore more. 

Moss Hummock, Canaan Valley State Park

If I had been on my own, it would have taken a lot of work to discover the many treasures of this area, but with Justin Black as my guide, I was able to enjoy the crash course. Justin has been visiting this location since his childhood, and explored it on backpacking trips and photo assignments–you may even recognize the area from some of the work he’s done for FujiFilm. It’s clear why the location continues to inspire him to return, again and again.

We started our scouting day by heading to Bear Rocks in the Dolly Sods Wilderness, near the highest elevation in the area. Details of the landscape change with altitude–you’ll find different plants, trees, and birds. Entering a new elevation range is often like visiting an entirely different place. You may have never experienced this, if you live in the flatlands of the midwest, but for those who have spent time in the mountains, it’s something we look forward to. Even a 1000-foot difference in elevation can tremendously alter the photographic possibilities. 

Wild Cranberries, Canaan Valley State Park

The changes elevation brought at Bear Rocks were immediately evident. As we approached, we discovered a vista of hundreds of acres of wild blueberry bushes with flaming red foliage, contrasting against the evergreens and exposed light-colored rocks of the region. I had seen this kind of ecosystem countless times, as I worked on client photos of Alaska over the years, but I had never traveled far enough north to see it myself, and I never expected to find it in West Virginia. 

Grabbing our gear, we hopped out to further scout the many trails through the red foliage and white rocks, leading to the cliffs of Bear Rocks, which look east into a deep valley with 180-degree panoramic vistas of distant peaks and valleys. We were there during late morning, and in average light, but it was still spectacular. Picturing what it would look like at sunrise, with the warm sun bringing out even more in the white rocks and red foliage, set my heart pounding with excitement. It was a great location!

Next, we headed back towards the lodge to explore some fire roads that promised tundra-like bogs to explore. Here I found a whole ecosystem unto itself, with many beautiful plants, mosses, and flowers, all with intricate textures and colors. Every square meter of this environment offered a completely different macro vista, and I felt like I had been let loose in an Elliot Porter book.

Even after extensive scouting, new discoveries happened every day as the workshop progressed. The amazing cottongrass (which I neglected to photograph last year, a mistake I don’t intend to repeat!), to bigtooth aspens (yes, aspens in West Virginia!) that I didn’t even know could grow this far south, and many more pleasant surprises.

I can’t emphasize how much easier it was to discover the intricacies of this place, thanks to Justin’s knowledge. From my years working with many of America’s top landscape photographers, I can confidently say Justin is a world-class instructor and photographer. Fuji named him one of their X-Photographers, so I guess they agree with me. 

It’s priceless to have the opportunity to see how a working professional and master photographer approaches the many challenges involved with making strong, inspiring photographs. Justin is generous with his knowledge and experience, both in the field where he identifies great photographic possibilities, and in the critique sessions where he brings to the table his extensive professional experience as a international workshop leader, stock photographer, and as the gallery manager for Galen Rowell.

Though it’s easier to brag on Justin’s abilities, I’ll be there too, sharing how I see and approach the landscape, helping to build your craft as well as your vision, and offering straightforward and simple tools that will give you greater confidence in your skills as you master the all-important fundamentals of the craft. If you’ve been helped by my online workshops, this is like one of those on steroids, with day after day of instruction and learning, in real-world settings that let you practice, learn, and grow under our guidance.

Experience the beauty for yourself this fall. To sign up, or learn more, click here or visit visionarywild.com.

Master File Workflow One Day Overview

How do you take your photograph from average to awe-inspiring? How do you wrangle all of the options available for image processing into an easy-to-understand and repeatable workflow? My one-day seminar will deliver answers to these questions, and more.

In my 25+ years of digital printmaking, I’ve seen a recurring truth: the difference between a good photograph and a fantastic one is often how it’s been processed. Processing is the part of photography people seem to struggle with the most. The problems are many. If you are using the wrong tools, or the wrong workflow, or if you lack a proper understanding of the fundamentals, it’s going to seem confusing and hard.

I have solutions that have helped hundreds of photographers like you, and I am teaching them in a one-day seminar on June 19. I’ll share the same workflow I use to produce museum-quality prints for some of America’s most celebrated landscape photographers. You’ll learn the fundamentals you need to consider when processing. I’ll also walk you through my workflow, showing you which tools I use in Photoshop, and, more importantly, the thought process behind why and how I use each tool. 

The good news is that it’s easier than you think. On workshop after workshop, students have been surprised by how simple my process is, and how it frees them to think more creatively and achieve better results. 

This class is Photoshop based, but you should consider it even if you are not a Photoshop user. Photoshop is easier than you think, if you use my workflow. You can work faster, more intuitively, and more precisely than in Lightroom, which will improve your processing, resulting in more transcendent photographs.

This class is for photographers of any skill level who want a tested-and-proven approach. We’ll cover a lot of ground, and you’ll gain real world, tested, practical workflows that will grow your skill set. 

June 19

11am-7pm Eastern

10am-6pm Central

9am-5pm Mountain

8am-4pm Pacific

Quotes

It’s not that we need new ideas, but we need to stop having old ideas.

Edwin Land

Frosty Morning at Cades Cove, Great Smokey Mountains National Park

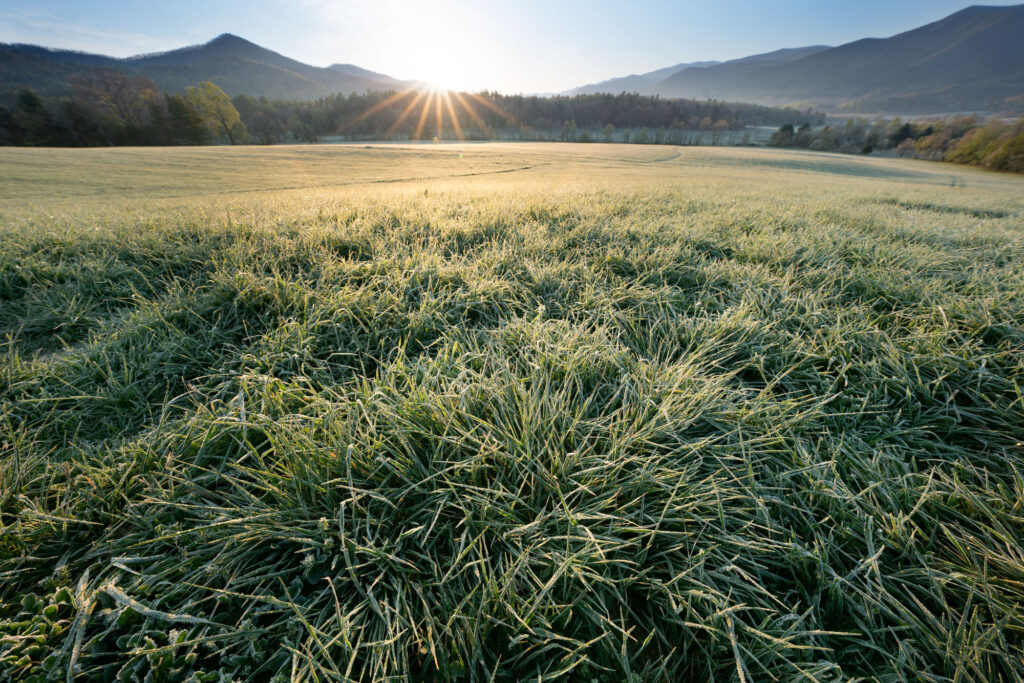
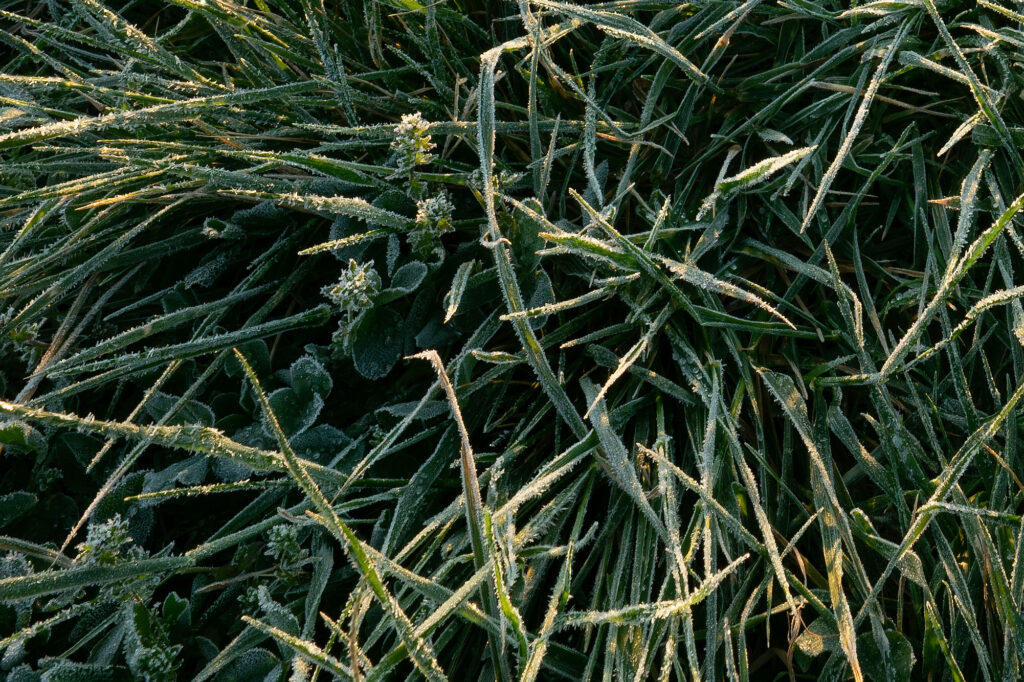
Day three of my recent Visionary Wild workshop came with a prediction of freezing temperatures at sunrise, and that had me on the lookout for frost. I thought the open fields of Cades Cove would be our best chance, so we headed out early that morning so we could be at the gate when it opened, and hurried towards a spot my fellow instructor Tillman Crane said would let us see the sun rising over the mountains. The frost was incredible, with delicate crystals and structures from the night’s freezing temps. We knew we have to work fast because the sun would melt this incredible scene all too quickly. 

I decided to use the Sony FE 12-24mm f2.8 GM lens that Sony had lent me for the trip because  I wanted to fill the bottom half of the frame with the incredible detail of the frosty grass and still show the mountains in the distance. This lens is incredibly sharp, and I knew it would hold all the detail in frost crystals across the frame at f11. 

When I’m making a picture, I’m usually thinking of what it will look like as a large print, and as a result, some of the things you’d experience at say 16×20 inches or larger are lost on the small view we get with social media platforms. So I’ve included a detail section that shows the frost detail that will be evident when this is printed. It’s this detail that drives my choice of lenses to produce the detail and resolution I’m used to from my years using large format film.

I also did a virtual split neutral density on this by using a darker frame made at 1/90 second , about 2.5 stops darker, for the topmost part to hold some color and tonality in the sky. 

Technical: Sony A7RII with Sony FE 12-24mm f2.8 GM lens, 12mm f11 1/15 sec 100 ISO

Last B&W Class Until Fall

F-1 Engines, Saturn V Rocket, Huntsville, Alabama
Sony A7RII, Sigma 35mm f1.4 ART lens

In the last year, I’ve helped hundreds of photographers improve their B&W processing through my talks and workshops, and I’d like to help you, too. Tuesday, May 11, I’ll be starting another round of my popular four-session Zoom class, Classic B&W Processing with Digital.

My recent talk at the B&H Photo Event Space provides a great (and free!) introduction to the workshop. It touches on many of the subjects this class will explore in greater depth. 

Every time I teach this class, it’s rewarding to see how the participants improve their photography and processing skills each week. Here’s what my students have to say about the class:

I have found the class to be outstanding, not only for learning techniques that are new to me in creating a B&W image, but also the creative ideas to draw the viewer into the scene.
– Brad K.


I want to thank you for your classes and all the extra effort you’re devoting to your students. The information is worth far more than than the price of admission.
– Al H.


This class has introduced me to new tools for vastly improving my images.
– Dennis W.

We’ll meet for four online sessions, each Tuesday through June 1. Each session lasts two hours. The first hour is live instruction, where I teach the techniques I use. During the second hour, I show how I apply those techniques to YOUR photographs, providing insight and critique that will help you learn and grow. 

Each session will be available to re-watch online for two weeks after the class, allowing you to go over the content again, or watch at a different time if you have a schedule conflict. 

This will be the last offering of this class for several months because I’ve blocked off this summer to develop new classes on topics ranging from color processing, Photoshop workflow, exposure, and color management. 

Sign up today, then keep chasing the light!

One Hour Talk with Atlanta Photo Group

Join me at the Atlanta Photo Group tomorrow night for my one hour presentation on Classic Black and White Photography. I’ll share why this approach is so inspirational to me as a way to tell my stories, and give you insight into how I process for gallery quality photographs.

A special thanks to Hahnemühle USA, who’s sponsorship for making this possible.

Check out the Atlanta Photo Group event page for complete details and to register.

Free B&W Lecture March 16 with Glazer’s Camera

Teaching workshops for me is about creating moments where the “light goes on” in a students head…where they gain a new understanding of photography that helps them better express themselves and enjoy the craft more. It always exciting because with new participants every time, no two workshops are the same, and their photos are always new and unique!

If you’re ready take your black and white photography to a new level, I’ll be giving a free online talk Tuesday night with Glazer’s Camera of Seattle where I’ll introduce you to the foundational principals I use in my B&W processing. The talk is free but registration is required, so sign up today if you think you’ll be able to attend.

This talk is the introduction to my more in-depth four session workshop where I’ll show you my process and techniques, as well as deliver hands-on live critiques and demonstration using your photographs. Working on your photographs provides powerful insight into the craft and vision of making expressive B&W photographs that will stretch and grow you in exciting ways.

Here’s what past participants have had to say about the experience:

I want to thank you for your classes and all the extra effort you’re devoting to your students. The information is worth far more than than the price of admission. 

Al H

This class has introduced me to new tools for vastly improving my images.

Dennis W

I hope you’ll be able to attend. See you Tuesday!