The Only Person Photographing In Yosemite

Imagine being the only person out photographing in Yosemite. That is the rare birthday gift I received twenty-five years ago today.

The flood of 1997 closed Yosemite for several months due to the damage. Only a few people were allowed to remain in the valley, and as the photographer documenting the damage for the National Park Service, I was very fortunate to be one of them.

My birthday that year happened to fall on a Sunday, and with no work going on to document, I had the day off. After working a burnout pace for most of January to capture the damage, and living under austere conditions (using a porta-potty in your drive way at 2am and 12 degree temps because the sewer line is broken gets old quick!), I decided to go celebrate my birthday by driving around the valley and making some personal work.

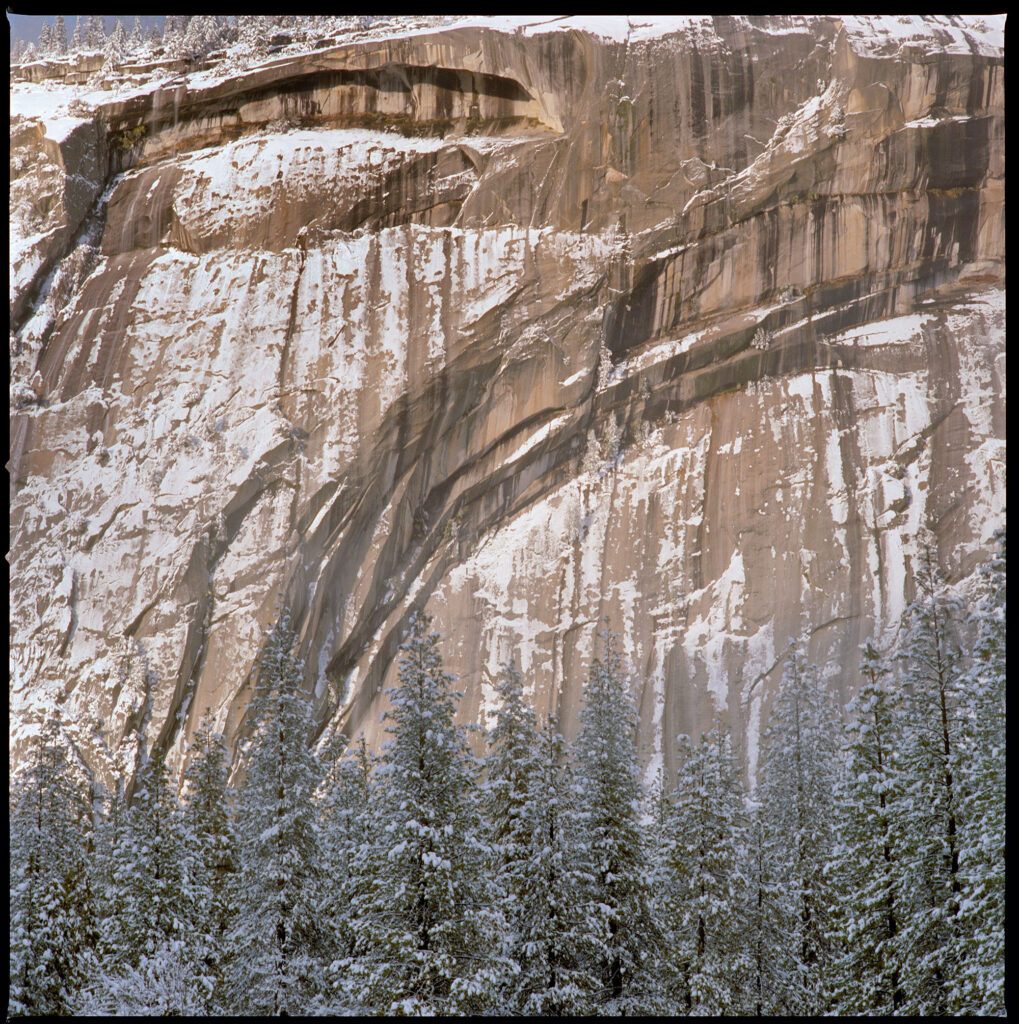
I remember clearly standing on the edge of Stoneman Meadow, looking up at the great granite faces of Half Dome, Royal Arches, and Glacier Point, all covered in layers of ice and snow, the crisp cold air in my nostrils as my booted feet stood on the cold snow below, and having it all to myself for a day.

A fresh snow had fallen, and the cold temperatures were making some beautiful conditions. As I drove around, I saw almost no one, which was typical for a Sunday during the flood closure. With about 250 people in the park, all park employees, everyone was enjoying a much-needed day of rest. And as a result, I had an experience I’ll likely never have again; being the only photographer out in Yosemite.

Of course, there were other photographers living in the valley at that time, but that day I didn’t see them, and hardly anyone else, so I had the illusion of having Yosemite all to myself. I’m not claiming a title but relating an experience. I knew at the time it was an amazing gift, but looking back, I didn’t really realize how rare that chance was.

The photos from that day are unremarkable. I decided to work in with color neg film in the Hasselblad Richard Newman had loaned me. I should have worked in B&W instead, but I was young and didn’t have the experience I do now. But I don’t care that I made no meaningful work. I had the chance to experience something even better than a great photograph, and it’s an experience I’ll likely never have again.

Which Brand Hard Drive Should I Buy?

Here’s another question I get a-lot. Some people hear they should buy Seagate drives because the competitors are junk. Others think they should buy Western Digital drives, because, you know, the other companies are junk and their brother’s cousin’s friend had one die on them and lost all their baby pictures, and their other friend works in IT and said so.

So what’s my answer? What should you buy?

Why not BOTH?!

That may seem too easy, but it’s the truth. Now you may be thinking there are more than two drive manufacturers out there, and you are correct. But only Seagate and Western Digital offer consumer-priced external drives.

I don’t see any real benefit to buying external drives in more expensive housings, as the aesthetics of an aluminum enclosure just don’t matter to me, and my experience says I don’t need the extra cooling they offer. Run of the mill external drives will do the job just as well, so for most photographers, Seagate and Western Digital are our two choices.

Drive Failure Rates

Current Seagate and Western Digital drives have similar failure rates based on the data from Backblaze. Most sizes and models of 8TB and larger have annual failure rates of 1% or less. That means if you had one hundred drives, about one of them would fail every year over the normal 4-5 year life of a drive. A difference of a percent or two either way are not going to be meaningful for you. Rough handling, dropping, and transport I suspect will have more effect on that rate than drive manufacturer. So put the brand issue aside. They are both “good enough.”

Most photographers problem isn’t a half percent difference in failure rates, it’s that they aren’t running a proper backup. And some only have one copy of their data. With a proper backup, even a couple percent difference in failure rate isn’t going to be a big issue for you.

Redundancy

In my backup plan, I like to alternate between brands for a little extra insurance. Every once in a while, a brand will have issues with a particular model. Don’t put your eggs all in one basket. It’s a safer approach to have your photos on both brands and on different models of those brands. (Hard drive models change all the time, so unless you bought all your drives at the same time, you’ll have enough redundancy of different models.)

Beware Bare Drives

I used to use a lot of bare drives for backup at West Coast Imaging because we had a never ending supply of them from server upgrades. Bare drives are fragile, and need to be stored and handled with care, and I customized a Pelican Case just to transport them safely. You’re not supposed to stack them, and even small shocks can damage them. It’s so much easier to just buy an external drive that is always in a case that offers a little more protection from shocks and other hazards.

RAID

RAID has a place, but few single user/single workstation still photographers need them, and they are a hassle unless you are a “computer person.” With the advent of 10TB drives and larger, the need to use a RAID to create a larger volume from several smaller volumes is gone for most users. 16TB consumer externals are shipping now, and 18-20TB are available in more expensive external lines. Roadmaps say we’ll have 30TB drives sometime in 2024. And RAIDs have their own issues. If you are on one, you should assess if you need to be and look at transitioning.

Closing Thoughts

We’ve reached a point where hard drives are reliable enough that we don’t have to worry about what brand is best. What most photographers need to solve is the issue of creating a good backup plan, with lots of drives, and maintaining that backup. Buying inexpensive external drives is ok. Being cheap and not buying enough of them for backup isn’t.

Buy a New Hard Drive Every Year

The folks at Backblaze have a really good blog post on hard drive life titled “How Long Do Disk Drives Last?” that is worth a read.

I’ll give you the TL;DR, it’s about four to six years according to their data.

Backblaze is the most reliable source for drive life data as they have been releasing drive life stats for their cloud backup system for over a decade, and given us the best real world look at how long drives last.

Their experience mirrors mine, albeit on a much smaller scale. In the West Coast Imaging days, I designed and maintained our storage system of forty drives to store all our client’s files and make them accessible to the staff. I’ve tracked over 100 drives through that system and in my own personal use, and I see something pretty close to what Backblaze is seeing.

While drives can die at any time, even new drives, it’s more typical to see a drive last 3-5 years in a home or office setting. After that, the failure rate starts to go up fast, as I’m experiencing right now with my backup consolidation project.

The Backblaze data combined with my own experience is leading me to a new storage approach. I plan to replace my main data drive after 365 days of use. At that point, it will be depreciated to use for onsite backup.

Basically I’m turning it into an oil change which just makes more sense, and will help me avoid headaches. It will make it easier to keep up to date than the “replace when something fills up or fails” plan I had been using.

My backup plan looks something like this:

Main Data Drive
Onsite Backup A
Onsite Backup B
Offsite Backup A
Offsite Backup B

I have five hard drive based copies of my data plus a copy in the cloud with Backblaze, which is an insurance layer every photographer should have in place.

As drives age, I’ll move them down the list of backups, so that their age will look like this:

Main Data Drive – less than 1 year old
Onsite Backup A – less than 2 years old
Onsite Backup B – less than 3 years old
Offsite Backup A – less than 4 years old
Offsite Backup B – less than 5 years old

And with this many copies and ages, I am well protected agains data loss IF I keep the backups up to date.

So buying a new drive every year will be my new strategy. (And don’t forget to mark your drives with the month and year of purchase to make it easy to know their age.)

Now where is that credit card…

FREE File Evaluation! – Limited Time!

As a sneak peek into my upcoming Mastering Manual Exposure Workshop, I’m offering a free file evaluation to my readers. Send me three of your favorite files by January 5, and I’ll tell you how well they are exposed.

You’d feel cheated if you opened a bottle of fine wine and found it was only half full, right? Well the same type of thing may be happening to your photos. You might be cheating yourself out on detail that would make your processing easier and your photos look better. 

Evaluating your RAW files gives you important feedback on how you can improve your photographs. It’s so important that it is my first step in processing, and part of the processing workflow I teach. As a part of this free offer, I’ll tell you how well you’ve achieved the goal of exposing to the right. This is important because even small differences in exposure can make a big impact.

You might be thinking, “Oh boy! If I send my files, Rich is going to tell me how I messed up!” I think you know me better than that by now. The goal is to see what you’re doing well, and to be aware of areas where there is room to grow. Afterall, the better we equip ourselves with tools and knowledge, the easier it is to achieve our goals. Even experienced photographers can benefit from this offer–afterall, it’s free, so you have nothing to lose, and information to gain!

Send me three files today, and I’ll help you learn and grow!

Here’s what you need to do:

1. Pick three of your favorite photos, and find the RAW files for them. (My evaluation software only works with RAW, sorry no DNG or JPEG.) Lightroom users, use “export RAW” or “show in finder” to access your RAW camera originals.

2. Use wetransfer.com to send the files to rich@richseiling.com

3. This is a LIMITED TIME OFFER! Be sure to send your files by Wednesday, January 5.

Once I receive your files, I’ll evaluate them using the same process that I’ll teach on my upcoming Mastering Manual Exposure Workshop. Then, I’ll give you a report that tells how well you exposed your images, and how much of your camera’s potential you are using for each exposure.

One more thing: While photography instruction is not covered under HIPAA, I promise your results will be completely confidential!

Quotes

It’s not that we need new ideas, but we need to stop having old ideas.

Edwin Land

Frosty Morning at Cades Cove, Great Smokey Mountains National Park

Day three of my recent Visionary Wild workshop came with a prediction of freezing temperatures at sunrise, and that had me on the lookout for frost. I thought the open fields of Cades Cove would be our best chance, so we headed out early that morning so we could be at the gate when it opened, and hurried towards a spot my fellow instructor Tillman Crane said would let us see the sun rising over the mountains. The frost was incredible, with delicate crystals and structures from the night’s freezing temps. We knew we have to work fast because the sun would melt this incredible scene all too quickly. 

I decided to use the Sony FE 12-24mm f2.8 GM lens that Sony had lent me for the trip because  I wanted to fill the bottom half of the frame with the incredible detail of the frosty grass and still show the mountains in the distance. This lens is incredibly sharp, and I knew it would hold all the detail in frost crystals across the frame at f11. 

When I’m making a picture, I’m usually thinking of what it will look like as a large print, and as a result, some of the things you’d experience at say 16×20 inches or larger are lost on the small view we get with social media platforms. So I’ve included a detail section that shows the frost detail that will be evident when this is printed. It’s this detail that drives my choice of lenses to produce the detail and resolution I’m used to from my years using large format film.

I also did a virtual split neutral density on this by using a darker frame made at 1/90 second , about 2.5 stops darker, for the topmost part to hold some color and tonality in the sky. 

Technical: Sony A7RII with Sony FE 12-24mm f2.8 GM lens, 12mm f11 1/15 sec 100 ISO

Free B&W Lecture March 16 with Glazer’s Camera

Teaching workshops for me is about creating moments where the “light goes on” in a students head…where they gain a new understanding of photography that helps them better express themselves and enjoy the craft more. It always exciting because with new participants every time, no two workshops are the same, and their photos are always new and unique!

If you’re ready take your black and white photography to a new level, I’ll be giving a free online talk Tuesday night with Glazer’s Camera of Seattle where I’ll introduce you to the foundational principals I use in my B&W processing. The talk is free but registration is required, so sign up today if you think you’ll be able to attend.

This talk is the introduction to my more in-depth four session workshop where I’ll show you my process and techniques, as well as deliver hands-on live critiques and demonstration using your photographs. Working on your photographs provides powerful insight into the craft and vision of making expressive B&W photographs that will stretch and grow you in exciting ways.

Here’s what past participants have had to say about the experience:

I want to thank you for your classes and all the extra effort you’re devoting to your students. The information is worth far more than than the price of admission. 

Al H

This class has introduced me to new tools for vastly improving my images.

Dennis W

I hope you’ll be able to attend. See you Tuesday!

February 24 Classic Black and White with Digital Workshop

I’ll be returning to Looking Glass Photo in February to teach my four session class on creating the Classic look of Black and White using digital tools.

Black and White photography offers us so many unique ways to communicate. Removing color can be a good thing, as it helps us focus more clearly on the shapes, lines, and forms that can be used to tell our story. It’s been a central part of my journey since the first time I saw a print “appear” from the developer in my friend’s basement around 1984. I continue to find new and exciting ways for black and white to tell my stories, and the materials continue to reveal new qualities and possibilities.

I teach these classes using Photoshop, which is my preferred tool, but I focus on fundamental concepts that transcend what software package you use. Every software package gives you tools to address the fundamentals I’ll teach.

You can book the full class use this link:

4 Session Classic B&W Class 2/24, 3/3, 3/10, 3/17 $196

Or book sessions individually:

February 24 – Contrast and how to use it

March 3 – RAW processing and converting to B&W

March 10 – Local Control Dodging and Burning/Brushing

March 17 – Navigating Print Choices

Click on the links above for an extended description of what will be covered in each class.

My thanks to Jon and Jen at Looking Glass for having me back. Camera stores like Looking Glass are an important part of a vibrant, healthy photo community and I encourage you to support them when by purchasing your equipment and supplies through them, and dealers like them, that support the photo community.

February Update

I haven’t been posting as many articles lately because because I’ve been working on curriculum for my online classes. Zoom has turned out to be an amazing way to teach my processing classes online, but repurposing and reformatting everything to fit into four 2-hour sessions does take a bit of effort!

What’s great about these Zoom classes is they offer bite sized opportunities to learn and engage in an ongoing conversation about the tools and process of making great photographs that fit with most people’s schedules and our need to follow COVID guidelines.

My Classic Black and White with Digital class is a chance to learn how I approach the decision making process to make a photograph that achieves a “gallery quality” black and white print. Of course we learn some tools and how to use them, but the “why” we do something, and “what” we should do to our photographs is always central to the process.

I’ll be adding a color class soon that will draw on the lessons I learned helping make hundreds of thousands of prints at West Coast Imaging that will help you take greater control over your own photographs.

Join my email list over on the top left column of my page if you want to receive notification of new workshops and join me for one of these new online workshops! Looking forward to seeing you on Zoom soon!