Growing Through Goals

Dragon Ice, Merced River, Wawona, Yosemite National Park
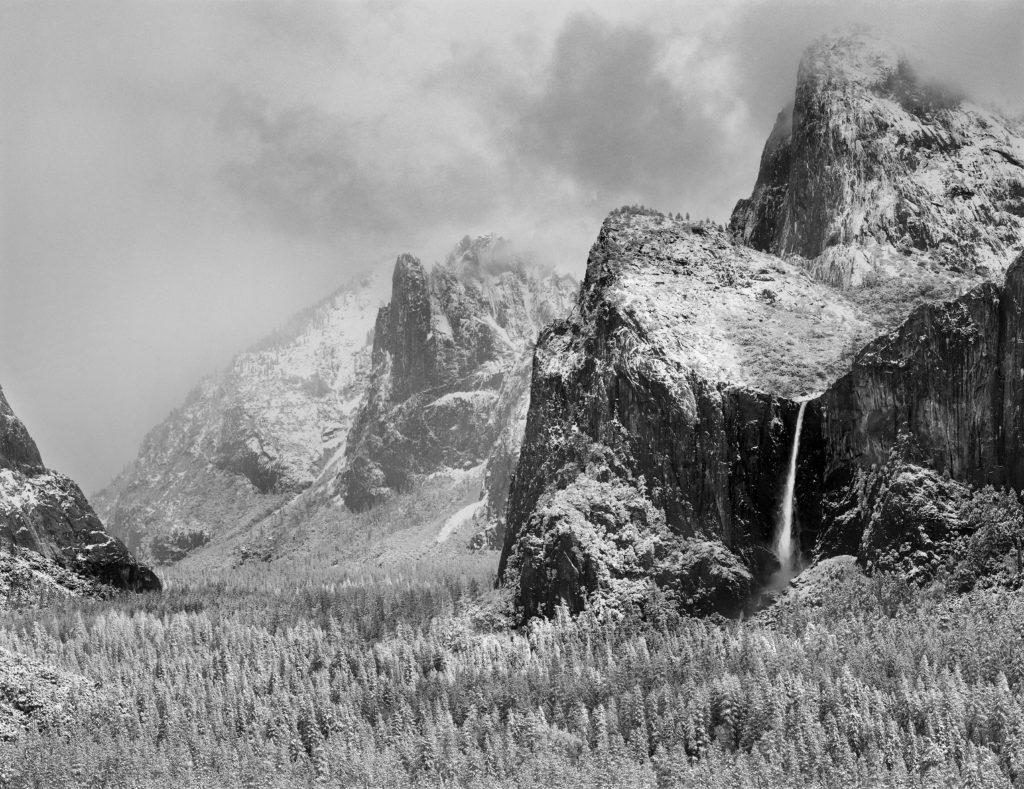
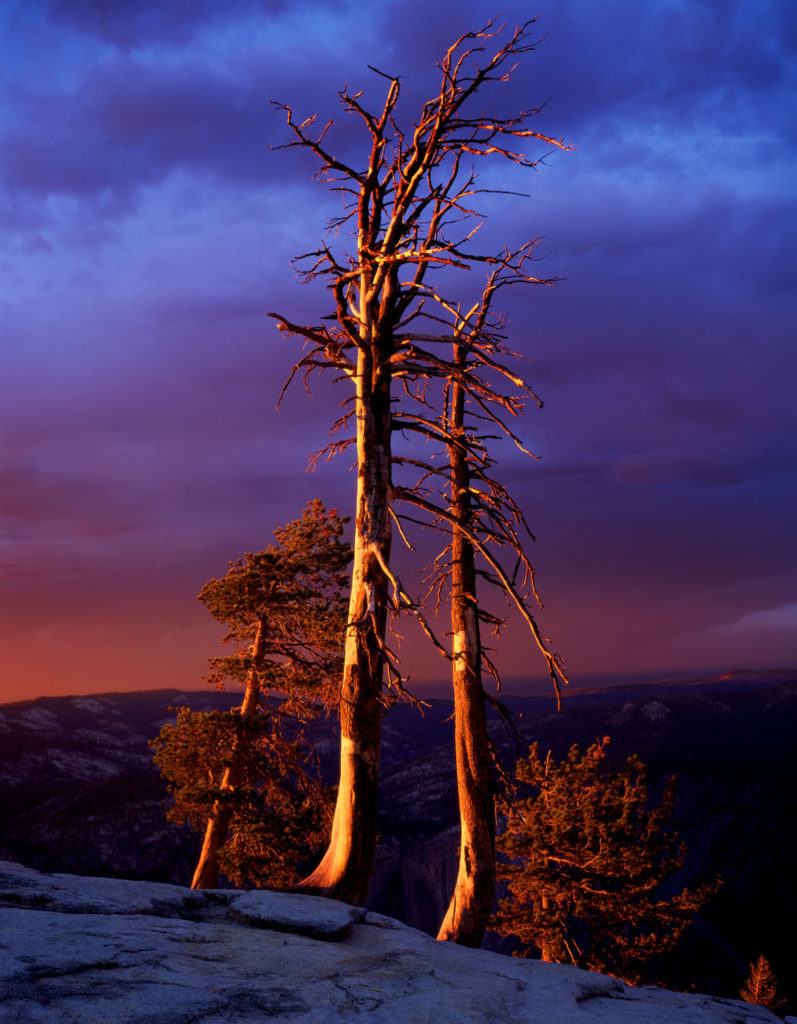
4×5 film, 135mm Nikkor lens, Fuji Film

Growth seems easier when you are striving for a goal. I know that is the case in my own photography. 

Starting at about age seventeen, I got a taste of how beautiful a photograph could be when I made a very small print of my girlfriend (and future wife!) to put in the “film reminder” slot of my Nikon camera. Printing a 35mm frame at near contact print size brought out tones I had never seen in the 5×7 sized prints I usually made, and a breakthrough happened, where i saw a higher level of communication and beauty that could be achieved in a photograph. 

That passion for high quality prints was fed again a year later when I discovered Ansel Adams, and then his assistant John Sexton. I chance encounter with a large Cibachrome print by Joseph Homes at a Nature Company store showed me that the same quality was possible with color photography. 

These experiences led me to a Yosemite workshop with John Sexton and Philip Hyde, where my twenty year old mind was blown away after seeing what seemed like hundreds of prints from these two masters, as well as the fine prints at The Ansel Adams Gallery where the workshop was being hosted. 

To say that workshop experience was life changing might be an understatement. I was changed forever.  It kindled in me a burning drive to learn the craft of photography so that I could express my vision with that degree of beauty, clarity, and impact I saw in the work of these masters.

That passion helped defined the next two decades of my adult life with West Coast Imaging, the fine art lab I founded to let me buy the then expensive tools of digital photograph like drum scanners and Chromira digital enlargers. Learning how to get the most from these tools, as well as working personally with photographers like Galen Rowell, Chip Hooper, Jack Dykinga, Michael Forsberg, Robert Glen Ketchum, stretched me even further as I had to meet their standards as well as my own. 

Striving for a goal with great focus and intensity has grown me immensely as a photographer. My craft and “seeing” have both grown as a result of chasing this illusive goal of making the best prints possible. There is always more to learn, but by just following my passion, I’ve learned so much, and prepared myself to learn more. 

So what goals in photography are driving you? Are you striving for a goal or are you feeling stuck? What’s your passion in photography? What do you want to say and who do you want to say it to?

As we head into a new year, I encourage you to set a year long goal for your photography and work intently at it. See how far you can get. Don’t be indecisive…just pick something…anything! A years worth of effort in any direction of photography will bear fruit and take you down paths you never expected.

Need some ideas?

How about a cohesive 8×10 print portfolio of your very best work? A new body of work of a new subject or location? Learning a new technique? Telling a story that is immensely important to you? Improving your printing? Improving your seeing?

What it is doesn’t matter as much as just doing it. Follow a passion, or try to work through a barrier or a fear.  Pick something you want to give your all to for a season and then see what happens. If you do, I’m confident you’ll look back at 2020 as the year you sharpened your vision. 

Black and White Digital Processing Workshop – January 25th

Bridal Veil Fall and Snow, Yosemite National Park

The beauty and elegance of classic black and white photography has captivated viewers for over a century. This series of workshops teaches the tools and techniques used to create this beauty using digital tools. 

In Part 1, we’ll introduce the “look” we are going for by looking at prints and discussing the characteristics and intent that create the classic look.  

We’ll then cover the three primary elements in creating this look. First, We’ll learn to apply the “classic” intent to RAW files to create a base for further processing. Second, converting our color digital files to B&W with a creative vision will be explored through various tools and techniques. Third, we’ll learn the foundational approaches to creating contrast in our photographs that creates form, volume, beauty, and visual tension. These three pieces are inextricably linked. How you use any one of them directly affects your ability to use the others to achieve your desired result. 

Throughout the workshop, we’ll be making small 8×10 proof prints to test our work and get around the limitations for monitors to display the full beauty of the B&W image. 

This workshop is limited to four students to maximize learning potential of the one day format. We’ll be working in Photoshop, taking advantage of some of its unique properties that are difficult to replicate in other software. You do not need to be a fluent Photoshop user, but you should be comfortable using editing software with intermediate experience in file processing. 

Saturday January 25, 10am—4pm
Technology Engagement Center
306 Minerva DriveMurfreesboro, TN

Fee – $150 per student

Signup online at Eventbright:

https://www.eventbrite.com/e/photo-workshop-processing-for-the-classic-black-and-white-look-part-1-tickets-86390754071

Test your Color Vision

What can you score on the Xrite Hue Test? Take it at the link below and post your scores:

https://www.xrite.com/hue-test

Here’s mine first try:

It’s interesting that they note that your score on this test is influenced by the lighting around you, the background colors at your desk area, your level of tiredness, your gender, and even your age. My personal experience is that these and many other things including blood sugar levels affect your sensitivity and creativity when printing, and that there is a limited window each day for doing the most exacting work. This squares with the experience of other printmakers whom I respect.

I would think that the monitor you are using could affect this as well. I did mine on a NEC PA242W which is very accurate. I’ve seen evidence to suggest that average monitors will make it more difficult to get a perfect score.

I see this as a tool not to measure yourself agains others, but rather a tool to help you find your current limitations fo color perception so that you can work to improve them. I don’t think most people are born looking at color precisely, although I am sure there are exceptions. I know it took me a lot of time and effort to learn.

So go ahead, take the test, and share your score!

A Cheaper Storage Upgrade

Seagate 2TB External Drive

If you are sick of my articles on Drobo/NAS/DAS/RAID storage solutions because they are just overkill for your needs, you are in luck. I’m laid up with the flu, which is a perfect time to dump out some different storage solutions because it doesn’t require the same part of my brain the creative photography content does. 

Talking with a friend yesterday about some upgrades for his mac that was running slow and we got around to his current storage shortage.  (Yes, I have a lot of photographer friends, a side effect of this incurable disease I have called photography 😉

After helping him spend about $300 on a RAM and SSD boot drive upgrade for his 2015 iMac, the budget was tight for storage. He wanted to set up a new Storage Set that would be dedicated to RAW files, and include his existing archive of 700GBs of existing RAWs. (See my Freemium Backup and Storage Plan article for an explanation on what a Storage Set is. )  

He settled on buying three 2TB external drives for a total cost of about $179. One would be the master, and two would be exact clones using CarbonCopyCloner. This would let him transfer his existing 700GB of RAWs to the new storage set, and leave maybe a years worth of space for new RAWs from his 45mp camera. The $179 price is an easy bill to afford, and way less than film and processing used to cost, so even if it ends up being a little undersized, it gets him through till his high season for photo sales. 

Putting all your RAW files on a separate drive is a great way to segment your data. Since these files will never be modified directly, the backup needs are greatly minimized for that master volume. Your modified RAWs can live on a volume set aside for more active files in the case of Photoshop, or in your catalog for DAM (digital asset management) programs like Lightroom. 

So why not a RAID in this case? While RAID is a very nice to have, it’s not always a need as long as you are very diligent in doing regular backups. This solution works in keeping the data safe and accessible for very little money. 

My storage articles over the last few weeks weren’t meant to say you need RAID, but rather to explore what they do and how to manage them based on my experiences managing a lot of spinning disks in Mirrored RAIDs and Synology NAS systems. I used to be able to heat my office in with three Mac servers and forty odd hard drives West Coast Imaging required, so to say I’m very close to this subject is an understatement…lol. 

Sometimes inexpensive solutions are the best solutions, and as I shared with my friend, there are always more things to spend money on in photography. Saving money for him means more days on the road having more adventures and making more photographs. So “just enough” is always the right size. Owing spinning disks is not our goal in life. 

Monitor Recommendations November 2019

A friend’s long used Apple Cinema Display is dying and asked if the recommendations I made earlier this year for color accurate displays still hold true. His expectations are similar to mine, which is very high, as the work he does is for fine art prints, books, and magazine publication. Here’s what I shared with him.

Here’s my current recommended color accurate displays:

PA271Q-BK-SV  27 inch model for ~$1450 from newegg, BH, or Adorama
PA243W-BK-SV  24 inch model for $899 at Amazon and Newegg

What about that new 31 inch display?

NEC replaced their previous color accurate 31 inch display with the new PA331D. Based on my past experience with NEC, I am confident the color will be great . What gives me pause is it’s pixel pitch of 149 pixels per inch on screen. The other NEC displays I recommend have a pixel pitch of about 100 ppi. Higher ppi on a display makes it more difficult to judge images at 100% Actual Pixels Magnification. This means it could be more challenging to preview sharpening effects as they will be hidden by the higher resolution. Maybe it’s just a matter of finding a new methodology to view the image at a higher magnification, but it’s a bridge I haven’t had to cross yet.

I’ve also recently had the chance to preview the quality of one of the Eizo line. From my brief examination, it seemed incredibly accurate. But I still don’t have enough personal experience with it to say which model will produce the results that I’m used to.

I’m fighting a flu that has taken down my whole family, so I’ll cut and paste what I shared with my friend about buying a color accurate display:

There is a 31 inch model that is quite a bit more. For imaging I think 24 inches is a good fit, and larger can get overwhelming, but the extra screen resolution and size of the 27 inch makes it great for working on two documents side by side and other layout/non photoshop type products.  Even with the 24 inch, I cover up have the screen when dust busting at 100% because it’s just too much screen to take in all at once. 

Make sure to get the exact model listed as the PA243W-BK doesn’t contain the calibrator that the PA243W-BK-SV does. You should buy the calibrator as it allows you to use the NEC calibration software that calibrates at 16 bits and it really does let you resolve more tones than other systems. The technology has advanced sufficiently that i’s time to upgrade whatever calibration system you have. 

Figure this monitor will like last 7-10 years based on my past experience with NEC displays. 

These are a pain to buy from Amazon because their listings often don’t include enough information to make sure you are getting the right model. No idea why but that’s been the case for years. 

Why Take A Workshop?

As I prepare my workshop curriculum for this year, I keep asking myself “Why should people take a workshop? What can I teach a student that they can’t get from a YouTube video?”

The answer is “A lot!”  Deep statement there so let me break it down a little more. 

Photography has always been about more than knowing where the dials and sliders and doohickeys are and what they do. 

What makes a successful photograph is applying those tools to your photographs in a way that communicates what you want to say. 

Improving as a photographer is about learning to see…improving your ability to observe what’s happening the world around you and using the tools to translate that into a two dimensional photograph that communicates what you want to say. 

Learning, and improving at this requires individualized instruction. You can watch countless hours of videos on how to improve your golf swing, but I bet you’d learn more with just a short time with a professional instructor that can analyze your swing, and show you the techniques to refine it. A video can’t diagnose what you’re doing wrong and what is holding you back. 

Photography is not meant to be learned alone. The same approach to coaching and training that works in other endeavors from sports to music, even spaceflight, work just as well in photography. 

My experiences as an instructor is that I can take almost any student and help them climb more steps on the ladder of photographic knowledge, and gain more enjoyment and satisfaction from photography. 

No workshop will turn you into a master overnight. But what I can do is give you understanding and a foundation of skills that let you keep growing and progressing. Often times I can accelerate that growth. 

In thirty five years of photography, I’ve made about every mistake you can, so I know where the challenging points are, and how to help you overcome them. My twenty plus years of working as a professional printmaker has given me solutions that will work just as well as you as for my master level clients. 

The advancement I see students make on workshops is always rewarding and encouraging. If you come on one of my workshops, I can show you how to apply the tools of photography individuals to your photographs to solve the problems you are having. I can help you learn to “see” better and more clearly. And hopefully I can inspire and encourage you in your growth as a photographer. 

The personalized instruction that comes on a workshop will grow you in ways YouTube never will.  Workshops continue to be a valuable, if not the most valuable way to learn and grow as a photographer. If you’re not happy with where you are at, then it’s time to take a workshop and grow!

Understanding Exposure – One Day Photo Workshop

Saturday January 18, 10am—4pm
Technology Engagement Center
306 Minerva Drive
Murfreesboro, TN

Fee $75

Are you 100% confident you’re making the best exposures you can? How about 75%? Or maybe, like many photographers, you just don’t really know. 

Feeling confident in your exposures is a core skill. Once mastered, it frees your creativity because you aren’t always worrying “did I expose it right?”

This one day workshop will help you feel more confident in your exposure choices by giving you a greater understanding of just what “correct exposure” really means. 

We’ll dive into things like ETTR, reading histograms, blinkies, RAW processing, bracketing, exposure latitude, highlight and shadow detail, and more. We’ll go beyond what you see in youtube videos to learn how to apply these tools with greater precision.

We’ll also talk about strategies for better metering, as well as determining what “good enough” exposure is in different photographic situations. 

This is a hands on class so you’ll need to bring your camera with you, and know how to change shutter speed, aperture, and ISO settings. We’ll be making test exposures during the workshop and evaluating them on the computer. 

Signup at Eventbright using this link:

https://www.eventbrite.com/o/rich-seiling-17868389260


Bad Reviews for Drobo on Amazon

I’ve been doing a lot of articles lately on the Drobo. These came out of my experience working with a friend to upgrade his storage system and replace a 5 year old Drobo that failed. While I don’t own a Drobo, I understand the underlying technology and how to manage its RAID like storage from owing a Synology and previously managing Mirrored RAID servers for a long time.

My recent PetaPixel article have several comments from Drobo users who had bad experiences that piqued my curiosity. I dove into this thinking the Drobo just worked well based on the positive things I’ve heard about it, and peoples acceptance of it. And on paper it looks like a good DAS option that should be easy to use.

So I dove into the Amazon reviews (and B&H) to get a bigger sample of users, and I’m not too excited by what I see. The percentage of 1 and 2 Star reviews is pretty high for the rock solid reliability I want in a storage device.

I didn’t read every negative comment, and it’s nearly impossible to measure the experience level of every person commenting. But 25% plus total 1&2 star reviews stands out to me. Based on this new knowledge, I don’t feel comfortable recommending the Drobo. It might be a good device, it might not. But I don’t want to deal with the risk that those reviews are correct.

Even with a solid backup system, dealing with storage failures is a nightmare. I’ve been there enough to know I want to eliminate as much risk as possible. The time and stress to fix faulty storage is just too high a price for me to pay, let alone the experience you need to troubleshoot. I had thought the Drobo would be a perfect solution from non IT savvy photographers, but I guess I was wrong.

I still have a couple more Drobo articles I’m going to post, with links to this article. And then I’m going to work on some articles about SoftRaid from Other World Computing which I have considerable first hand experience with over nearly 20 years using it for mirrored raids on hundreds of drives. OWC also sells some excellent drive cases, some with built in RAID. They take a little more experience than the Drobo to use, but my experience with OWC is that they produce excellent kit. I’ve also used them as my RAM supplier for my businesses (at least 35 Macs upgraded), and my laptop has been running a 1TB SSD drive from them for the last 4-ish years.

If you are putting together a storage upgrade, I encourage you to give OWC a look. And look at my consulting services if you need some more in depth help.