Ansel Adams Books

Few people have had such a sweeping impact on an art as Ansel Adams continues to have on photography. He helped make photography acceptable as a fine art, and even today, he is the best selling photographer at the annual art auction. But one of the things that makes Ansel most unique is his lifelong effort to teach photography and improve the understanding of the medium. His Zone System has helped countless photographers gain control over exposure, development, and printing, and still has relevancy in the digital age.

I think there is much to be learned by reading Ansel’s books and studying his methods. I’ve been a student of Ansel since I first discovered him as a eager, but inexperienced seventeen year old. In Ansel’s books, I found answers I couldn’t find in the dozens and dozens of other books I had read. In my early years, I devoured Ansel’s books as I attempted to improve my craft, and started a journey that lead me to a stint working at the Ansel Adams Gallery in Yosemite, and the chance to meet many of the people who worked with him and whom he influenced.

His way of approaching the making of a photograph has had a profound effect on me, and I still find directly applicable to digital cameras today. So I’ve compiled a list of his books that I think will help give insight into the photographic process. While Ansel’s books are primarily about black & white (please don’t call it monochrome), the though process of making a print is equally applicable to color.


Examples: The Making of 40 Photographs
Detailed notes on the controls Ansel applied at printing to create the final piece. How he selectively lightened and darkened, controlled contrast, and more. As interesting as the technical part is, the insight into is though process, how he “saw” and pre-visualised the results is arguably of even greater valuable.

The Print
Book three of Ansel’s three part instructional series on the Zone System, The Print focuses on everything related to the printing process. The insight in to how to approach the challenges of adjusting contrast and image density both global and locally through dodging & burning is as applicable to digital processing as it is to darkroom work.

The Negative
Valuable insight into the Zone System which describes the series of shades in a photograph from black to white as Zones that can be pre-visualised to better control exposure.

The Camera
Fundamentals of how to “see” with different focal length lenses. How wide angle and telephoto lenses change the perspective on a subject, and so much more fundamental information on how cameras and lenses work.

Yosemite and the Range of Light
Ansel’s Magnum Opus, reflecting his life long relationship with Yosemite and the High Sierra. One of my favorite coffee table books, and still an inspiration.

Color Test Sheets

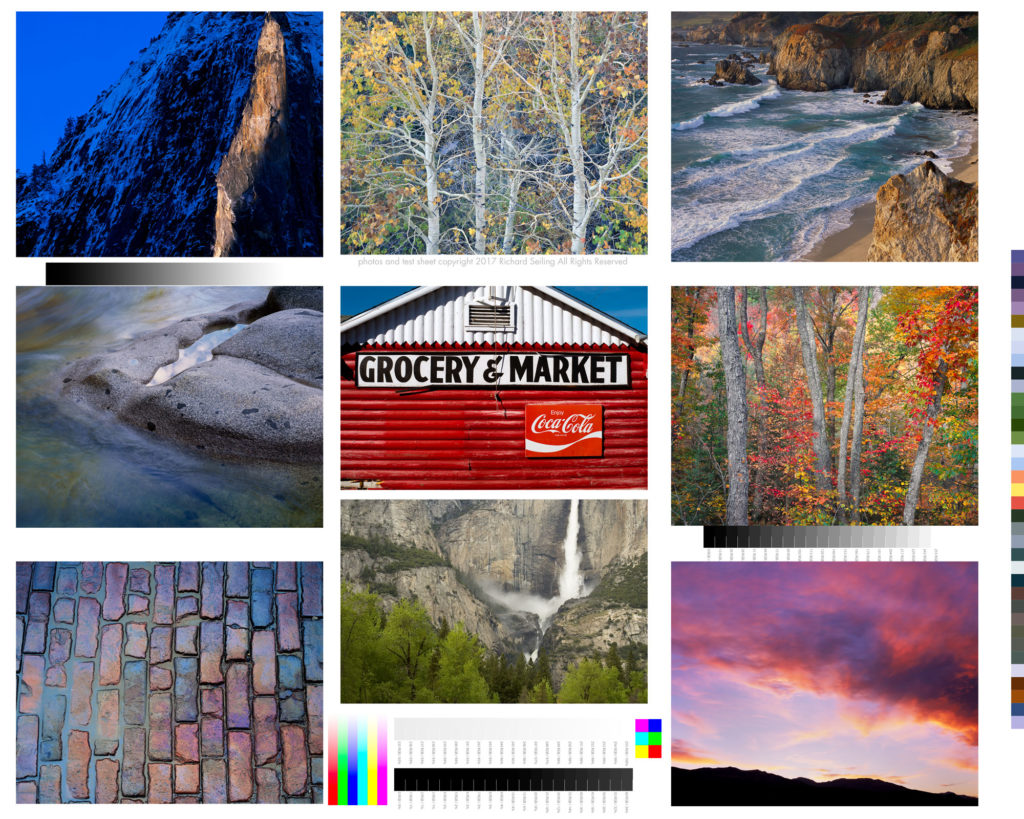
Testing profiles and printers is an important part of ensuring your printer is “in tune” and maintaining a color managed workflow. To make sure my profiles are in tune, I use a reference print that I created that allows me to visually compare color that I find to be the best way to evaluate. This is the process behind the hundreds of thousands of prints I’ve made for customers.

Below are links for 8×10 sections of my reference print that you can print on your own printer and compare them to my validated reference prints. I bring my reference prints to select workshop, and I also sell them so that you can have a copy for reference.

Purchase a copy of my approved and validated color test sheet.

Download files for testing:

Printing Instructions
Color 1
Color 2
Color 3
B&W 1
B&W 2

I suggest you print these files using your normal workflow as a test of your process. I have found that in addition to color, they can uncover other problems in the printing process that you may not even be aware of.

The files are sized to print at 8×10, and should be printed to that exact size to make the most accurate and useful test. 

You SHOULD NOT do any processing on them. That defeats the purpose of trying to see how the same file prints on different printer/profile/paper combinations. The file is our control to test the variables of printer setups.

How to use these test files in conjunction with my approved test prints:

Make a print on the paper you want to test using your normal printing procedures and profile. 

Write the paper name, date, printing profile, and any other useful settings and data that will help you identify how when and where your test print was made. This will make it more valuable in the future when you want to compare new printers, papers, and profiles to it. 

Use the right light to compare prints. I prefer to use SoLux 4700k bulbs, or if not available, actual daylight. Check out my blog post on SoLux for an explanation of why I use it. 

Compare your print to my print. I like to stack the prints on top of each other so that I can view the colors right next to each other. Compare each image as a whole and then look at specific colors. Look at dmax (black density) and also be sure to consider white points. Warmer paper bases will make the image look warmer overall than color papers, and this warmth or coolness can not be added or subtracted in an imaging editing program as it is inherent to each paper. 

If you are happy with the match, then “approve” your print by signing it and writing “approved” on it.  This is now your known reference to use for your printer, and can be used in the future to test your printer against itself. Keep it in a safe place with the other reference prints you will be making.  Why would you test your printer? If you are getting different results, if something significant changes, like settings, head replacement, three year olds, moving the printer, etc. It also becomes a record of what your printer was producing at a given point in time, and allows you to compare it to other printers, profiles, and papers. 

MAKE YOUR OWN REFERENCE PRINT! Once you have a known and approved printing setup that has been validated with my reference print, pick some of your favorite images and make your own reference print so that you can have your own personal reference that you know is printing right because you validated your process with my reference print.  Choosing a range of colors and densities will help, and you’ll learn over time which colors are most sensitive to changing with different ink sets and paper white points. 

If my reference print was helpful to you, take a picture of your print overlapping mine and share it on social media with a few words on how it helped, and tag me in it so I can re-share it too.

Canon PRO-1000 Ink Affiliate Links

To make finding the the exact ink for the Canon PRO-1000 easier, I’ve created this handy reference page with links to all the inks and consumables. I get a small commission every time you use these links, which help me continue to produce this site.

The Canon PRO-1000 printer is a true pro quality printer that allows you to make better than lab quality prints at home up to 17 inches wide. Canon printers have become my preferred choice for many reason including incredible color, deep blacks, ease of print head maintenance, and print longevity.

If you are buying a new Canon printer, you can save signifigant money by waiting for the regular rebates offered by Canon. You should be able to buy the PRO-1000 for about $999 or $1099. It’s worth searching multiple vendors as some rebates are vendor specific.

Most inks last for many prints, but when low ink warning for a color comes on, you should order that ink immediately. Inks are used at different rates, and that changes based on the content of your images. Depending on which papers you use, you’ll likely use Photo or Matte Black the most, along with the Croma Optimizer. If you print a lot of black and white, you’ll use the gray inks more quickly than the color inks.

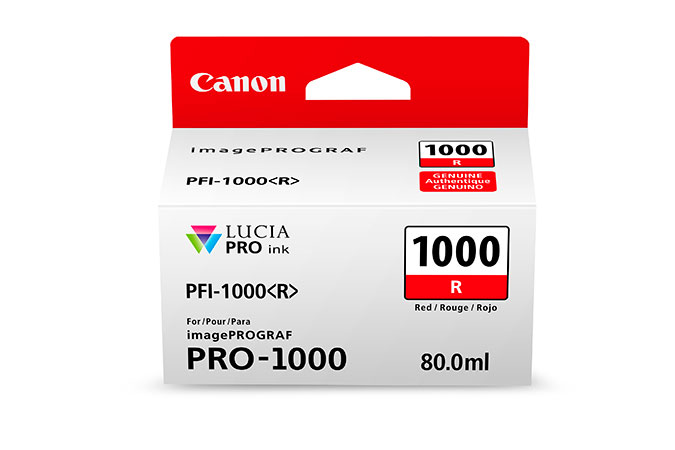
Genuine Canon Lucia PRO PFI-1000 inks

Photo Cyan PC
Cyan C
Magenta M
Photo Magenta PM
Yellow Y
Photo Gray PGY
Gray GY
Matte Black MBK
Photo Black PBK
Blue B
Croma Optimizer CO
Red R

Waste Ink Tank MC-20

Should I buy a new mirrorless camera?

The new Nikon mirrorless system has everyone buzzing. Even my pizza guy was talking about it with me the other day while I was waiting on my pies, a conversation prompted by the Sony a5000 around my neck.
So what do I think? 

I think you should be thinking about lenses. For most photographers, the latest camera isn’t going to do near as much for your photographs as better lenses will. That’s because, if you are like most photographers, you are probably using lenses that don’t make the fullest use of your sensor (and that’s true even of your expensive zoom.) 

The reality is that the sensors in all the major camera brands have gotten pretty good. If you are using a pro body instead of a consumer body that is of recent vintage, the improvements are going to be incremental. Even the top of the line Nikon D810 only offered incremental improvements over the D800, and while I might be able to see that extra little bit when working the file in Photoshop, once you get to the print, there are no tell tale signs to tell me which was from the D800 vs D810. 

In fact, the differences between even different brands of sensors with a pro-ish body  isn’t something you can readily identify by looking at typical prints. ~24 MegapixelNikon/Canon/Sony/Fuji all produce really good results.

You probably have more to gain by buying a better lens than a new camera. Because while the camera brand you used might not be noticeable in print, the lenses you use will be. 

Prints don’t lie. If your corners are fuzzy, with low resolution even at a higher f stop, then it’s very telling of the quality of your lens and how you used it. 

For years the standard with film SLRs, and now DSLRs, has been to accept lenses that were sharp in the middle and gradually lost resolving power towards the corners. 

But while this was the standard in 35mm size SLR bodies, it was not the standard with medium and large format film cameras used by many professionals. On my 4×5 film camera that resolves upwards of 200 megapixels, I expect the image to be sharp from corner to corner as well as in the middle.  After all, what’s the point of using such high resolution film if you aren’t getting all  the incredible sharpness and resolution it can achieve?

So I come to DLSRs with a different expectation. It is possible to achieve this corner to corner, high resolution sharpness with a DSLR…if you pick the right lenses. 
Zeiss is the first lens brand that comes to mind, as well as many of the Sigma Art lenses. Select lenses from Nikon and Canon lenses are also very good, but most lenses from Nikon/Canon/Sony/Fuji are are just average…which is really true of all the manufacturers. Nikon/Canon/Sony/Fuji et. al. make lenses at a wide variety of price points with a wide variety of quality. This is especially true of zoom lenses. It requires careful research to separate the multitude of average lenses from the few really great lenses. 

Picking these lenses is a topic for a different article, but a good starting point is looking at the MTF curves for a lens. Another great resource is Lloyd Chambers site diglloyd.com. Instead of made up testing metrics, Lloyd lets you see full size images from most of the high end lenses and camera systems made in real world situations (although you do have to pay for access.) I find that looking at actual images tells me more about a lens than the average opinion, and Lloyd lets me do that without having to buy or rent a plethora of lenses. Or you can put things to the ultimate test and use them them side by side, which is always very enlightening. 
Lenses are the long term investment in a system, not camera bodies. The rules of physics don’t change, and a great lenses today will be a great lens for a long long time. You are likely to keep your lenses for over a decade or more, and use them on a series of different camera bodies. So before rushing out to buy the latest greatest body, take a look at your lenses, and see if you should be adding one or two really sharp primes to your bag instead. 

Honestly I’d rather use a 24 megapixel camera with a couple of really sharp primes than an 36+MP camera with just average glass. The difference is that striking.  Getting a better lens is  the lowest hanging fruit you can pick, and will improve every photograph you make with it much more than a incremental body upgrade will.