Classic Black and White Digital Processing Class

Are you ready to start processing your black and white photographs like a master?

In the last year, I’ve helped hundreds of photographers improve their B&W processing through my talks and workshops, and I’d like to help you, too. Wednesday, January 12, I’ll be starting another round of my popular four-session Zoom class, Classic Black and White Digital Processing.

My talk at the B&H Photo Event Space provides a great (and free!) introduction to the workshop. It touches on many of the subjects this class will explore in greater depth. 

Every time I teach this class, it’s rewarding to see how the participants improve their photography and processing skills each week. Here’s what my students have to say about the class:

I have found the class to be outstanding, not only for learning techniques that are new to me in creating a B&W image, but also the creative ideas to draw the viewer into the scene.
– Brad K.


I want to thank you for your classes and all the extra effort you’re devoting to your students. The information is worth far more than than the price of admission.
– Al H.


This class has introduced me to new tools for vastly improving my images.
– Dennis W.

We’ll meet for four online sessions, each Tuesday through February 2. Each session lasts two hours. The first hour is live instruction, where I teach the techniques I use. During the second hour, I show how I apply those techniques to YOUR photographs, providing insight and critique that will help you learn and grow. 

Each session will be available to re-watch online for two weeks after the class, allowing you to go over the content again, or watch at a different time if you have a schedule conflict. 

Sign up today, then keep chasing the light!

Printing Issues After Software Update

When your prints come out looking completely different than last time, it makes for a frustrating morning. 

This morning I tried to print with my MacBook Pro fresh of an update to Catalina, the latest software it can run. The first print came out looking odd. So I compared it to a previous print, and my color memory was correct, it did not print properly. 

Time to start troubleshooting. I picked a second photo and printing it, triple checking that I chose all the correct settings.  Same problem. So I print it again with a different profile to see if the profile is the problem. Still wrong. SO I try it on a completely different paper and profile. Still wrong. Possible root causes are going through my mind this whole time. 

Maybe it’s the ink starvation issue I had when this printer was new that caused one of the colors to drop out? So I pulled out the special test sheet made specifically for this purpose. The colors didn’t match, but they all printed. So probably not that. Another sheet of paper burned with no fix. 

I’m about six sheets of paper in at this point, and that is always frustrating because I hate wasting paper and money. But burning paper is part of troubleshooting a printer so I fordge ahead. And my heart rate is going up as I think about at best spending the next day or so remaking profiles, or at worst dropping $800+ on a new print head and the ink needed to install it. 

With this latest piece of data, I realize I’m chasing my tail, and before I go down the road of more involved solutions, I need to try printing from a different computer to isolate if this is software or hardware related. Time to fire up the mac mini that I had validated last week as “working.”

Eureka! That fixed it. My heart rate goes down, no need to buy an expensive print head to fix it, or reprofile all my papers.

So what happened? Likely a software issue when I updated my MacBook Pro, probably the print driver. A reinstall of the print driver with the latest version should fix it. But that can wait for another day when I’m not trying to make Christmas presents. 

Today’s difficulties are one of the reasons I am very cautious about major updates to my computers. Updates cause issues and deviations from the carefully controlled environment needed to make consistent, accurate prints. 

Furthermore, my printer and monitor rely on third party apps to work correctly, and it’s common  for vendors to take months after a major software update to write new ones that are compatible. NEC had to write the Spectraview app I use to calibrate my monitor, and IIRC it was months after OS 11 came out. Not good…I couldn’t go without my calibrated monitor for even a few days. 

So some takeaways from this. 

1. Software changes and or updates can cause changes to how your printer prints color, so only update when you have time to troubleshoot the problems it can cause. Expect problems and the need to revalidate your printing setup after updating system software or print drivers. In general, it is best to wait at least six months after a major system software update to upgrade to give time for the bugs to be worked out. Identify all mission critical software and ensure it works properly with the OS you are updating to. And it helps to have a way to be able to “roll back” to your old system software if the new version doesn’t work. 

2. Diagnosing problems is much easier if you have test prints that validate previous printer settings so you can compare your new setup to your previous approved setup. I find few people do this, but it’s a vital part of my workflow. And a reminder that I need to finish the curriculum for my color management workshop. 

3.It’s helpful to have two different computers you can print from to test if a problem is printer or computer related. This also helps during software updates because it gives you a way to continue printing from a known setup while troubleshooting issues. This helped save my bacon today. 

Had I not had a second computer to print from, I might have started more invasive fixes that still wouldn’t have worked because I’m working from a fault tree that is in my head. So maybe my next step is to create a printed fault tree to help me solve these problems instead of having to tease out the answer every time and risk missing a critical fault finding step.

The Value of Looking at Prints

For me, looking at a finely crafted print is one of the most enjoyable experiences photography has to offer. But It’s wasn’t something I understood intuitively when I first started in photography, it’s an appreciation that developed from my experiences. And one experience in particular was a major turning point on that journey. 

When I was just 20 years old, I took a workshop with John Sexton and Philip Hyde in Yosemite National Park, two superb photographers and masters of the craft. 

During the evening sessions, we looked at prints. Lots of them. And not just quantity, but quality. The prints Sexton and Hyde showed were mind blowing, transcendent, of which I have insufficient superlatives to express. Prints where you have to settle with that knowing look and head nod that can be shared by two people who have a similar refined knowledge and appreciation for fine printmaking of just how amazing they were because they are beyond words.

It was a life changing experiences, and that may be an understatement. 

But why was this so profound? I’d seen their work in books before, but my real life exposure to truly fine printing was limited to what I’d seen at a couple museum exhibitions of vintage prints from other artists. 

What was striking was how much more expression was revealed in the actual prints than could be shown by the reproductions made by ink on paper. Reproductions are never as good as the original, and that still hold true today. 

Chances are the only way you’ve seen photographs from your friends and favorite photographers is on a screen, and maybe just your tiny phone. 

I’d like you to consider that you’ve seen just a dull glimmer of what these photos are really like, because the screen is not capable of conveying all that a print can.Our screens and devices have allowed us to be exposed to more photography than ever before, but what we’ve gained in breadth, we’ve sacrificed for depth. 

Just looking at a picture of a dish from a restaurant I want to visit isn’t the same as actually eating it. The picture is devoid of all the layers, flavors, smells, and complexities of the real thing. 

And honestly, seeing a photo on a screen is lacking the same way to me. Now granted, my experiences have made me a bit biased. In my time as a curator at The Ansel Adams Gallery, I was exposed to the finest printing the 20th century had to offer. And as a fine art printmaker, I’ve been able to make museum quality prints for many photographers who’s work I greatly admire. I’ve seen a lot, and that my expectations are based on that. 

But you don’t have to have the same experiences as me to appreciate this, and that is the whole point.

There is a much deeper layer of photography you can experience by looking at prints. There is a value in making your own prints, and taking the time to track down prints made by photographers who you’ve only admired in a instagram post. There is a whole world to discover beyond the screen, and all it requires is realizing this experience exists and taking the time to visit galleries, museums, and exhibitions to see real prints.  If you don’t, then you are really missing out on one of the best parts of photography. So what are you waiting for. 

Processing for Print Instead of for Screen

When you process your photos, are you trying to make them look good for screen or are you thinking about how they will print? And why is this even a question? 

Well if you’ve ever made a print and had it come back looking nothing like your screen, you’ve experienced why this matters. 

And not only do screens look different from prints, every screen looks different! 

Every.Single.One.

If you don’t believe me, next time you walk into Costco, look at all the giant flat screen TVs and see how different every one looks. 

The harsh reality is that when it comes to displaying our photos on a phone, tablet, or computer, It’s going to look different on every device. Throw in what instagram or facebook is doing to your photos and the same photo may even look different on the same device!

Trying to adjust to this every moving target is just chasing your tail. Great Rich, thanks for that little nugget of wisdom, but what do I do about it?

The answer lies in picking a more consistent standard, and for me that standard is prints. 

With the right workflow, prints allow a higher degree of control and consistency. So instead of processing something to look good on my screen when I know it will look different on your screen, my goal is to process the file so that it will make a good print. 

That’s a great goal, but what are some practical steps to achieve it. 

Well, first, I have to know my monitor well enough to get past the screen to print differences I talked about earlier. I do that with a mix of experience, knowing what a certain result on screen will produce on print.  I also use the info tool to read the pixel values ( “the numbers” ) so that I can make precise adjustments beyond what the screen can show me. 

Learning to understand what how the screen will translate to print is what I call an “mental calibration” as you are training your vision to compensate for differences between the two. It’s a learnable skill, but it does take practice. 

You can improve the process by “calibrating” your display with a device like the x-rite color monkey, and by using special reference monitors designed for screen to print matching ( I use a NEC MultiSync PA242W which you can read about in a previous article.)

Using that process, the processing decisions I make lead me to a file that I think will print the way I want. And if it will print the way I want, then this is the “most accurate” version of the file. 

So when I share this file on the web or social media, I’m starting with the best possible source. Since I know it’s being viewed on countless devices I have no control over, I know that at least I was feeding in the best original I could. 

So what happens if you work the opposite way? Making it look good for the screen with no regard for the print?

If you never print, that is a perfectly valid way to work. But it builds in a “gotcha” if you decide to print one of those files, chances are it will look nothing like your screen. 

It’s really easy to push a file so far in such a way that still looks good on screen but moves outside the realm of what can ever be produced in a print. That doesn’t mean screens are better…in fact quite the opposite. What it means is that a screen is imprecise enough that it can hide a lot of bad processing decisions that become glaringly obvious on print. 

There is a saying in the music world that if you can’t play well, then play loud. Screens are kinda like that. 

You can get so used to hearing your photo “loud” on screen that when you switch to prints, which are capable of so much more depth and subtlety, that you can’t make the two meet. By processing my file for print, I don’t run into this problem.

Because I never expect the print to look just like it does on screen, I’m setting up a different expectation in my mind than that held by a photographer who seldom prints. Furthermore, I never expect that when I share my photo on the internet that it will look exactly the way it does on my precisely color managed monitor at home. It all comes down choosing a set of expectations that meet your particular needs, and using a workflow that helps you consistently achieve those expectations.  

Color Processing and Printing Workshop – Part 1

Saturday February 29, 10am—4pm
Technology Engagement Center
306 Minerva Drive
Murfreesboro, TN

Fee – $150 per student

This workshop is designed to teach you the processing tools and techniques that have allowed me to make beautiful prints for myself and for my professional clients in over twenty years of fine art printmaking. To maximize the learning potential, this class is limited to four participants. 

This is part one of a series of workshops. We’ll start the day with an overview of the tools and techniques we’ll be working with, and then spend the rest of the day applying those techniques as you process and print your own images. Working hands-on allows us to solve your problems with your images, working towards achieving professional quality results. 

We’ll be working in Photoshop, taking advantage of some of its unique properties that are difficult to replicate in other software. You do not need to be a fluent Photoshop user, but you should be comfortable using editing software and have some experience in file processing. This class is meant to teach foundations, so you don’t need to be an expert! The tools are actually very easy. Learning to “see” how to use them is the hard part, and the aspect we will focus most on. 

https://www.eventbrite.com/e/color-processing-and-printing-workshop-part-1-tickets-92033102487

Why are my B&W prints Purple?

That’s the problem one of my workshop participants was having and asked what could be causing it. This is actually a pretty common problem, but it can be easy to miss until you’ve trained your eyes to see it. 

The prints in question were made with the Epson Stylus Photo R1900, which lacks the Light Gray and Light Light Gray found in some other Epson models. That means when it prints a B&W photo, most shades of gray are being made up from the color inks. 

It’s very difficult to make a neutral gray from color inks, hence the color cast. The 24 and 44 inch epson and Canon printers, as well as some smaller printers, use two shades of light gray in addition to black to solve this. 

Yet even with those extra shades of gray, profiles can be to blame.  You need an accurate profile to get neutral color, and canned profiles (the ones that came with your printer or you downloaded from the paper manufacturer) rarely achieve perfect neutrality. 

In the case of the Epson R1900, if the photographer wants a better result, they will have to print on a printer that has gray inks and a decent profile. 

Processing Makes the Difference in Prints

Reflections, Tuolumne Meadows, Yosemite National Park

Not sure why your prints aren’t coming our the way you want? Want better prints? Then it’s time to look at how you process. 

Processing is where we take creative control over what a print will look like. 

The printer (output device) is supposed to be the dumb part of the process. It’s not supposed to interpret, fix, or change your processing decisions. It’s just supposed to render the processing accurately. 

A printer should be like a player piano. You put in a piano roll, and assuming the piano is in tune, you hear the music as the musician intended. 

Our file is the piano roll, and processing is where we decide what notes should be played, when, and for how long. 

Processing is where the really important stuff happens. Processing creates a file that tells the output device what to do; what colors to print, how dark and how light, how saturated, and what color balance. The output device isn’t supposed to be deciding those things, YOU ARE!

One of the challenges you may be facing is that making something look “good” on a screen is easier than making it look good in print. 

Screens are more forgiving because they they can’t display the same subtle variations of color, highlight, and shadow that a print can. They hide small (and sometimes not so small) differences in processing. This is especially true of phone and tablet size screens. 

If you are processing for web and social media, the screen becomes your final output device, and you can see it instantly in its final form. But not so with prints. 

There is always a screen to print translation as we switch from transmitted light (screen) to reflected light with ink on paper (print.) 

Prints are less forgiving of processing errors. Things that will hide on screen become glaringly evident on the print. The “pop” of a screen isn’t there to mask these processing errors. 

So when we’re printing, we need to learn how to “read” the monitor and anticipate what it will look like on the print. Like any art, that means practicing, gaining experience, and refining our techniques. 

Printing is sensitive to very small changes. If you can see the difference between a one point slider move on screen, assume you’ll be able to see the difference in print. 

So instead of trying to see if 50 contrast is better than 30, try and see if 34 contrast is better than 35. Or instead of deciding between a 5000k and a 4950k white balance how about trying a 4975k setting?

It may sounds like splitting hairs, but these very refined changes is where you bring out the magic in a print. I often spend half my processing time on an image going back and forth between small changes to asses their effect. I’m looking for the “perfect” setting that matches my artistic vision.

This fine tuning is really noticeable in highlights and shadows because  those tonal areas simply do not display accurately on screen.  So I rely on the info tool to read the numbers. This gives me a mathematic measure of what the print will show instead of the visual measure our eyes give us. For shadows and highlights, the numbers are more accurate than our monitor or eyes. 

Processing for print is a culmination of all your photographic experience and knowledge to express your vision. The more you grow your skills, the more you gain experience, the more satisfied you’ll be with your results. Next time you don’t get the print you were expecting, go back to your processing to make it better. 

Printing Re-Imagined

Recent improvements in printing technology should have you reconsidering how you print your photographs.

If you’re printing with a lab, you’ve probably been making C-prints. C-prints are made on Kodak or Fuji paper C-print is the name given to the chemical process used in the paper, an abbreviation of longer name “chromogenic print”. Sometimes they are referred to by their surface, such as E-surface, or Luster, but that is not always a precise identifier. 

What defines a C-print is that it’s made on a light sensitive paper which exposes a negative image with light (LED or laser light for digital prints,) then is processed in RA-4 chemicals. 

C-print papers came from the pre-digital age, and were designed to make prints from color negatives easy and affordable for mass production of color photography. Your family photo albums are likely stuffed with C-prints.

When the first “digital enlargers” came on the scene around 1997, they most commonly used these same C-print papers, which offered great ease of use, quality, and price. Printing on a “negative” paper was no problem for a digital device that could easily convert a digital file into the data needed by the printer. 

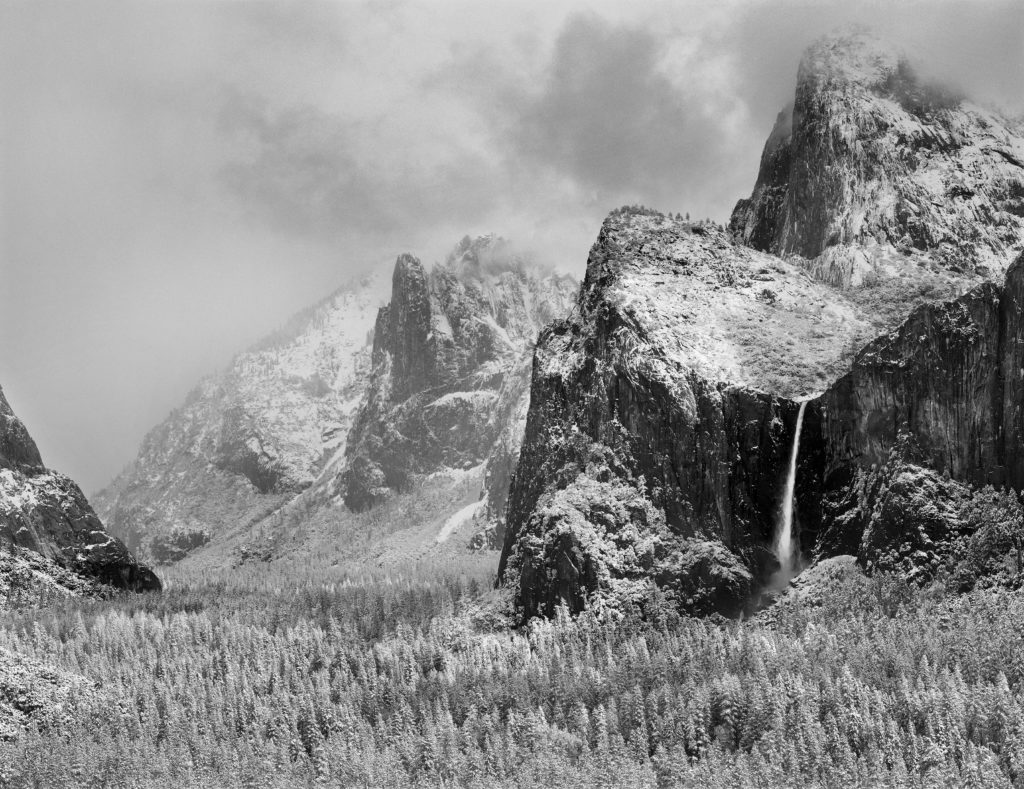
I saw my first LightJet digital C-prints around 1996/7 when I was working at The Ansel Adams Gallery. They were nothing short of amazing.  At that time I was trying to perfect my own photographic skills, looking to find the best methods for color printing, so I was constantly studying prints. I was very fortunate that my position as Assistant Curator brought me in contact with some of the world’s best prints daily.  

What those first digital C-prints represented was a paradigm shift. Finally there was a way to turn digital files into a true fine art quality print that was as good as they very best darkroom prints I had seen. This was a huge accomplishment and changed the way we print forever. 

To say the prints were a hit is an understatement. The process was championed early on by several of the gallery’s photographers including Charlie Cramer and William Neill, and all of the Yosemite photo community quickly jumped on board. As a curator, I was able to sell more work than ever from our artists because of the ease of producing duplicate prints in quantity that exactly matched the previous batches, and at any size. Suddenly it was relatively easy to gat a 30×40 print made once a file had been perfected.  I had an incredible run with one photograph in particular by Charlie Cramer, selling somewhere near 100 copies. (I have a copy of that print on my desk that still looks as good as it did when I first saw it. )

Digital C-prints quickly became the dominant form of color printing in museums, galleries, and were also embraced by advanced amateurs and  hobbyists. 

While the technology was readily available, the knowledge to use it to make true fine art quality prints was still quite difficult. To help solve that, I started my first print studio, West Coast Imaging, with a focus on making gallery quality prints using my knowledge to great digital prints that didn’t feel “digital” but retained the inherent qualities of fine art photography.  

 In my time running WCI, I printed the first digital exhibitions for Galen Rowell, Jack Dykinga, Robert Glenn Ketchum, and many others, and used hundreds of thousands feet of Fuji C-print material. So it would be fair to say I know C-prints very well. I’ve been committed to it over the years for my personal as well as my professional work. And alongside it, I’ve used about every generation of Epson inkjet printer since about 1999/2000, as well as several Canon Pro printers. 

For a long time, C-prints were better than inkjet prints when printing on similar surface papers.

But recently that has changed. 

When I started testing my Canon PRO-4000 printer, I noticed something was different, and better. Much better. 

As I compared my calibrated test sheets from the Canon PRO-4000 to my reference digital C-print, something about the Canon print made the C-print look dead and lifeless. Perhaps it’s better explained that the Canon print had a depth, a brilliance, a dimensionality that I could never recall seeing before. 

I was taken off guard because I didn’t recall seeing this big a difference a few years earlier comparing the previous generation Canon or Epson inks to C-prints. So I dug in to my archive of calibrated test prints to try and confirm what I was seeing. What I saw surprised me. 

The wider color gamut and darker blacks (D-Max) of the new Canon printer really did make a difference. The new Canon prints bested every print I had made before. And not only were they “better”, they were magical. I realized I was seeing things in the prints I never thought would be possible. It was the same “ah-ha” moment I had when I saw my first  digital C-print at the Ansel Adams Gallery a few years later. These new print set a high water mark, one that allows photographers to express themselves in ways not possible before.

It became clear that this was the process I wanted to use to print my personal photographs, as well as the work of my clients. While C-prints are still a legitimate medium for fine art, the qualities of these new prints are too exciting to overlook. With this new process, I’m making the best prints of my career, and expressing qualities I never thought were possible in a print. It’s taken a long time to reach this level of quality, but now that we have, I’m excited to switch from C-prints to inkjet and explore all the new possibilities!

Settings That Work

Printed a lovely 24×36 for a client today. I’ve printed the photo before, but not to this large size, so I looked up the settings to build my mental reference library of what settings produce what result. I though it would be valuable to share a real world example of what I think worked to make a gallery quality wildlife photography print.

Camera was a Nikon D850 with a 80-200 lens used at 150mm. Exposure was at f/5 at ISO 640. The results are what I’d expect from a medium format camera using 100 ISO film. Print was made from a ~223 ppi file at the output size. It’s a perfect example of how large prints still look fantastic below 300 dpi. I was also surprised with how much the lens resolved with the high resolution sensor of the D850. It’s exciting to see how the D850 is helping photographers raise the bar on wildlife photography.

I can’t say enough how striking it was, and the effect it had on me. Most important to the photo was the subject, the light, and the moment captured, but when you throw in a high res capture, the effect is a stunning piece.

Buying A Printer

Buying a printer can be a big decision and a significant investment. I’m posting these quick thoughts from an email with a client today to start your brain thinking about some of the decision points, and I hope to expand this into a full article in the future.

To buy a printer or not is a big question. It comes down to a couple things:

1. will it make you money?

2. will it really save you money?

3. Is the cost inconsequential compared to the convenience? 

4. Will it give you control you can’t get with a lab?

5. Do you need the faster turnaround times. 

A printer is like getting a dog, it has needs (ink, paper, maintenance, profile making/testing) that cost money and will always be there, and you need to take care of it. Unless you print a lot, the total cost of ownership is going to be close to just sending out, but if you want to print a lot, it makes those individual prints less expensive.

At the $400 price point, a printer can be more easily justified. Once you get to the $1,000 17×22 printers, you have to be printing enough to make it work out.

Printers should be viewed as consumable/disposable items, as painful as that sounds. They are made to work for a couple years, not forever, and the manufacturers expect you to upgrade. Do not look at it as a long term investment. It’s not like buying a car, it’s like buying tires, you expect them to wear out. 

Thoughts or experiences? Share them in the comments!