File Backups – Checking for Copy Errors

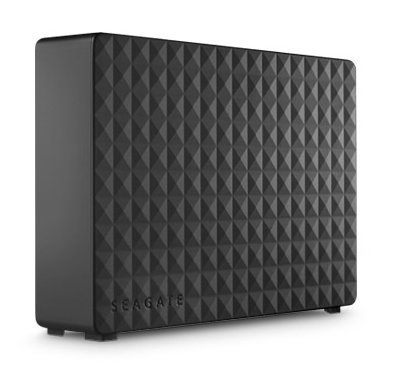
One of my “safer at home” projects is updating my file storage system. The drive I put new camera captures on was getting close to filling up, so I needed to expand my system by purchasing a 8TB Seagate external drive that could hold the contents of a partially full 6TB drive, along with the contents of a partially full 2TB drive.

It took me many hours of copying with CarbonCopyCloner to transfer the files from both drives to the new 8TB drive, which always tests my patience, and my tendency to want to watch the pot to see if it’s boiled.

With the copy complete, the next to do is a major reorganization of my folder structure to better fit my current needs and to work with my backup scheme. As part of this, I’m going to erase and reuse some older backup drives, but before I erase those drives, found myself with a nagging question. Did my computer actually copy all my files correctly to the new drive?

Most file copy operations, including what I did with CarbonCopyCloner, are optimized for speed. They read the file from one location and write it to another without verifying that the file was written correctly. Verifying a copy would take re-reading each file and comparing them, which would take a lot more time. In the case of my 5.5TB of data, it would have to read 11TB total of data. 5.5TB on the original drives, and 5.5TB on the copies.

Since my copies weren’t verified, it’s entirely possible that when I copied my files to this new drive, files that hold decades of work, valuable drum scans, irreplaceable originals and memories, that some did not copy correctly, and I could be losing some data. I used to accept that risk in the past, but experience has made me less willing accept it going forward. So what to do then?

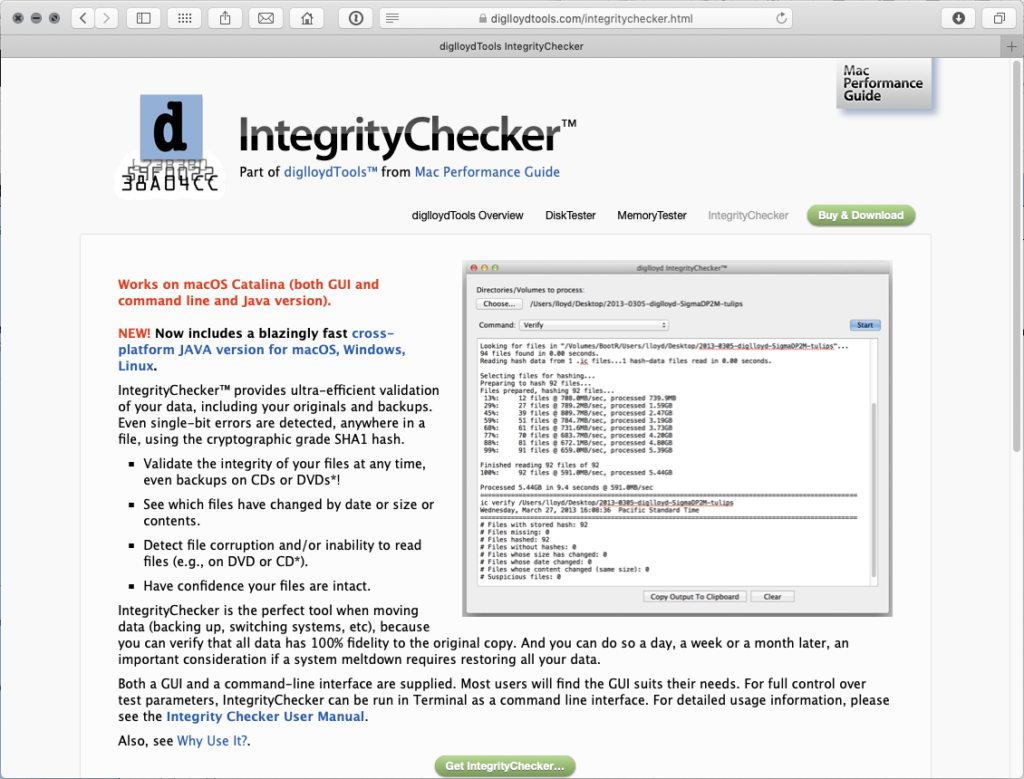
CarbonCopyCloner has an option to compare your backup with your original, but for the size of my archive, it was going to be a very time consuming project, and difficult to organize. Fortunately I remembered Lloyd Chamber’s IntegrityChecker software that was designed to do just what I wanted.

First a couple lines about Lloyd and why I’m trusting his software to check my files. Many years ago I met Lloyd when he attended one of my workshops. He was using 8×10 film at the time and trying to push the bounds of what it could achieve…no minor feat. His film was of fantastic quality, but he was still not satisfied. He’s the type of person who obsesses over details in a way I greatly appreciate. But he’s not just a photographer. He has a couple patents to his name for compression technology he used in his very popular DiskDoubler and RAMDoubler software. He has the knowledge and experience to get very deep in the weeds of some interesting computer and digital imaging problems, and he blogs about lens and camera testing at diglloyd.com.

IntegrityChecker validates files in a very unique way. It creates a cryptological hash for every file on a storage volume that can be used to check if the file has been changed in any way. This lets you check the integrity of files and backups in the most efficient way I know how.

So now I’m in the process of creating hash files for my “original” disks. Once all the hash files are created, I’ll use those to validate that my multiple backups are faithful copies of the “original.” That will let me have peace of mind that I have good copies of all my files, and let me decide which copies are redundant so I can re-use those drive.

This kind of integrity checking is something we should all do, but since it’s not built into the operating software we use, it doesn’t happen unless we seek it out. If this is something you’re interested in, check out IntegrityChecker on Lloyd’s website.

I think it’s important to note that this is more of a “expert” level tool. It’s offered in both GUI and command line versions, and it’s going to take some understanding of the underlying principles of what it’s doing if you want to apply it correctly. Because of that, it’s not a tool for everyone, but it’s one I wish I had started using a lot sooner. For now it’s the easiest way I know to ensure my files copy correctly and don’t change once they are copied. Check it out and see if it belongs in your toolbox.

Counting In Full Stops

Do you know how to count in full shutter speed stops?

Even with all the auto settings available on our camera, this basic photo knowledge still can help us solve many exposure problems.

If you don’t have this chart memorized, take some time to learn it, and understand how cutting the amount of time in half cuts the amount light in half, and how doubling the time doubles the amount of light.

It seems so basic but understanding it gives you so many more ways to apply it to your photographs. 

What should you buy with your stimulus check?

My advice, hold off on equipment and take a good photo trip instead. #makememories

For nature photographers, photos happen by being in the field. In general, You should probably be spending more “being out there” than you do on equipment. So bank that check for when we can travel again and start plotting out the trip that will cure your cabin fever.

How bright should a calibrated monitor be?

Reader question:

 I use a SpiderMunki to calibrate my monitors. The software recommends that the luminescence value be 120.  I watched a video on printing and the presenter stated that the monitor should be no brighter than 80.  I wanted to get your thoughts about the appropriate settings.

Great question! Here are my thoughts:

First let’s answer why we are turning the brightens on our monitor down so far. These standards are driven by creating a good screen to print match. There are industry standard viewing lights  for printed materials that cost about $1,000, and are used in the prepress and lab industry to match color to professional standards. A accurate screen to print match requires a similar illumination of both screen and print. 

Dynamic range also has to be considered. Anytime you can make the highlights “brighter” you increase dynamic range and contrast. Normally we want that, but in the case of screen to print matching, it hinders matching the transmissive light monitor to the reflective light print. Lowering the brightness of the monitor makes a better match, and also makes it easier to see subtle tones and detail in the monitor that would be hidden with higher dynamic range/contrast. 

So now that we’ve explored a little of the why, let’s answer is 80, 120 or some other number correct. Traditionally 100 c/m2 has been the accepted value. I’ve been on calibrated monitors since the ~1994 and that was the value recommended with my first x-rite calibrator. It’s the brightness I’ve used for countless files, prints, and CMYK book/press reproductions for pro photographers. It’s also what my team of printermakers and scanning masters used at West Coast Imaging, so it is a rock solid, tested, proven number. 

The reality is there is a range of numbers that can work. The difference between 80 and 120 c/m2 is not that large. About a 20% variance from the 100 value I consider standard. In my early years I would work with CRT monitors, and as these aged, they dimmed, so that you could no longer achieve 100 c/m2, so I’ve worked with lower ranges too. It worked to a point, but for my taste once you get around 80, things start to get a little murky. 

At some point IIRC,  x-rite started recommending 120 c/m2 in their software. No idea why, they just did. So people started using that. I tried 120 it and decided I still liked 100 cd/m2 better. 

You also have to take into account that there is some mental translation in screen to print match. So some people may feel they get a better match with their lights and their monitor at one setting over another. 
So which value is right? I think you could make it work with a range of values from 80-120, but I know 100 c/m2 works so I stick with that if my monitor can achieve it. 

Photo Projects – Update Your Backup!

When is the last time you did a proper backup? You know, three total copies of your photos?

If you are stuck at home because of the Corona crisis, now is the perfect time to finally get your backup up to date. If you already know how to backup, then just do it.

If you don’t know how to backup, then now’s the time to learn. Figure out what software you want to use (Carbon Copy Cloner is my favorite for mac) and take the time to read the manual and figure out how to use it.

Looking for a simple plan you can follow? Then send me your email address and I’ll give you access to my members only Simple Backup Plan article. It explains many of the ints and outs of backing up your photos, how to structure your backups, and much more.

Backup doesn’t get solve by itself. Only you can protect your photos, so what are you waiting for?

Inspiration to Photograph During COVID-19

Even if you are stuck at home, there are so many ways to grow your photography and stay inspired. I made this vlog to share with you some ideas to keep making great work with what you have on hand, and I talk about how Edward Weston made one of the most famous photos ever during a time of great hardship and limited resources. At ~5:50 I talk about the effect photography has on my wellbeing and why I I think it’s important to keep photographing.

When you’re done watching the video, here’s some links to things discussed in the video:

Links Pepper #30
https://en.wikipedia.org/wiki/Edward_Weston#/media/File:Weston-pepper30.jpg

Auction listing
http://www.sothebys.com/en/auctions/ecatalogue/2014/photographs-n09129/lot.24.html

Edward Weston
https://en.wikipedia.org/wiki/Edward_Weston

Robert Glenn Ketchum exhibit at Booth Museum https://boothmuseum.org/exhibitions/
https://www.robertglennketchum.com/

(This video was recorded March 17. The Robert Glenn Ketchum opening I referred to was on April 7. Yeah, it took me a while to edit and post it. 😉

My Foundational Experiences In Photography

How we approach photography is shaped by our experiences. This episode of my vlog shares some of my foundational experiences, how they shaped my vision and my expectations for quality, and gives some of the backstory behind what I teach.

What are some experiences that have shaped your photography?