Canon Printer Overview – November 2020

For those who want to print at home, Canon has updated their desktop size professional/fine art inkjet printers recently. The new PIXMA PRO-200 and imagePROGRAPF PRO-300 provide much needed updates, as the PRO-100 was getting quite dated given the state of the art of inkjet printing in 2020. 

If you are thinking about buying a printer, I’m going to walk through the current Cannon offerings with my thoughts on the advantages of each. 

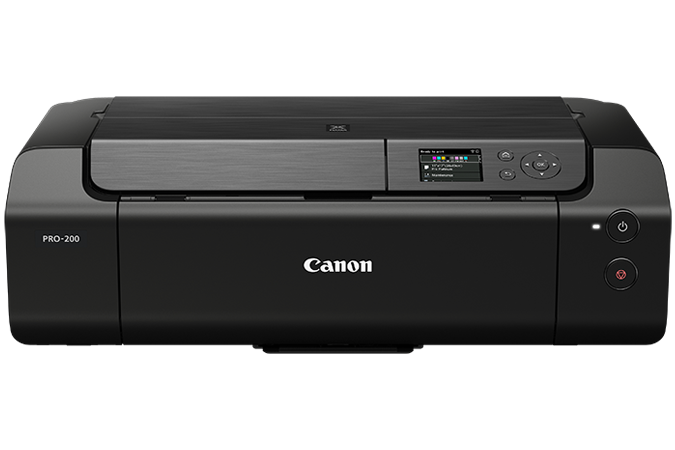
PIXMA PRO-200 – 13 inch wide prints  MSRP $699

This is the “entry level” printer for 13” wide making photo quality prints. It offers two shades of gray ink which I consider necessary for pleasing black and white prints. I’ve not printed with this printer, but I suspect it will offer higher quality than the PRO-100 which I believe was introduced in 2012 which is a lifetime ago in inkjet printing. But you should note that this printer uses dye based inks, which typically are not as fade resistant as pigment inks.

At the lower end of their range, Canon limits the features you get, as you’ll see when we look at the features of the more expensive models in their lineup, so you aren’t going to get everything unless you are willing to pay for it. Even so, this printer sits nicely at the bottom of Canon’s line with good features for the price slot it occupies

Buy on Amazon.

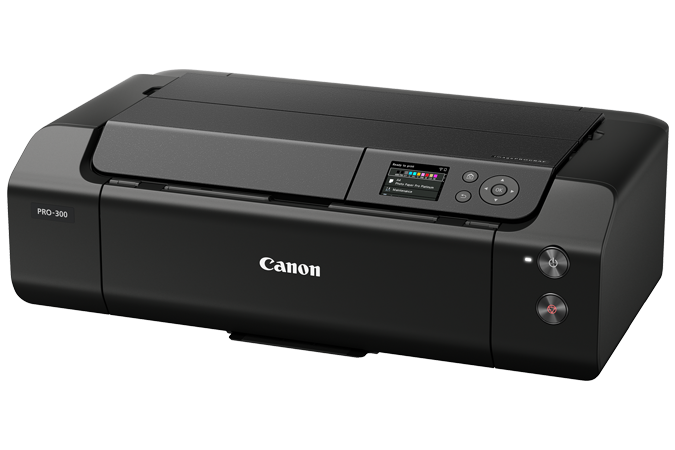
imagePROGRAPF PRO-300 – 13 inch wide prints MSRP $899

The PRO-300 offers a different mix of options than the PRO-200.  Some are upgrades, but some I’d consider downgrades. 

Let’s start with the upgrades. First, you get a Matte Black ink which will give you better results on artist papers like Hahnemühle Photo Rag. Better black improve print quality, so this is a big advantage if you regularly print on artist papers. 

Second is the addition of a red ink. My experience is that this offers a meaningful increase in the ability to reproduce the stunning reds in your photographs, and the reason you should be using the ProPhoto colorspace when editing your files (never use AdobeRGB or sRGB when editing or for “Master” files because they severely compromise the reds in your file.) 

Third is the addition of the Chroma Optimizer that is found in their larger printers. The Chroma Optimizer puts a clear coat over the ink that helps produce a smooth surface on glossy and semi-gloss papers which Canon says results in in more evenly reflected light that gives richer blacks, more vivid colors, and less bronzing. From what I’ve seen, these claims are true, and that gives the PRO-300 another advantage. 

But there is always a catch, right? Adding these extra inks means you give up the light gray ink found in the higher end models (and even the Pro-100.) I do a lot of black and white printing, so I don’t like that at all because it means the lightest, most delicate highlights now need to be made from gray ink which will most likely have visible dots and not achieve the delicate tones possible using a third lighter gray ink. That’s a frustrating choice to have to make, and for me, that makes this printer a pass, but if you only occasionally do B&W, it may not be an issue for you. 

I’m also pretty sure this is the “least expensive” printer in the Canon lineup that uses the LUCIA PRO pigment inks. Typically pigment inks last longer than dye inks, so if you are looking to make long lasting prints, you should take that into consideration. 

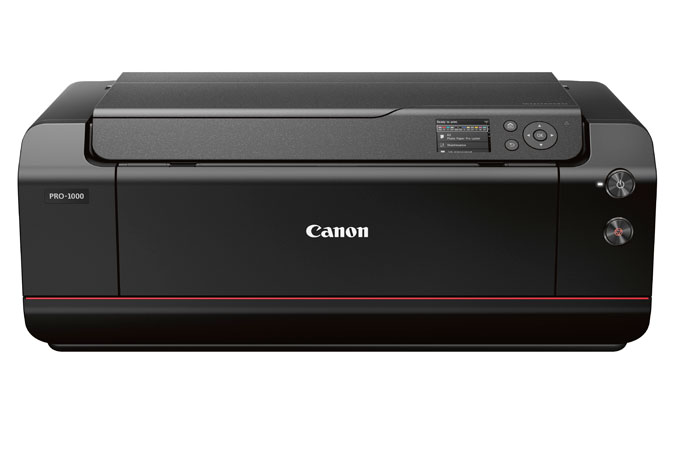
imagePROGRAPF PRO-1000 – 17 inch wide prints MSRP $1299

The Pro-1000 is the entry level step into the highest quality Canon offers with 11 ink color of its LUCIA PRO pigment inks including Matte Black, Gray, PhotoGray (light Gray), Blue, and Red as well as the ChromaOptimizer. This is the same inkset found in PRO-2100/4100/6000 printers. I’ve owned this printer and can confirm I was able to match the prints from my larger PRO-4000 printer. This ink-set is capable of producing beyond lab quality prints, unless your lab is using this same printer.

My experience as of November 2020 is that this inkset produces the most brilliant digital prints of any process I’ve seen, so much so that it has changed the way I look at my photographs, and allows me to push my printing to new heights. This due in large part to the incredible blacks (d-max) the inks achieve, which give prints more depth and dimensionality. It’s a big upgrade even over the Canon 8400 printers I have previously used. Canon made a big leap forward with this inkset, and changed photography in the process because it literally makes my old prints look dated when compared side by side to the new inkset.

Another advantage is obviously the ability to print to 17 inches wide, which allows for prints to 17×22 inches. For many photographers, this lets them print most of their work in house, so a lab only needs to be used when making larger prints. 

You also get to use larger ink cartridges which is an advantage if you are printing a lot. Canon ink costs a little more per ml than Epson inks, but my experience is that Canon printers use less ink than Epson so I think it evens out in the end on cost. 

The drawback for me is no roll feeder. You have more paper options when printing on rolls, that feature is going to cost you more. Probably not something that affects most photographers, but one that factors in for me. 

Buy on Amazon.

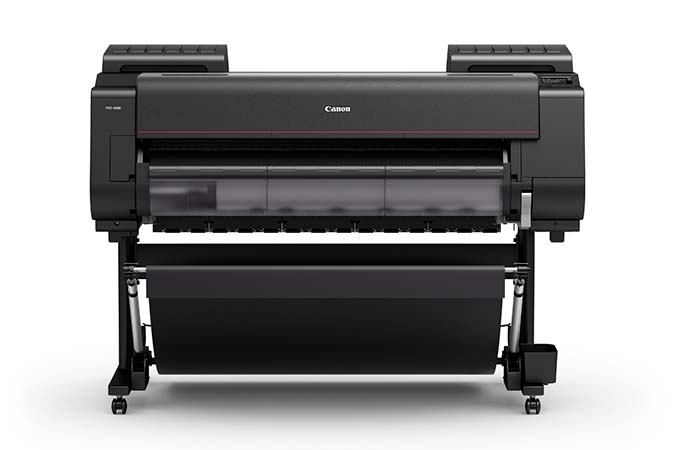
imagePROGRAPF PRO-2000, PRO-4000, PRO-2100, PRO-4100, PRO-6000

I really can’t say enough about these printers. With them, I am making the best prints in my 20+ years of digital printing, prints that have impressed the very discerning pros I work with. The black ink took a generational leap ahead of Epson, but Epson is catching up (competition is a great thing for us photographers!)

These models allow you to print in 24 inch, 44 inch and 60 inch print widths that allow you to print almost anything you can imaging.

The advantage to these printers is the size you can print. The disadvantage is the size they take up. Not everyone has the room for one of these outside a professional environment, or a frequent enough need for larger prints. 

These models all use same eleven LUCIA PRO pigment inks found in the PRO-1000 so you get the same quality.

A printer this large is a multi year investment, and you really should do the ROI on it and make sure you need it so it doesn’t just sit there and collect dust.  If you can make it pencil out, wow, what an amazing tool it is to have. If you can’t, consider the PRO-1000 instead. 

I highly recommend buying the extended maintenance contract Canon offers, which gives you a layer of insurance that the printer will be a useable tool for the life of the contract. 

These printers are really “disposable” items in that they can cost as much to fix as buying a new printer. You need to buy it with that mindset, and not think of it as a lifelong investment. If that ROI doesn’t work, DON’T BUY IT! 

Final Thoughts

I’ve listed the MSRP for these printers, but you should never pay full retail on a printer. Canon and Epson are always offering insane sales and rebates. The rebates cycle every month or tow, and even cycle between vendors. But a little patience can save you hundreds or thousands of dollars. 

New printers don’t have discounts immediately, so there is a price for getting a printer immediately after it’s introduced. Do your research, determine your needs, and decide waiting is worth it or not. 

You should also look at extended maintenance or warranty options. Printers are very expensive to repair when they break, so much so it’s sometimes less expensive to just buy a new printer. Canon offers maintenance contracts on many of their printers, which act as insurance to guarantee your printer will work when it’s under contract. For desktop printers, you may have to look at third party insurance offers by some vendors like Amazon. Printers are not an investment, they are an expense that allows you to use it for a certain amount of time until it either dies or is rendered obsolete. It may last two years or ten, but it’s a gamble every time, so protect your bet as best you can and make sure the cost fits your business model or need. 

Canon PRO-100 Printer for $179.99

B&H has a great rebate on the Canon PRO-100 printer for the next few days if you are looking for a bargain printer to print photos at home. This is the same printer I’m currently using on my workshops because it’s portable and produces pretty good quality. Larger printers don’t like to be moved because they can spill ink and they are heavy, so this is a good choice for my workshops needs when I need to bring a printer.

This printer first shipped in 2012, so it’s not the latest technology, but it does offer three shades of gray ink which helps B&W photos look better. If you want something better, you’ll be spending in the $600+ range. The PRO-1000 will offer you much better print quality, but the PRO-100 (confusing names, right?) is a great choice for someone who wants to print at home with good results but wants to spend as little as possible.

Printers are “disposable” items. The cost of a full set of ink for this printer is $125, and a print head is in the $200 range, so you are basically getting a free printer. And if it dies, the cost effective solution is to just buy another one. Or buy the Canon extended warranty from B&H when you purchase.

A couple buying tips here.

Buy the Extended Warranty

Always buy the manufacturer extended warranty for your printers. There are all kinds of ways they can fail, and with more expensive printers, it can cost you a lot of money. Buy the extended warranty and roll it into the total cost of ownership. If your printer dies out of warranty, it’s often more cost effective to just buy a new printer.

Wait for Rebates/Sales

Canon and Epson are always running sales and rebates on their printers, so never pay retail! Wait for rebate. Rebates are often vendor specific, so it pays to look at multiple vendors when you are ready to buy.

Printers are “Disposable” Items

A full set of ink for this printer is $125, and a print head is in the $200 range, so you are basically getting a free printer. If it dies, the cost effective solution is to just buy another one. Or buy the Canon extended warranty from B&H when you purchase and let them deal with it.

It’s a great deal while it lasts if the more expensive printers don’t fit your budget.

FYI, I am not a B&H affiliate, so they aren’t paying me to write it. 🙂

Why are my B&W prints Purple?

That’s the problem one of my workshop participants was having and asked what could be causing it. This is actually a pretty common problem, but it can be easy to miss until you’ve trained your eyes to see it. 

The prints in question were made with the Epson Stylus Photo R1900, which lacks the Light Gray and Light Light Gray found in some other Epson models. That means when it prints a B&W photo, most shades of gray are being made up from the color inks. 

It’s very difficult to make a neutral gray from color inks, hence the color cast. The 24 and 44 inch epson and Canon printers, as well as some smaller printers, use two shades of light gray in addition to black to solve this. 

Yet even with those extra shades of gray, profiles can be to blame.  You need an accurate profile to get neutral color, and canned profiles (the ones that came with your printer or you downloaded from the paper manufacturer) rarely achieve perfect neutrality. 

In the case of the Epson R1900, if the photographer wants a better result, they will have to print on a printer that has gray inks and a decent profile. 

Taming Large File Sizes in Photoshop

Working with high megapixel files in Photoshop can be a pain. It seems I’m routinely working on files that are close to a GB in size when I start adding layers to my 42MP 16 bit captures. New 61MP and larger cameras are just going to make that worse. 

While Photoshop can deal with these files, the disk space taken up by multiple versions of them, as well as for backup, plus save times can get to be a real drag. So how do we make it easier?

Well, this problem is nothing new. In my early days as a printmaker, working on 300 MB scans was a huge challenge. I remember when it took an hour just to do a 90 degree rotation, which gave me plenty of time to roam outside my cabin in Yosemite, but wasn’t very efficient. So I came up with a solution that I think you might find useful today. 

Here’s how it works. When starting with a large source file, like a 1GB scan or high MP capture, I make a copy of it and size it down to a reasonable size, say 8×10 inches @300ppi, which is a good size for proofing. Then I do all my processing on adjustment layers in Photoshop. This keeps the files small and quick to work on. 

When, and if, I need a larger version of the file, there is a simple process to transfer all those layers over to the high resolution original. 

My printmakers and I used this process on thousands upon thousands of files in my days at West Coast Imaging, and I even made a youtube video that demonstrates the process. One of these days I want to re-record these videos in beautiful HD (or 4k!), but I thought it was worth sharing the old videos because the process works the same, even on the ancient version of Photoshop depicted. 

Take a look and see if it’s a trick that can help in your toolbox. 

Printing Re-Imagined

Recent improvements in printing technology should have you reconsidering how you print your photographs.

If you’re printing with a lab, you’ve probably been making C-prints. C-prints are made on Kodak or Fuji paper C-print is the name given to the chemical process used in the paper, an abbreviation of longer name “chromogenic print”. Sometimes they are referred to by their surface, such as E-surface, or Luster, but that is not always a precise identifier. 

What defines a C-print is that it’s made on a light sensitive paper which exposes a negative image with light (LED or laser light for digital prints,) then is processed in RA-4 chemicals. 

C-print papers came from the pre-digital age, and were designed to make prints from color negatives easy and affordable for mass production of color photography. Your family photo albums are likely stuffed with C-prints.

When the first “digital enlargers” came on the scene around 1997, they most commonly used these same C-print papers, which offered great ease of use, quality, and price. Printing on a “negative” paper was no problem for a digital device that could easily convert a digital file into the data needed by the printer. 

I saw my first LightJet digital C-prints around 1996/7 when I was working at The Ansel Adams Gallery. They were nothing short of amazing.  At that time I was trying to perfect my own photographic skills, looking to find the best methods for color printing, so I was constantly studying prints. I was very fortunate that my position as Assistant Curator brought me in contact with some of the world’s best prints daily.  

What those first digital C-prints represented was a paradigm shift. Finally there was a way to turn digital files into a true fine art quality print that was as good as they very best darkroom prints I had seen. This was a huge accomplishment and changed the way we print forever. 

To say the prints were a hit is an understatement. The process was championed early on by several of the gallery’s photographers including Charlie Cramer and William Neill, and all of the Yosemite photo community quickly jumped on board. As a curator, I was able to sell more work than ever from our artists because of the ease of producing duplicate prints in quantity that exactly matched the previous batches, and at any size. Suddenly it was relatively easy to gat a 30×40 print made once a file had been perfected.  I had an incredible run with one photograph in particular by Charlie Cramer, selling somewhere near 100 copies. (I have a copy of that print on my desk that still looks as good as it did when I first saw it. )

Digital C-prints quickly became the dominant form of color printing in museums, galleries, and were also embraced by advanced amateurs and  hobbyists. 

While the technology was readily available, the knowledge to use it to make true fine art quality prints was still quite difficult. To help solve that, I started my first print studio, West Coast Imaging, with a focus on making gallery quality prints using my knowledge to great digital prints that didn’t feel “digital” but retained the inherent qualities of fine art photography.  

 In my time running WCI, I printed the first digital exhibitions for Galen Rowell, Jack Dykinga, Robert Glenn Ketchum, and many others, and used hundreds of thousands feet of Fuji C-print material. So it would be fair to say I know C-prints very well. I’ve been committed to it over the years for my personal as well as my professional work. And alongside it, I’ve used about every generation of Epson inkjet printer since about 1999/2000, as well as several Canon Pro printers. 

For a long time, C-prints were better than inkjet prints when printing on similar surface papers.

But recently that has changed. 

When I started testing my Canon PRO-4000 printer, I noticed something was different, and better. Much better. 

As I compared my calibrated test sheets from the Canon PRO-4000 to my reference digital C-print, something about the Canon print made the C-print look dead and lifeless. Perhaps it’s better explained that the Canon print had a depth, a brilliance, a dimensionality that I could never recall seeing before. 

I was taken off guard because I didn’t recall seeing this big a difference a few years earlier comparing the previous generation Canon or Epson inks to C-prints. So I dug in to my archive of calibrated test prints to try and confirm what I was seeing. What I saw surprised me. 

The wider color gamut and darker blacks (D-Max) of the new Canon printer really did make a difference. The new Canon prints bested every print I had made before. And not only were they “better”, they were magical. I realized I was seeing things in the prints I never thought would be possible. It was the same “ah-ha” moment I had when I saw my first  digital C-print at the Ansel Adams Gallery a few years later. These new print set a high water mark, one that allows photographers to express themselves in ways not possible before.

It became clear that this was the process I wanted to use to print my personal photographs, as well as the work of my clients. While C-prints are still a legitimate medium for fine art, the qualities of these new prints are too exciting to overlook. With this new process, I’m making the best prints of my career, and expressing qualities I never thought were possible in a print. It’s taken a long time to reach this level of quality, but now that we have, I’m excited to switch from C-prints to inkjet and explore all the new possibilities!

Buying A Printer

Buying a printer can be a big decision and a significant investment. I’m posting these quick thoughts from an email with a client today to start your brain thinking about some of the decision points, and I hope to expand this into a full article in the future.

To buy a printer or not is a big question. It comes down to a couple things:

1. will it make you money?

2. will it really save you money?

3. Is the cost inconsequential compared to the convenience? 

4. Will it give you control you can’t get with a lab?

5. Do you need the faster turnaround times. 

A printer is like getting a dog, it has needs (ink, paper, maintenance, profile making/testing) that cost money and will always be there, and you need to take care of it. Unless you print a lot, the total cost of ownership is going to be close to just sending out, but if you want to print a lot, it makes those individual prints less expensive.

At the $400 price point, a printer can be more easily justified. Once you get to the $1,000 17×22 printers, you have to be printing enough to make it work out.

Printers should be viewed as consumable/disposable items, as painful as that sounds. They are made to work for a couple years, not forever, and the manufacturers expect you to upgrade. Do not look at it as a long term investment. It’s not like buying a car, it’s like buying tires, you expect them to wear out. 

Thoughts or experiences? Share them in the comments!

Inkjet Printing Through Photoshop – Macintosh

Using printer profiles correctly when printing is essential to getting accurate color from your printer. The challenge is that you have a bunch of settings that have to be set up exactly right, every time, for it to work. That is further complicated because every editing software, OS, and printer driver has it’s own settings and names for those settings.

You’d think that there should be some good information out there on how do do all this, but even the paper manufacturers don’t have good guides. One of my favorite companies has German language screenshots in their English language document, and they note that their instructions don’t work for every setup. Uggg!!!! It makes you want to pull your hair out.

I’m going to make my attempt to solve this problem by sharing the settings I use with Photoshop on the Mac. These settings have been tested and verified to print my Color Test Sheets correctly.

The settings for Lightroom on the Mac are quite similar to these, so you should be able to translate them over. Understanding what each setting does may also help you translate this for other editing programs and setups. As time allows, I plan to make more of these, but the easiest place to start was with the software I print through.

download the PDF here:
Inkjet Printing Through Photoshop – Macintosh.pdf

Color Test Sheets

Testing profiles and printers is an important part of ensuring your printer is “in tune” and maintaining a color managed workflow. To make sure my profiles are in tune, I use a reference print that I created that allows me to visually compare color that I find to be the best way to evaluate. This is the process behind the hundreds of thousands of prints I’ve made for customers.

Below are links for 8×10 sections of my reference print that you can print on your own printer and compare them to my validated reference prints. I bring my reference prints to select workshop, and I also sell them so that you can have a copy for reference.

Purchase a copy of my approved and validated color test sheet.

Download files for testing:

Printing Instructions
Color 1
Color 2
Color 3
B&W 1
B&W 2

I suggest you print these files using your normal workflow as a test of your process. I have found that in addition to color, they can uncover other problems in the printing process that you may not even be aware of.

The files are sized to print at 8×10, and should be printed to that exact size to make the most accurate and useful test. 

You SHOULD NOT do any processing on them. That defeats the purpose of trying to see how the same file prints on different printer/profile/paper combinations. The file is our control to test the variables of printer setups.

How to use these test files in conjunction with my approved test prints:

Make a print on the paper you want to test using your normal printing procedures and profile. 

Write the paper name, date, printing profile, and any other useful settings and data that will help you identify how when and where your test print was made. This will make it more valuable in the future when you want to compare new printers, papers, and profiles to it. 

Use the right light to compare prints. I prefer to use SoLux 4700k bulbs, or if not available, actual daylight. Check out my blog post on SoLux for an explanation of why I use it. 

Compare your print to my print. I like to stack the prints on top of each other so that I can view the colors right next to each other. Compare each image as a whole and then look at specific colors. Look at dmax (black density) and also be sure to consider white points. Warmer paper bases will make the image look warmer overall than color papers, and this warmth or coolness can not be added or subtracted in an imaging editing program as it is inherent to each paper. 

If you are happy with the match, then “approve” your print by signing it and writing “approved” on it.  This is now your known reference to use for your printer, and can be used in the future to test your printer against itself. Keep it in a safe place with the other reference prints you will be making.  Why would you test your printer? If you are getting different results, if something significant changes, like settings, head replacement, three year olds, moving the printer, etc. It also becomes a record of what your printer was producing at a given point in time, and allows you to compare it to other printers, profiles, and papers. 

MAKE YOUR OWN REFERENCE PRINT! Once you have a known and approved printing setup that has been validated with my reference print, pick some of your favorite images and make your own reference print so that you can have your own personal reference that you know is printing right because you validated your process with my reference print.  Choosing a range of colors and densities will help, and you’ll learn over time which colors are most sensitive to changing with different ink sets and paper white points. 

If my reference print was helpful to you, take a picture of your print overlapping mine and share it on social media with a few words on how it helped, and tag me in it so I can re-share it too.

Canon PRO-1000 Ink Affiliate Links

To make finding the the exact ink for the Canon PRO-1000 easier, I’ve created this handy reference page with links to all the inks and consumables. I get a small commission every time you use these links, which help me continue to produce this site.

The Canon PRO-1000 printer is a true pro quality printer that allows you to make better than lab quality prints at home up to 17 inches wide. Canon printers have become my preferred choice for many reason including incredible color, deep blacks, ease of print head maintenance, and print longevity.

If you are buying a new Canon printer, you can save signifigant money by waiting for the regular rebates offered by Canon. You should be able to buy the PRO-1000 for about $999 or $1099. It’s worth searching multiple vendors as some rebates are vendor specific.

Most inks last for many prints, but when low ink warning for a color comes on, you should order that ink immediately. Inks are used at different rates, and that changes based on the content of your images. Depending on which papers you use, you’ll likely use Photo or Matte Black the most, along with the Croma Optimizer. If you print a lot of black and white, you’ll use the gray inks more quickly than the color inks.

Genuine Canon Lucia PRO PFI-1000 inks

Photo Cyan PC
Cyan C
Magenta M
Photo Magenta PM
Yellow Y
Photo Gray PGY
Gray GY
Matte Black MBK
Photo Black PBK
Blue B
Croma Optimizer CO
Red R

Waste Ink Tank MC-20