Are you using cloud backup but not local backup? Your data is at risk.

If you don’t have a local backup in addition to your cloud backup, there is a big hole in your backup plan that you may not be aware of. Cloud backup takes time, because it has to go across your internet connection. For small documents like word processing, spreadsheets, you won’t see any problems. But photographers don’t deal in such small files. How often do you come back form the field with 32GB or more of data? How long does that take to upload to the cloud? If you can’t answer that, then your data may be at risk. 

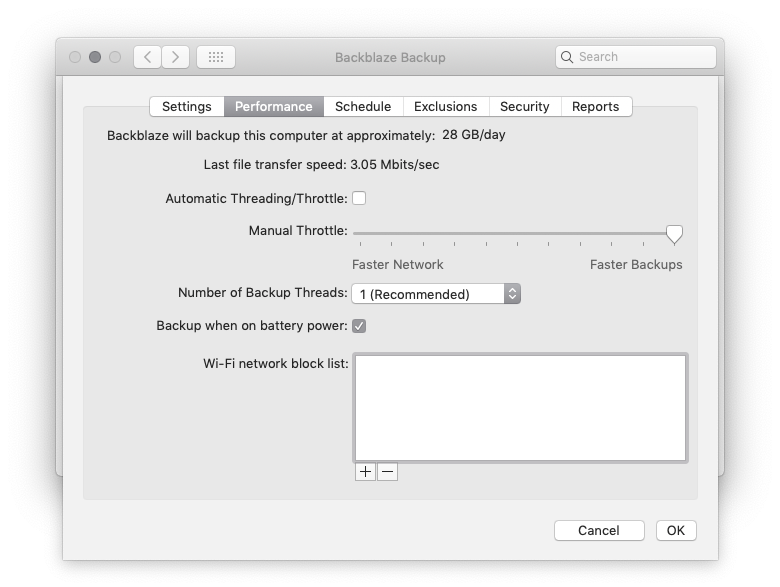
Here’s an example. Last month I returned from teaching a workshop with 100GB of new files that needed to be added to the hard drive where I store all my photos. Checking my BackBlaze control panel, I see that my upload rate is 28GB per day. That means it would to take three and a half days before all my data is transmitted to Backblaze. And for most of those three days, my data is at risk of loss. 

That’s why we need local backup in addition to cloud backup.

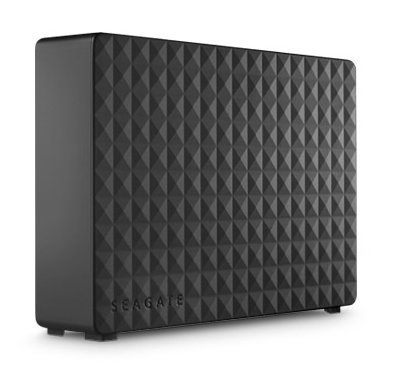
My backup plan includes several “backup” drives that I use with CarbonCopyCloner to keep exact duplicates of my main hard drive. Whenever I download photos from my memory cards, I immediately make a backup onto the backup drives before I erase the card. I can do this in a matter of minutes, not days like an online backup takes, so I can get an almost instant backup of my new photos.

So why use cloud backup when it can take days instead of minutes? Because we need to protect against extreme disasters. 

What if my house burns down, or my drives are stolen? Or a virus? Even with multiple copies of my data in one location, there are a number of very real ways those could all be destroyed. Putting a copy in the cloud gives me an “offsite” backup that is protected from local disasters like fire, flood, theft, etc. It make take a couple days to get it all uploaded, so there is still some risk, but I’ve greatly lessened my overall risk by having both onsite and offsite. backups 

Understanding your needs and how your backup plan works will go a long way to protecting your work. 

To make improve your backup plan, think about your answers to the following questions:

  1. Do you have an on site backup?

2. Do you have an off site backup?

3. How fast can you upload a 32BG shoot to the cloud?

4. Are your backups automated and run regularly?

My hard drives didn’t let me down!

This is a follow up to my April project to check the integrity of my backups as I was moving my files to a larger hard drive. 

My objective was to make sure that every single file (about one million) copied exactly to the new drive, and that there were no errors that would prevent me from accessing my data. 

To do this I used a software app from Lloyd Chambers called Integrity Checker which is the most efficient tool I’ve found for this unique job. It’s a command line tool that uses the Mac terminal. That in itself was a learning experience as previously I’ve been very afraid of how bad the wrong command in terminal could muck things up. 

Thanks to Integrity Checker, I was able to confirm that my two main backup copies are exact duplicates of the “master” hard drive. That’s a very good thing because it means I really do have a useable backup when my main drive fails. (All drives fail, it’s just a matter of when.)

My secondary objective was to verify some bare drives I was using in the past for backups. I had stopped using them because the were throwing errors in CarbonCopyCloner. I suspected that these errors were due to the drive dock I was using them in, but had no way to be sure, so I didn’t trust them. They got shoved into a drawer and were just sitting there as “worst case” backups as a hail Mary play in case I needed it if things every got really ugly.

To try and bring these orphaned drives back into my active backup,  I put them into a known good drive enclosure. Then, using Integrity Checker, I was able verify that every file on them matches my “master” and that the drives are trustworthy. That gives me confidence to use them again for backing up new data, and lets them be useful as part of my backup strategy.

The one thing that has surprised me as I completed this project is that everything actually worked. Terabytes upon terabytes of data and multiple copies of a million files that were hashed and read multiple times, and it all worked. Even digital photos from the mid 1990s were still there and readable. I think I found a dozen files that threw an error, but they were all readable so the error was insignificant and they were mostly XMP files. That has made me much more trusting of the process used to backup my data. A sigh of relief, but I’ll still remain vigilant. 

Another surprise was how many files I had duplicated on the drives. For a myriad of reasons, I had multiple folders with the same files that built up over the last twenty-ish years of managing my archive. One terabyte of duplicates to be precise.  It would be a nightmare to reconcile all those files manually, but Integrity Checker came to the rescue again. One of it’s functions allows you to identify duplicate files…that’s how I discovered the 1 TB of duplicates in the first place. 

But just as valuable was Integrity Checker’s ability to “clone” the duplicates and regain that wasted space if you are using a APFS formatted drive. 

APFS is a format for storage drives used with a Mac. It’s designed for solid state drives, not spinning disks. It will work with a spinning hard drive, but it can cause a slowdown in transfer speed. That’s something I could tolerate for backups if it let me get back a terabyte of space, so one by one I converted my backups to APFS, re-verified that all the files would read back correctly, then used Integrity Checker to “de-dupe” the drives and reclaim that 1 TB of space back.

The unexpected benefit of this de-duping is that I now have a whole new set of tricks up my sleeve to manage my storage more efficiently.

The end result is that I now know that every copy of my data is good, and I know how to check it as I go forward to ensure it stays good. This gives me more  confidence that my files will be there when I need them, which was the whole point of this adventure…and something I wish I had done a lot sooner. 

My next adventure is to take one of my offsite backups into the cloud using a Synology DiskStation and Backblaze cloud…more on that in a future post. 

Until then, keep backing up those bits!

A Cheaper Storage Upgrade

Seagate 2TB External Drive

If you are sick of my articles on Drobo/NAS/DAS/RAID storage solutions because they are just overkill for your needs, you are in luck. I’m laid up with the flu, which is a perfect time to dump out some different storage solutions because it doesn’t require the same part of my brain the creative photography content does. 

Talking with a friend yesterday about some upgrades for his mac that was running slow and we got around to his current storage shortage.  (Yes, I have a lot of photographer friends, a side effect of this incurable disease I have called photography 😉

After helping him spend about $300 on a RAM and SSD boot drive upgrade for his 2015 iMac, the budget was tight for storage. He wanted to set up a new Storage Set that would be dedicated to RAW files, and include his existing archive of 700GBs of existing RAWs. (See my Freemium Backup and Storage Plan article for an explanation on what a Storage Set is. )  

He settled on buying three 2TB external drives for a total cost of about $179. One would be the master, and two would be exact clones using CarbonCopyCloner. This would let him transfer his existing 700GB of RAWs to the new storage set, and leave maybe a years worth of space for new RAWs from his 45mp camera. The $179 price is an easy bill to afford, and way less than film and processing used to cost, so even if it ends up being a little undersized, it gets him through till his high season for photo sales. 

Putting all your RAW files on a separate drive is a great way to segment your data. Since these files will never be modified directly, the backup needs are greatly minimized for that master volume. Your modified RAWs can live on a volume set aside for more active files in the case of Photoshop, or in your catalog for DAM (digital asset management) programs like Lightroom. 

So why not a RAID in this case? While RAID is a very nice to have, it’s not always a need as long as you are very diligent in doing regular backups. This solution works in keeping the data safe and accessible for very little money. 

My storage articles over the last few weeks weren’t meant to say you need RAID, but rather to explore what they do and how to manage them based on my experiences managing a lot of spinning disks in Mirrored RAIDs and Synology NAS systems. I used to be able to heat my office in with three Mac servers and forty odd hard drives West Coast Imaging required, so to say I’m very close to this subject is an understatement…lol. 

Sometimes inexpensive solutions are the best solutions, and as I shared with my friend, there are always more things to spend money on in photography. Saving money for him means more days on the road having more adventures and making more photographs. So “just enough” is always the right size. Owing spinning disks is not our goal in life. 

Drobo Cost Calculations

UPDATED 2019-10/31 with link to Google Sheet

At what point is buying a Drobo worth it compared to using single external drives? And what size drives should you buy for the best value? To help a friend with this question and satisfy my curiosity, I created this spreadsheet that you can access on Google Sheet.

Using 8TB drives gives the best value per TB. If you need more than ~21TB (dual drive redundancy), it’s cheaper to buy a second Drobo than it is to use 10TB, 12TB, or 14TB drives. And “upgrading” the drives in an existing DROBO usually isn’t worth it, unless all your drives are so old that they just need replacing anyway.

PRO TIP: Drobo is NOT a backup. It merely makes your master data more resilient to drive failures. A backup is a separate copy on a separate device, and you need two backups. Keep one backup off site to protect agains fire, flood, theft, tornados, hurricanes.

If you are going to buy a Drobo, use my Amazon Affiliate links and I’ll get a small commission:

Drobo 5C

8TB Internal Hard Drive