Lightroom vs Photoshop: Do I need Both?

Photographers get pretty dogmatic about what processing software to use. We do that with camera brands too, but that’s a story for another day. Often these dogmatic positions are based on emotions rather than a thorough understanding of both the tool and the result we wish to achieve, and that stops us from growing as photographers.

I’m going to suggest that your toolkit shouldn’t be either Lightroom or Photoshop, but both. 

Most photographers I meet primarily use Lightroom for processing. That’s no surprise, because Lightroom took most of the things that were hard about Photoshop and made them easier to access and harder to mess up. So right from the start, Lightroom and Photoshop were designed to use different methods to achieve a satisfyingly processed photo. Different means different, that that means we’ll usually get different results too. 

If computers generally frustrate you, Lightroom is the better choice. It is going to hide a lot of the process from you so that you can’t mess up your files as easily, and with many photos it is possible to make pleasing results. 

But the more serious you get about your photography, the more time you spend at it, the more you should consider learning Photoshop and the added tools it gives you. You can do it…It’s just another tool like many you have mastered in your lifetime from driving a car in city traffic to the expertise that allow you to be successful in your profession. 

Photoshop has a reputation for being hard, and honestly there are way more ways to mess things up in Photoshop if you don’t have a solid workflow. But once you get a good foundation, Photoshop becomes easier to work in that Lightroom in many ways, and lets you achieve a higher level of precision and exert more control over the process. 

The thing is, all those things you need to learn to understand Photoshop, the things hidden in Lightroom, are things you need to learn to take more control over your photographs. There are a lot of ways Lightroom can bite you hard too. I know experienced photographers who have lost entire catalogs of photos because of one wrong click in Lightroom because they were lulled into a false sense of security. Lightroom isn’t perfect and neither is Photoshop. It’s always up to you to know how they work and make sure they are doing what you want them to do and not do things that are destructive to your photo archive. 

The fact is, if you want to grow as a photographer, you have to become more versed in all aspects of the process. It’s not about which software you use, but about how you think about the problems you need to solve, and understanding which tool lets you solve those problems to your satisfaction. 

The honeymoon phase of photography is when you like everything you do and it seems easy. But the real fun starts when you start to see beyond your current experience, and feel that drive to get more from your photos. That’s when the real learning starts, and when things get really rewarding. 

So I’d encourage you to make this the year you start using Lightroom AND Photoshop, and break through the barriers that are keeping you from using one or the other. In the process you’ll gain some new skills, and feel more confident in whatever processing choice you make.
Classic Black and White Digital Processing Class

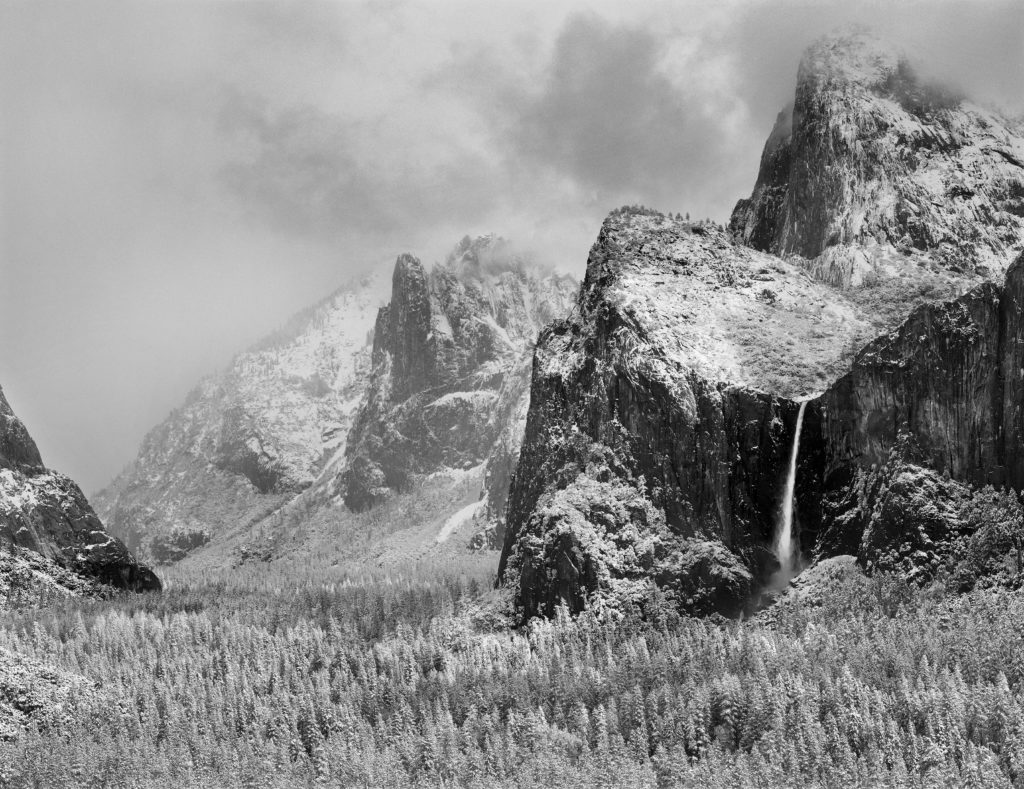
Are you ready to start processing your black and white photographs like a master?

In the last year, I’ve helped hundreds of photographers improve their B&W processing through my talks and workshops, and I’d like to help you, too. Wednesday, January 12, I’ll be starting another round of my popular four-session Zoom class, Classic Black and White Digital Processing.

My talk at the B&H Photo Event Space provides a great (and free!) introduction to the workshop. It touches on many of the subjects this class will explore in greater depth. 

Every time I teach this class, it’s rewarding to see how the participants improve their photography and processing skills each week. Here’s what my students have to say about the class:

I have found the class to be outstanding, not only for learning techniques that are new to me in creating a B&W image, but also the creative ideas to draw the viewer into the scene.
– Brad K.


I want to thank you for your classes and all the extra effort you’re devoting to your students. The information is worth far more than than the price of admission.
– Al H.


This class has introduced me to new tools for vastly improving my images.
– Dennis W.

We’ll meet for four online sessions, each Tuesday through February 2. Each session lasts two hours. The first hour is live instruction, where I teach the techniques I use. During the second hour, I show how I apply those techniques to YOUR photographs, providing insight and critique that will help you learn and grow. 

Each session will be available to re-watch online for two weeks after the class, allowing you to go over the content again, or watch at a different time if you have a schedule conflict. 

Sign up today, then keep chasing the light!

Limitations of the Contrast Slider in Adobe Camera Raw

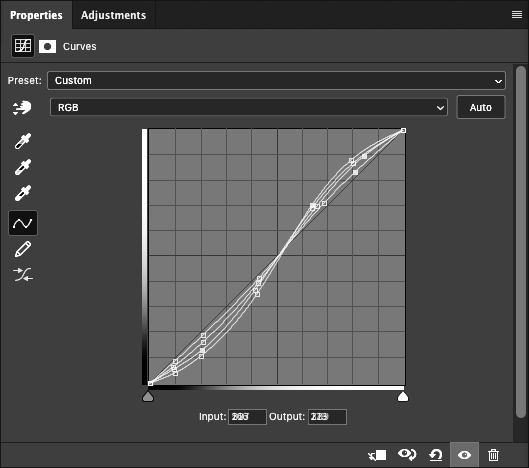
Curve equivalents of Contrast Slider in Adobe Camera Raw at +25, +50, +75, and +100.

I’m working on an article, and it turns out the Curves slider in Adobe Camera RAW is very limiting. The graphic above shows the curves required to produce the equivalent of +25, +50, +75, and +100 with the curves slider. The most pronounced curve is the +100, and the least pronounced (from the 1:1 slope baseline) is +25.

I’ve been meaning to do this for a long time, and honestly I’m a little shocked by the results. Even at +100, the curves slider is weak sauce, and doesn’t even begin to harness the power of curves.

What I’ve seen so far makes be glad I bypass the contrast slider and go right to curves. I’m looking forward to running some more experiments and developing a more in depth article.

Adobe Enhance Details

Does the new Enhanced Detail feature in Photoshop and Lightroom really work? It does, at least for me. 

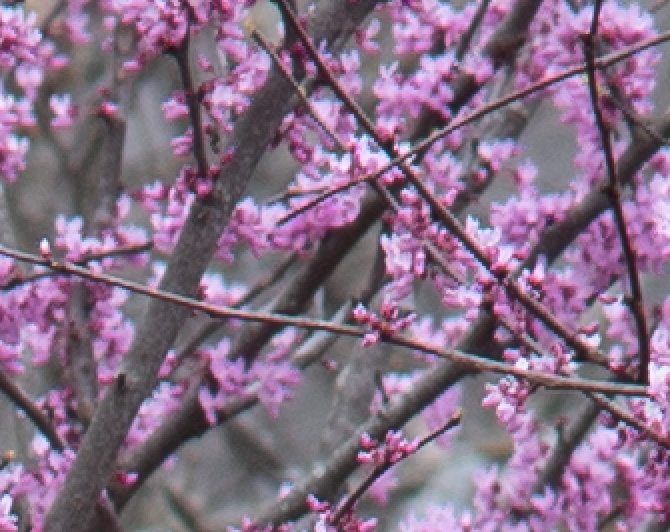
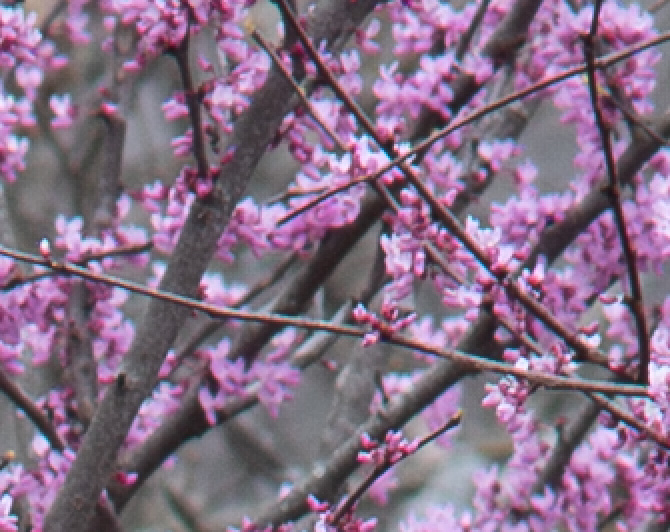
Heres an example of the same RAW file processed with Enhance Details on, and with it off. This is a screen shot at about 400% magnification. 

Normal Raw Processing
Processed using Enhance Details

You might have to zoom in to see this on your device, but when viewed at full resolution, I can clearly see that all the lines of the branches, and even the edges of the flowers are smoother and more refined. With it off, there is much more aliasing, very blocky in-fact. 

Enhanced Details may work better with some sensors than others. I’m hearing from photographers that see no effect, but I’ve seen plenty of examples where it does work. So you’ll have to try it yourself. 

For my Sony A7RII, it clearly does work, and this refinement of detail will allow me more options when applying unsharp mask, as well as resolving finer detail.  It’s now my default processing option. I just wish Adobe would integrate it better into the workflow instead of the current requirement to export to a DNG first.