Lightroom vs Photoshop: Do I need Both?

Photographers get pretty dogmatic about what processing software to use. We do that with camera brands too, but that’s a story for another day. Often these dogmatic positions are based on emotions rather than a thorough understanding of both the tool and the result we wish to achieve, and that stops us from growing as photographers.

I’m going to suggest that your toolkit shouldn’t be either Lightroom or Photoshop, but both. 

Most photographers I meet primarily use Lightroom for processing. That’s no surprise, because Lightroom took most of the things that were hard about Photoshop and made them easier to access and harder to mess up. So right from the start, Lightroom and Photoshop were designed to use different methods to achieve a satisfyingly processed photo. Different means different, that that means we’ll usually get different results too. 

If computers generally frustrate you, Lightroom is the better choice. It is going to hide a lot of the process from you so that you can’t mess up your files as easily, and with many photos it is possible to make pleasing results. 

But the more serious you get about your photography, the more time you spend at it, the more you should consider learning Photoshop and the added tools it gives you. You can do it…It’s just another tool like many you have mastered in your lifetime from driving a car in city traffic to the expertise that allow you to be successful in your profession. 

Photoshop has a reputation for being hard, and honestly there are way more ways to mess things up in Photoshop if you don’t have a solid workflow. But once you get a good foundation, Photoshop becomes easier to work in that Lightroom in many ways, and lets you achieve a higher level of precision and exert more control over the process. 

The thing is, all those things you need to learn to understand Photoshop, the things hidden in Lightroom, are things you need to learn to take more control over your photographs. There are a lot of ways Lightroom can bite you hard too. I know experienced photographers who have lost entire catalogs of photos because of one wrong click in Lightroom because they were lulled into a false sense of security. Lightroom isn’t perfect and neither is Photoshop. It’s always up to you to know how they work and make sure they are doing what you want them to do and not do things that are destructive to your photo archive. 

The fact is, if you want to grow as a photographer, you have to become more versed in all aspects of the process. It’s not about which software you use, but about how you think about the problems you need to solve, and understanding which tool lets you solve those problems to your satisfaction. 

The honeymoon phase of photography is when you like everything you do and it seems easy. But the real fun starts when you start to see beyond your current experience, and feel that drive to get more from your photos. That’s when the real learning starts, and when things get really rewarding. 

So I’d encourage you to make this the year you start using Lightroom AND Photoshop, and break through the barriers that are keeping you from using one or the other. In the process you’ll gain some new skills, and feel more confident in whatever processing choice you make.
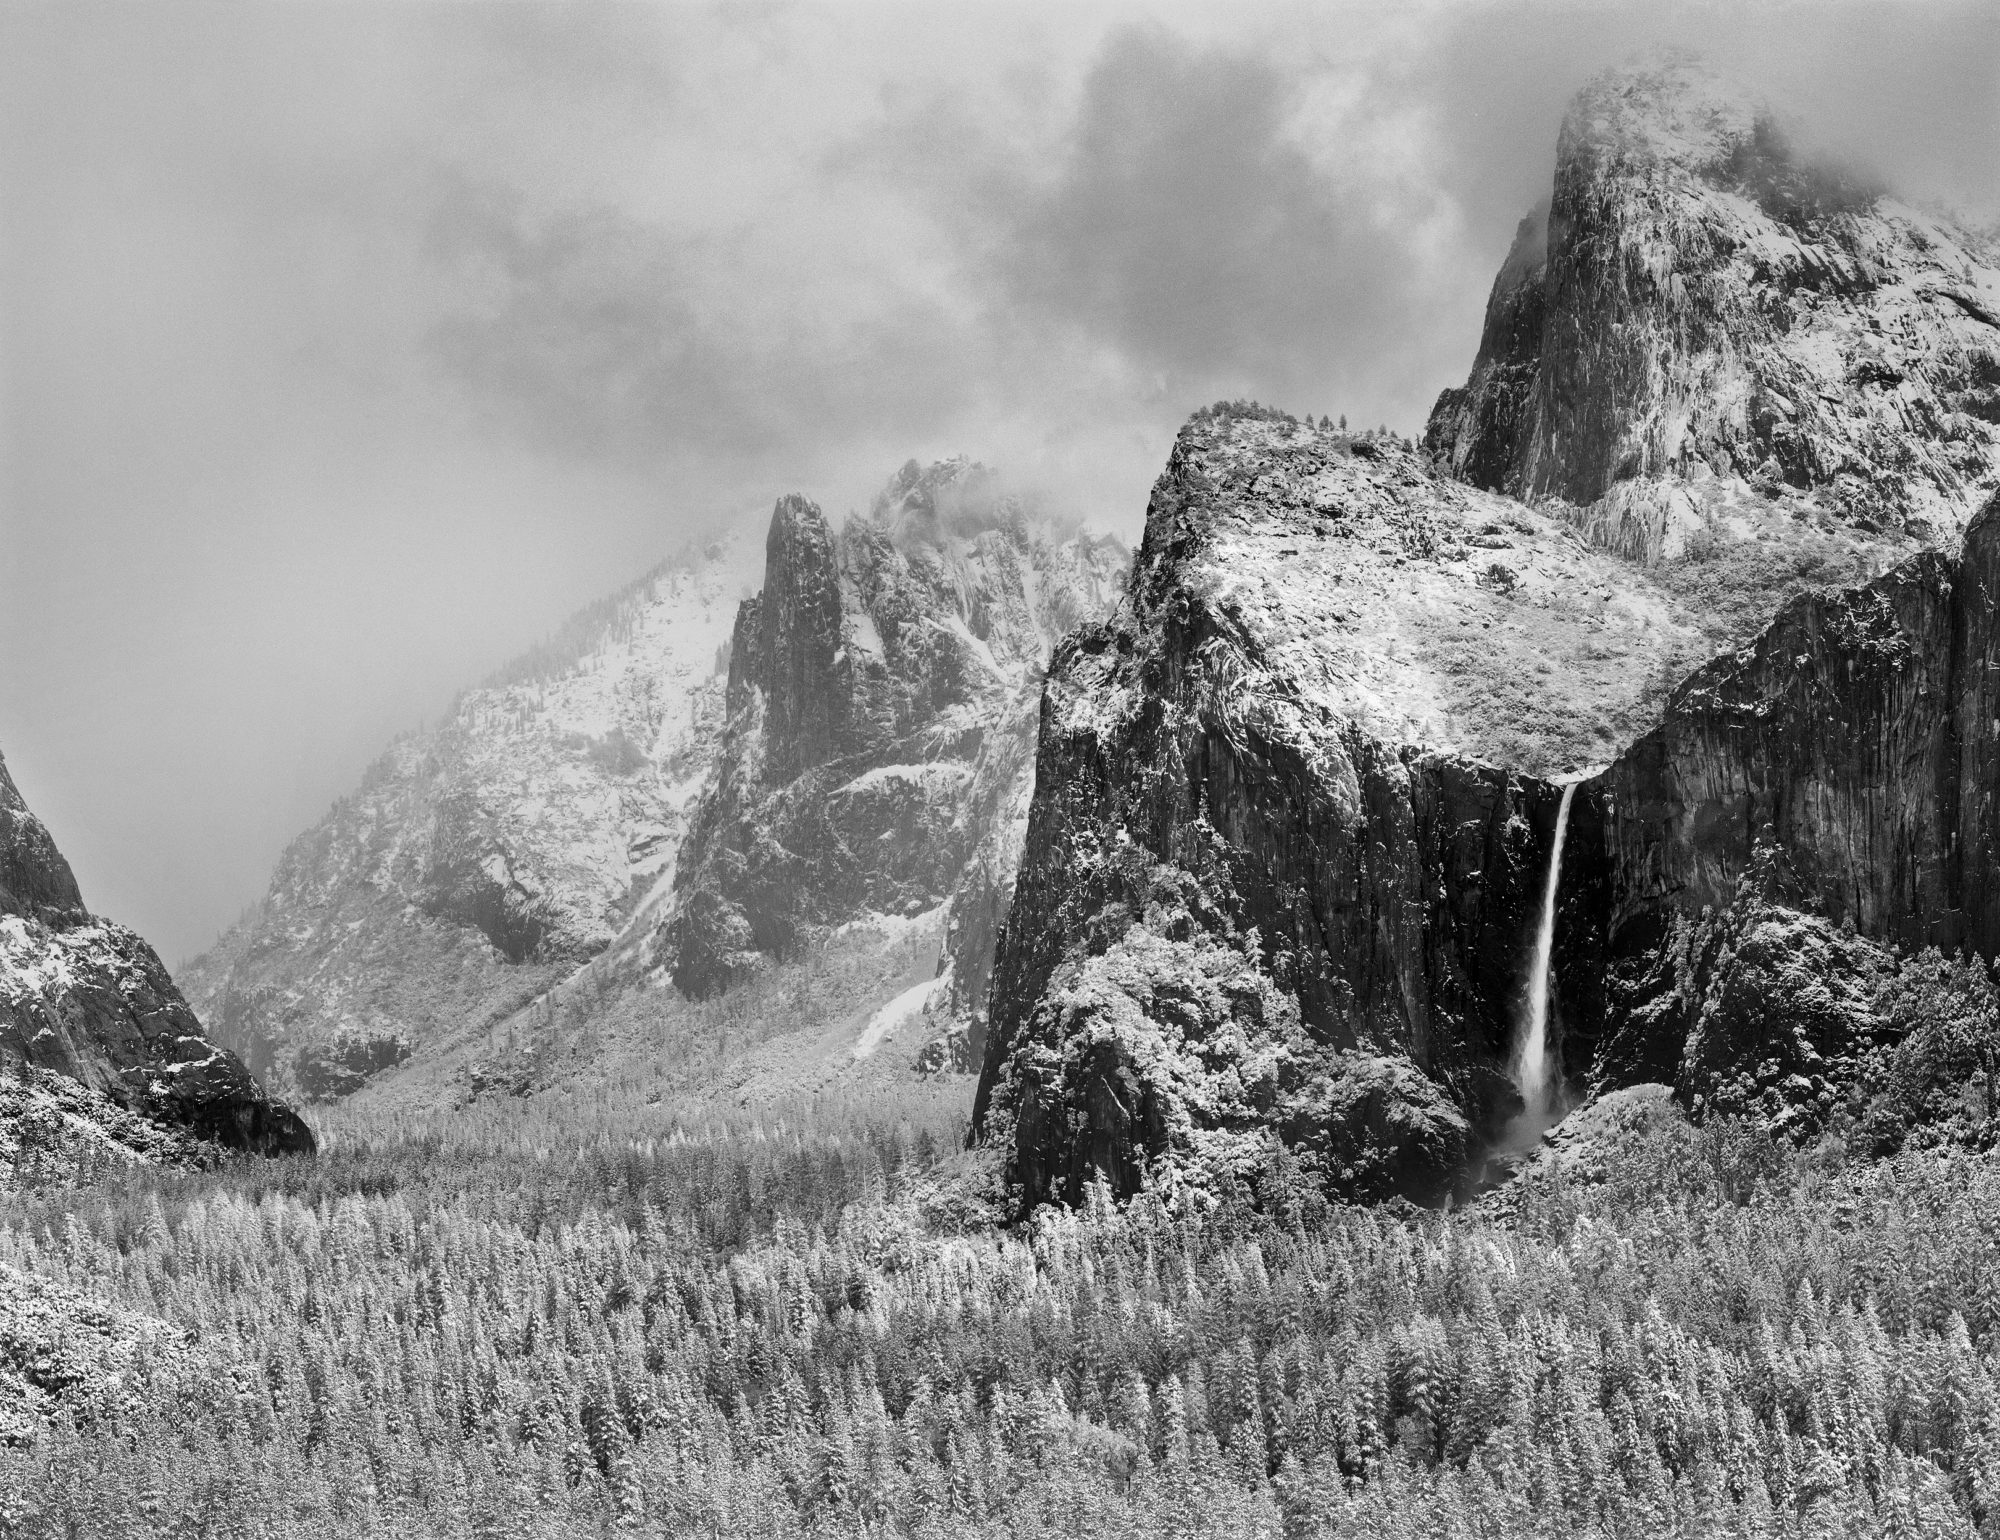
Classic Black and White Digital Processing Class

Are you ready to start processing your black and white photographs like a master?

In the last year, I’ve helped hundreds of photographers improve their B&W processing through my talks and workshops, and I’d like to help you, too. Wednesday, January 12, I’ll be starting another round of my popular four-session Zoom class, Classic Black and White Digital Processing.

My talk at the B&H Photo Event Space provides a great (and free!) introduction to the workshop. It touches on many of the subjects this class will explore in greater depth. 

Every time I teach this class, it’s rewarding to see how the participants improve their photography and processing skills each week. Here’s what my students have to say about the class:

I have found the class to be outstanding, not only for learning techniques that are new to me in creating a B&W image, but also the creative ideas to draw the viewer into the scene.
– Brad K.


I want to thank you for your classes and all the extra effort you’re devoting to your students. The information is worth far more than than the price of admission.
– Al H.


This class has introduced me to new tools for vastly improving my images.
– Dennis W.

We’ll meet for four online sessions, each Tuesday through February 2. Each session lasts two hours. The first hour is live instruction, where I teach the techniques I use. During the second hour, I show how I apply those techniques to YOUR photographs, providing insight and critique that will help you learn and grow. 

Each session will be available to re-watch online for two weeks after the class, allowing you to go over the content again, or watch at a different time if you have a schedule conflict. 

Sign up today, then keep chasing the light!

Processing for Print Instead of for Screen

When you process your photos, are you trying to make them look good for screen or are you thinking about how they will print? And why is this even a question? 

Well if you’ve ever made a print and had it come back looking nothing like your screen, you’ve experienced why this matters. 

And not only do screens look different from prints, every screen looks different! 

Every.Single.One.

If you don’t believe me, next time you walk into Costco, look at all the giant flat screen TVs and see how different every one looks. 

The harsh reality is that when it comes to displaying our photos on a phone, tablet, or computer, It’s going to look different on every device. Throw in what instagram or facebook is doing to your photos and the same photo may even look different on the same device!

Trying to adjust to this every moving target is just chasing your tail. Great Rich, thanks for that little nugget of wisdom, but what do I do about it?

The answer lies in picking a more consistent standard, and for me that standard is prints. 

With the right workflow, prints allow a higher degree of control and consistency. So instead of processing something to look good on my screen when I know it will look different on your screen, my goal is to process the file so that it will make a good print. 

That’s a great goal, but what are some practical steps to achieve it. 

Well, first, I have to know my monitor well enough to get past the screen to print differences I talked about earlier. I do that with a mix of experience, knowing what a certain result on screen will produce on print.  I also use the info tool to read the pixel values ( “the numbers” ) so that I can make precise adjustments beyond what the screen can show me. 

Learning to understand what how the screen will translate to print is what I call an “mental calibration” as you are training your vision to compensate for differences between the two. It’s a learnable skill, but it does take practice. 

You can improve the process by “calibrating” your display with a device like the x-rite color monkey, and by using special reference monitors designed for screen to print matching ( I use a NEC MultiSync PA242W which you can read about in a previous article.)

Using that process, the processing decisions I make lead me to a file that I think will print the way I want. And if it will print the way I want, then this is the “most accurate” version of the file. 

So when I share this file on the web or social media, I’m starting with the best possible source. Since I know it’s being viewed on countless devices I have no control over, I know that at least I was feeding in the best original I could. 

So what happens if you work the opposite way? Making it look good for the screen with no regard for the print?

If you never print, that is a perfectly valid way to work. But it builds in a “gotcha” if you decide to print one of those files, chances are it will look nothing like your screen. 

It’s really easy to push a file so far in such a way that still looks good on screen but moves outside the realm of what can ever be produced in a print. That doesn’t mean screens are better…in fact quite the opposite. What it means is that a screen is imprecise enough that it can hide a lot of bad processing decisions that become glaringly obvious on print. 

There is a saying in the music world that if you can’t play well, then play loud. Screens are kinda like that. 

You can get so used to hearing your photo “loud” on screen that when you switch to prints, which are capable of so much more depth and subtlety, that you can’t make the two meet. By processing my file for print, I don’t run into this problem.

Because I never expect the print to look just like it does on screen, I’m setting up a different expectation in my mind than that held by a photographer who seldom prints. Furthermore, I never expect that when I share my photo on the internet that it will look exactly the way it does on my precisely color managed monitor at home. It all comes down choosing a set of expectations that meet your particular needs, and using a workflow that helps you consistently achieve those expectations.  

Simple Photo Processing – Less Is More

Don’t you wish processing could be easier? With all those sliders, it’s so easy to overdo things, but that’s not always the best choice. Let me give you a peek into how simple it can be if you get everything working together.

I process the photo in this video with just one global curve adjustment. Not all my photos process this easily, but when you get just the right light and subject, it’s possible. Watch the video and let me know what you think!

Grizzly Bear Processing Video

Capturing the feel of a large, wet, and hungry grizzly bear just a few dozen yards away can be challenging. In this video, I’ll show you some of my processing techniques that reveal the characteristics of the animal while holding the viewer’s attention.

I’ve processed many photos of grizzlies over the years, and every time I’m amazed at these huge creatures and the power they have.

My goal with wildlife photos is to help people experience what the photographer saw, and the many qualities of the animal that have to translate into the 2D medium of photography.

Thanks to Dan Brown for letting me show you how I processed his photo.

Limitations of the Contrast Slider in Adobe Camera Raw

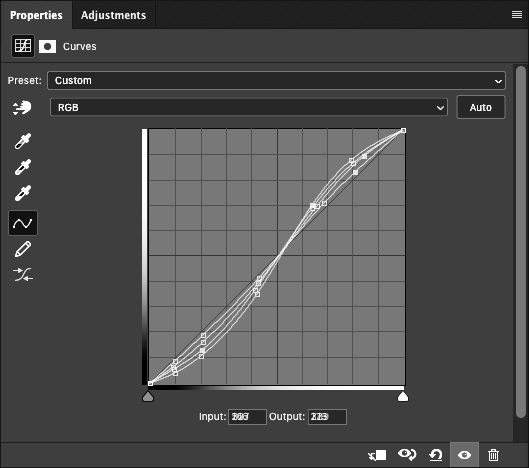
Curve equivalents of Contrast Slider in Adobe Camera Raw at +25, +50, +75, and +100.

I’m working on an article, and it turns out the Curves slider in Adobe Camera RAW is very limiting. The graphic above shows the curves required to produce the equivalent of +25, +50, +75, and +100 with the curves slider. The most pronounced curve is the +100, and the least pronounced (from the 1:1 slope baseline) is +25.

I’ve been meaning to do this for a long time, and honestly I’m a little shocked by the results. Even at +100, the curves slider is weak sauce, and doesn’t even begin to harness the power of curves.

What I’ve seen so far makes be glad I bypass the contrast slider and go right to curves. I’m looking forward to running some more experiments and developing a more in depth article.

Processing Makes the Difference in Prints

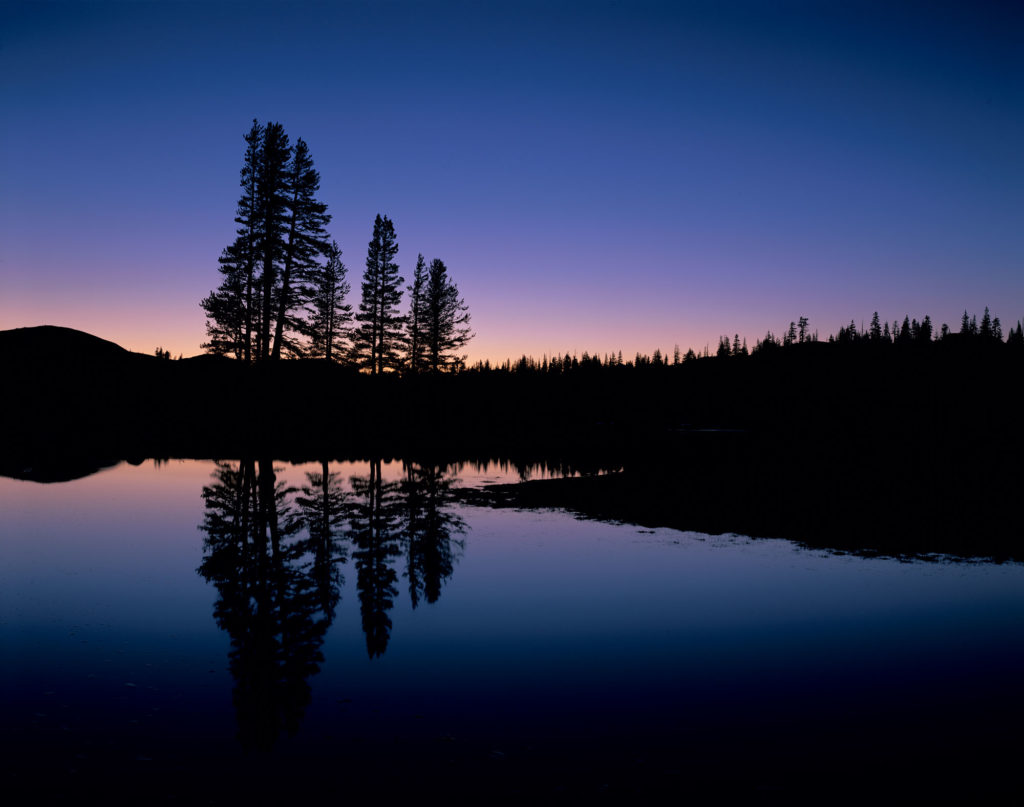
Reflections, Tuolumne Meadows, Yosemite National Park

Not sure why your prints aren’t coming our the way you want? Want better prints? Then it’s time to look at how you process. 

Processing is where we take creative control over what a print will look like. 

The printer (output device) is supposed to be the dumb part of the process. It’s not supposed to interpret, fix, or change your processing decisions. It’s just supposed to render the processing accurately. 

A printer should be like a player piano. You put in a piano roll, and assuming the piano is in tune, you hear the music as the musician intended. 

Our file is the piano roll, and processing is where we decide what notes should be played, when, and for how long. 

Processing is where the really important stuff happens. Processing creates a file that tells the output device what to do; what colors to print, how dark and how light, how saturated, and what color balance. The output device isn’t supposed to be deciding those things, YOU ARE!

One of the challenges you may be facing is that making something look “good” on a screen is easier than making it look good in print. 

Screens are more forgiving because they they can’t display the same subtle variations of color, highlight, and shadow that a print can. They hide small (and sometimes not so small) differences in processing. This is especially true of phone and tablet size screens. 

If you are processing for web and social media, the screen becomes your final output device, and you can see it instantly in its final form. But not so with prints. 

There is always a screen to print translation as we switch from transmitted light (screen) to reflected light with ink on paper (print.) 

Prints are less forgiving of processing errors. Things that will hide on screen become glaringly evident on the print. The “pop” of a screen isn’t there to mask these processing errors. 

So when we’re printing, we need to learn how to “read” the monitor and anticipate what it will look like on the print. Like any art, that means practicing, gaining experience, and refining our techniques. 

Printing is sensitive to very small changes. If you can see the difference between a one point slider move on screen, assume you’ll be able to see the difference in print. 

So instead of trying to see if 50 contrast is better than 30, try and see if 34 contrast is better than 35. Or instead of deciding between a 5000k and a 4950k white balance how about trying a 4975k setting?

It may sounds like splitting hairs, but these very refined changes is where you bring out the magic in a print. I often spend half my processing time on an image going back and forth between small changes to asses their effect. I’m looking for the “perfect” setting that matches my artistic vision.

This fine tuning is really noticeable in highlights and shadows because  those tonal areas simply do not display accurately on screen.  So I rely on the info tool to read the numbers. This gives me a mathematic measure of what the print will show instead of the visual measure our eyes give us. For shadows and highlights, the numbers are more accurate than our monitor or eyes. 

Processing for print is a culmination of all your photographic experience and knowledge to express your vision. The more you grow your skills, the more you gain experience, the more satisfied you’ll be with your results. Next time you don’t get the print you were expecting, go back to your processing to make it better. 

Taming Large File Sizes in Photoshop

Working with high megapixel files in Photoshop can be a pain. It seems I’m routinely working on files that are close to a GB in size when I start adding layers to my 42MP 16 bit captures. New 61MP and larger cameras are just going to make that worse. 

While Photoshop can deal with these files, the disk space taken up by multiple versions of them, as well as for backup, plus save times can get to be a real drag. So how do we make it easier?

Well, this problem is nothing new. In my early days as a printmaker, working on 300 MB scans was a huge challenge. I remember when it took an hour just to do a 90 degree rotation, which gave me plenty of time to roam outside my cabin in Yosemite, but wasn’t very efficient. So I came up with a solution that I think you might find useful today. 

Here’s how it works. When starting with a large source file, like a 1GB scan or high MP capture, I make a copy of it and size it down to a reasonable size, say 8×10 inches @300ppi, which is a good size for proofing. Then I do all my processing on adjustment layers in Photoshop. This keeps the files small and quick to work on. 

When, and if, I need a larger version of the file, there is a simple process to transfer all those layers over to the high resolution original. 

My printmakers and I used this process on thousands upon thousands of files in my days at West Coast Imaging, and I even made a youtube video that demonstrates the process. One of these days I want to re-record these videos in beautiful HD (or 4k!), but I thought it was worth sharing the old videos because the process works the same, even on the ancient version of Photoshop depicted. 

Take a look and see if it’s a trick that can help in your toolbox. 

Adobe Enhance Details

Does the new Enhanced Detail feature in Photoshop and Lightroom really work? It does, at least for me. 

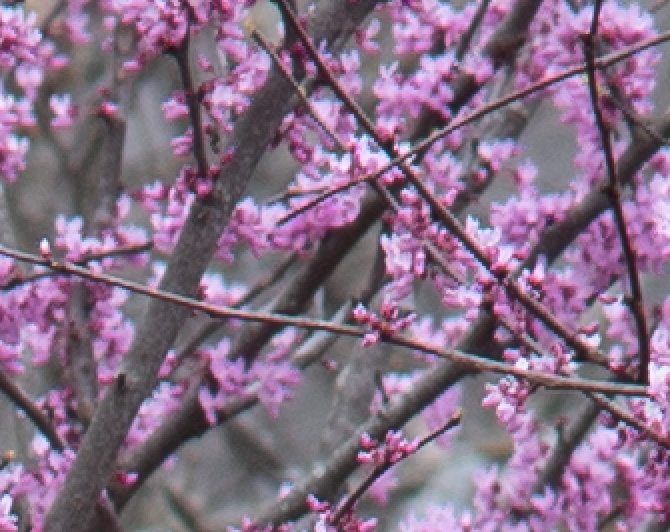
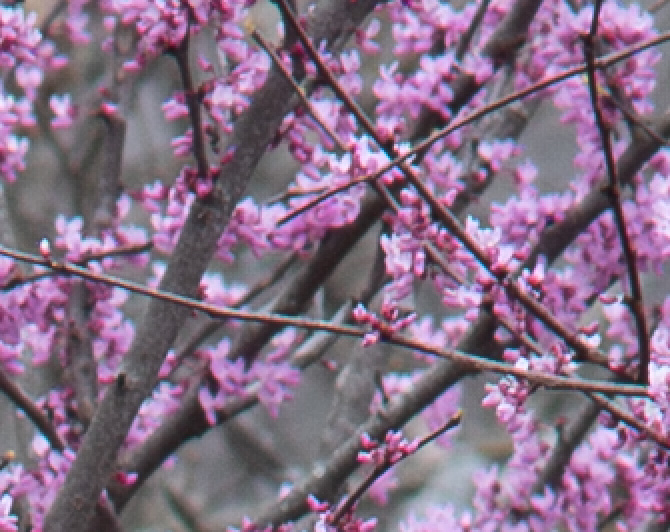
Heres an example of the same RAW file processed with Enhance Details on, and with it off. This is a screen shot at about 400% magnification. 

Normal Raw Processing
Processed using Enhance Details

You might have to zoom in to see this on your device, but when viewed at full resolution, I can clearly see that all the lines of the branches, and even the edges of the flowers are smoother and more refined. With it off, there is much more aliasing, very blocky in-fact. 

Enhanced Details may work better with some sensors than others. I’m hearing from photographers that see no effect, but I’ve seen plenty of examples where it does work. So you’ll have to try it yourself. 

For my Sony A7RII, it clearly does work, and this refinement of detail will allow me more options when applying unsharp mask, as well as resolving finer detail.  It’s now my default processing option. I just wish Adobe would integrate it better into the workflow instead of the current requirement to export to a DNG first.