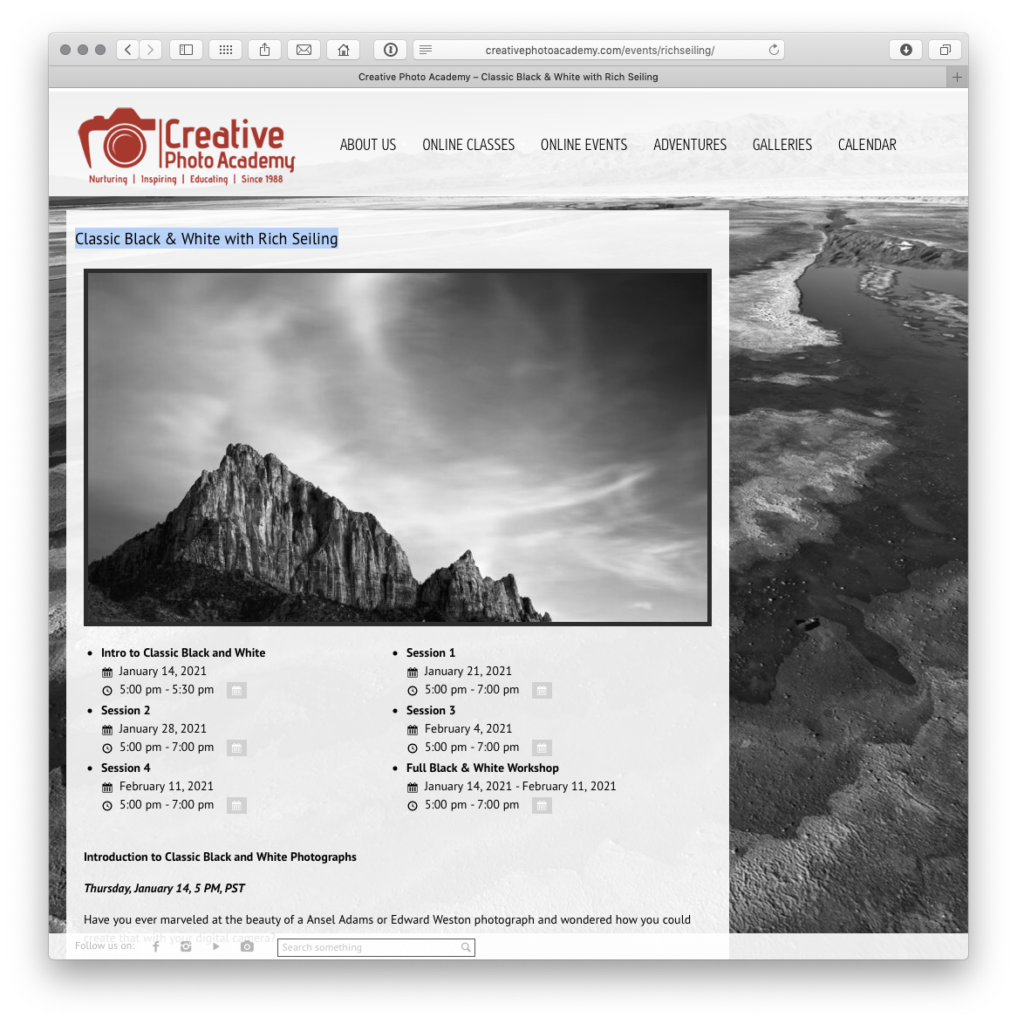
Want to learn how to make the classic looking black and white photographs with a digital camera and digital processing? My five week online course will teach you! We start on January 14, and the first lecture is free if you register at the link below! Looking forward to seeing you there!
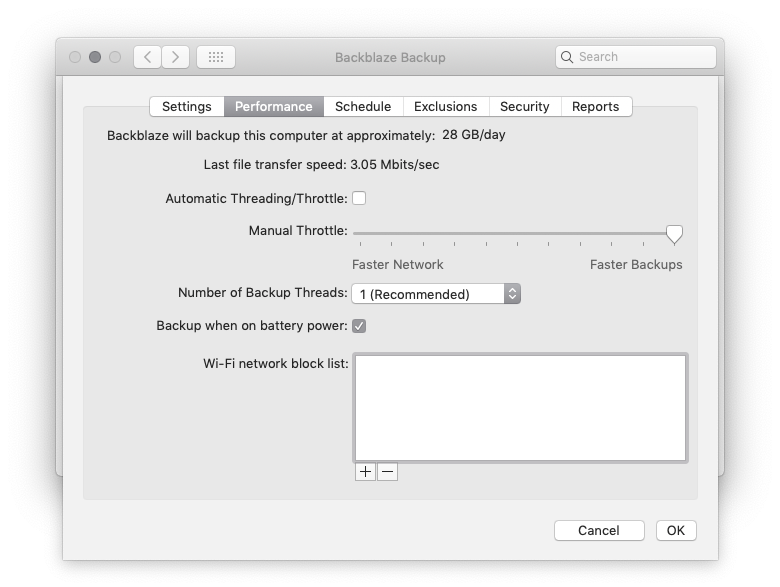
If you don’t have a local backup in addition to your cloud backup, there is a big hole in your backup plan that you may not be aware of. Cloud backup takes time, because it has to go across your internet connection. For small documents like word processing, spreadsheets, you won’t see any problems. But photographers don’t deal in such small files. How often do you come back form the field with 32GB or more of data? How long does that take to upload to the cloud? If you can’t answer that, then your data may be at risk.
Here’s an example. Last month I returned from teaching a workshop with 100GB of new files that needed to be added to the hard drive where I store all my photos. Checking my BackBlaze control panel, I see that my upload rate is 28GB per day. That means it would to take three and a half days before all my data is transmitted to Backblaze. And for most of those three days, my data is at risk of loss.
That’s why we need local backup in addition to cloud backup.
My backup plan includes several “backup” drives that I use with CarbonCopyCloner to keep exact duplicates of my main hard drive. Whenever I download photos from my memory cards, I immediately make a backup onto the backup drives before I erase the card. I can do this in a matter of minutes, not days like an online backup takes, so I can get an almost instant backup of my new photos.
So why use cloud backup when it can take days instead of minutes? Because we need to protect against extreme disasters.
What if my house burns down, or my drives are stolen? Or a virus? Even with multiple copies of my data in one location, there are a number of very real ways those could all be destroyed. Putting a copy in the cloud gives me an “offsite” backup that is protected from local disasters like fire, flood, theft, etc. It make take a couple days to get it all uploaded, so there is still some risk, but I’ve greatly lessened my overall risk by having both onsite and offsite. backups
Understanding your needs and how your backup plan works will go a long way to protecting your work.
To make improve your backup plan, think about your answers to the following questions:
Do you have an on site backup?
2. Do you have an off site backup?
3. How fast can you upload a 32BG shoot to the cloud?
For those who want to print at home, Canon has updated their desktop size professional/fine art inkjet printers recently. The new PIXMA PRO-200 and imagePROGRAPF PRO-300 provide much needed updates, as the PRO-100 was getting quite dated given the state of the art of inkjet printing in 2020.
If you are thinking about buying a printer, I’m going to walk through the current Cannon offerings with my thoughts on the advantages of each.
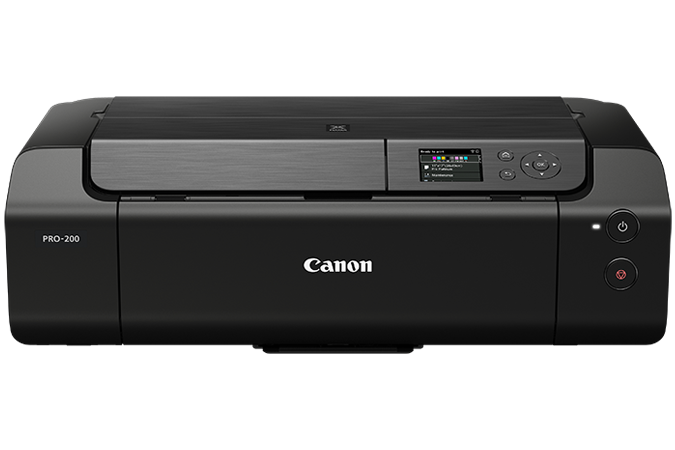
PIXMA PRO-200 – 13 inch wide prints MSRP $699
This is the “entry level” printer for 13” wide making photo quality prints. It offers two shades of gray ink which I consider necessary for pleasing black and white prints. I’ve not printed with this printer, but I suspect it will offer higher quality than the PRO-100 which I believe was introduced in 2012 which is a lifetime ago in inkjet printing. But you should note that this printer uses dye based inks, which typically are not as fade resistant as pigment inks.
At the lower end of their range, Canon limits the features you get, as you’ll see when we look at the features of the more expensive models in their lineup, so you aren’t going to get everything unless you are willing to pay for it. Even so, this printer sits nicely at the bottom of Canon’s line with good features for the price slot it occupies
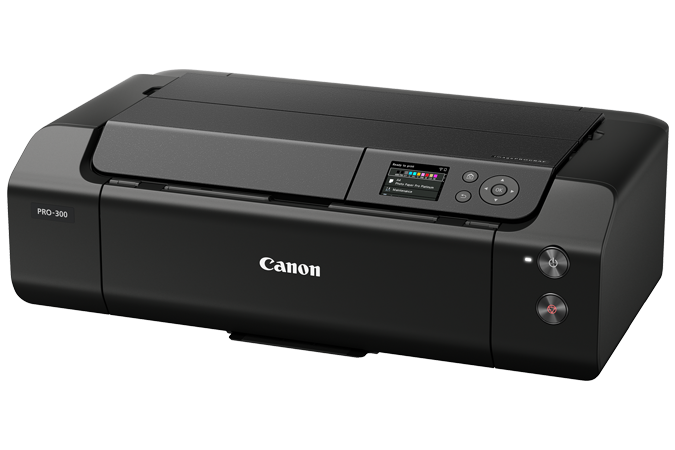
imagePROGRAPF PRO-300 – 13 inch wide prints MSRP $899
The PRO-300 offers a different mix of options than the PRO-200. Some are upgrades, but some I’d consider downgrades.
Let’s start with the upgrades. First, you get a Matte Black ink which will give you better results on artist papers like Hahnemühle Photo Rag. Better black improve print quality, so this is a big advantage if you regularly print on artist papers.
Second is the addition of a red ink. My experience is that this offers a meaningful increase in the ability to reproduce the stunning reds in your photographs, and the reason you should be using the ProPhoto colorspace when editing your files (never use AdobeRGB or sRGB when editing or for “Master” files because they severely compromise the reds in your file.)
Third is the addition of the Chroma Optimizer that is found in their larger printers. The Chroma Optimizer puts a clear coat over the ink that helps produce a smooth surface on glossy and semi-gloss papers which Canon says results in in more evenly reflected light that gives richer blacks, more vivid colors, and less bronzing. From what I’ve seen, these claims are true, and that gives the PRO-300 another advantage.
But there is always a catch, right? Adding these extra inks means you give up the light gray ink found in the higher end models (and even the Pro-100.) I do a lot of black and white printing, so I don’t like that at all because it means the lightest, most delicate highlights now need to be made from gray ink which will most likely have visible dots and not achieve the delicate tones possible using a third lighter gray ink. That’s a frustrating choice to have to make, and for me, that makes this printer a pass, but if you only occasionally do B&W, it may not be an issue for you.
I’m also pretty sure this is the “least expensive” printer in the Canon lineup that uses the LUCIA PRO pigment inks. Typically pigment inks last longer than dye inks, so if you are looking to make long lasting prints, you should take that into consideration.
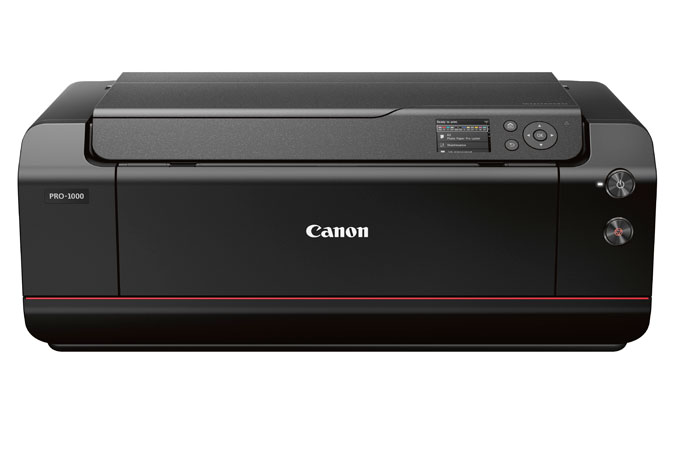
imagePROGRAPF PRO-1000 – 17 inch wide prints MSRP $1299
The Pro-1000 is the entry level step into the highest quality Canon offers with 11 ink color of its LUCIA PRO pigment inks including Matte Black, Gray, PhotoGray (light Gray), Blue, and Red as well as the ChromaOptimizer. This is the same inkset found in PRO-2100/4100/6000 printers. I’ve owned this printer and can confirm I was able to match the prints from my larger PRO-4000 printer. This ink-set is capable of producing beyond lab quality prints, unless your lab is using this same printer.
My experience as of November 2020 is that this inkset produces the most brilliant digital prints of any process I’ve seen, so much so that it has changed the way I look at my photographs, and allows me to push my printing to new heights. This due in large part to the incredible blacks (d-max) the inks achieve, which give prints more depth and dimensionality. It’s a big upgrade even over the Canon 8400 printers I have previously used. Canon made a big leap forward with this inkset, and changed photography in the process because it literally makes my old prints look dated when compared side by side to the new inkset.
Another advantage is obviously the ability to print to 17 inches wide, which allows for prints to 17×22 inches. For many photographers, this lets them print most of their work in house, so a lab only needs to be used when making larger prints.
You also get to use larger ink cartridges which is an advantage if you are printing a lot. Canon ink costs a little more per ml than Epson inks, but my experience is that Canon printers use less ink than Epson so I think it evens out in the end on cost.
The drawback for me is no roll feeder. You have more paper options when printing on rolls, that feature is going to cost you more. Probably not something that affects most photographers, but one that factors in for me.
I really can’t say enough about these printers. With them, I am making the best prints in my 20+ years of digital printing, prints that have impressed the very discerning pros I work with. The black ink took a generational leap ahead of Epson, but Epson is catching up (competition is a great thing for us photographers!)
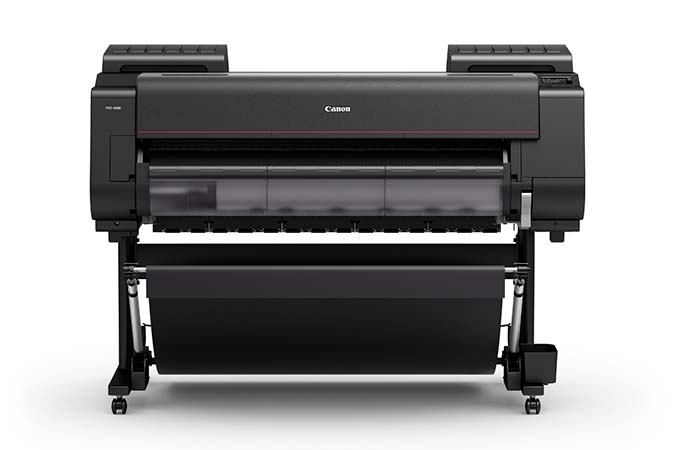
These models allow you to print in 24 inch, 44 inch and 60 inch print widths that allow you to print almost anything you can imaging.
The advantage to these printers is the size you can print. The disadvantage is the size they take up. Not everyone has the room for one of these outside a professional environment, or a frequent enough need for larger prints.
These models all use same eleven LUCIA PRO pigment inks found in the PRO-1000 so you get the same quality.
A printer this large is a multi year investment, and you really should do the ROI on it and make sure you need it so it doesn’t just sit there and collect dust. If you can make it pencil out, wow, what an amazing tool it is to have. If you can’t, consider the PRO-1000 instead.
I highly recommend buying the extended maintenance contract Canon offers, which gives you a layer of insurance that the printer will be a useable tool for the life of the contract.
These printers are really “disposable” items in that they can cost as much to fix as buying a new printer. You need to buy it with that mindset, and not think of it as a lifelong investment. If that ROI doesn’t work, DON’T BUY IT!
Final Thoughts
I’ve listed the MSRP for these printers, but you should never pay full retail on a printer. Canon and Epson are always offering insane sales and rebates. The rebates cycle every month or tow, and even cycle between vendors. But a little patience can save you hundreds or thousands of dollars.
New printers don’t have discounts immediately, so there is a price for getting a printer immediately after it’s introduced. Do your research, determine your needs, and decide waiting is worth it or not.
You should also look at extended maintenance or warranty options. Printers are very expensive to repair when they break, so much so it’s sometimes less expensive to just buy a new printer. Canon offers maintenance contracts on many of their printers, which act as insurance to guarantee your printer will work when it’s under contract. For desktop printers, you may have to look at third party insurance offers by some vendors like Amazon. Printers are not an investment, they are an expense that allows you to use it for a certain amount of time until it either dies or is rendered obsolete. It may last two years or ten, but it’s a gamble every time, so protect your bet as best you can and make sure the cost fits your business model or need.
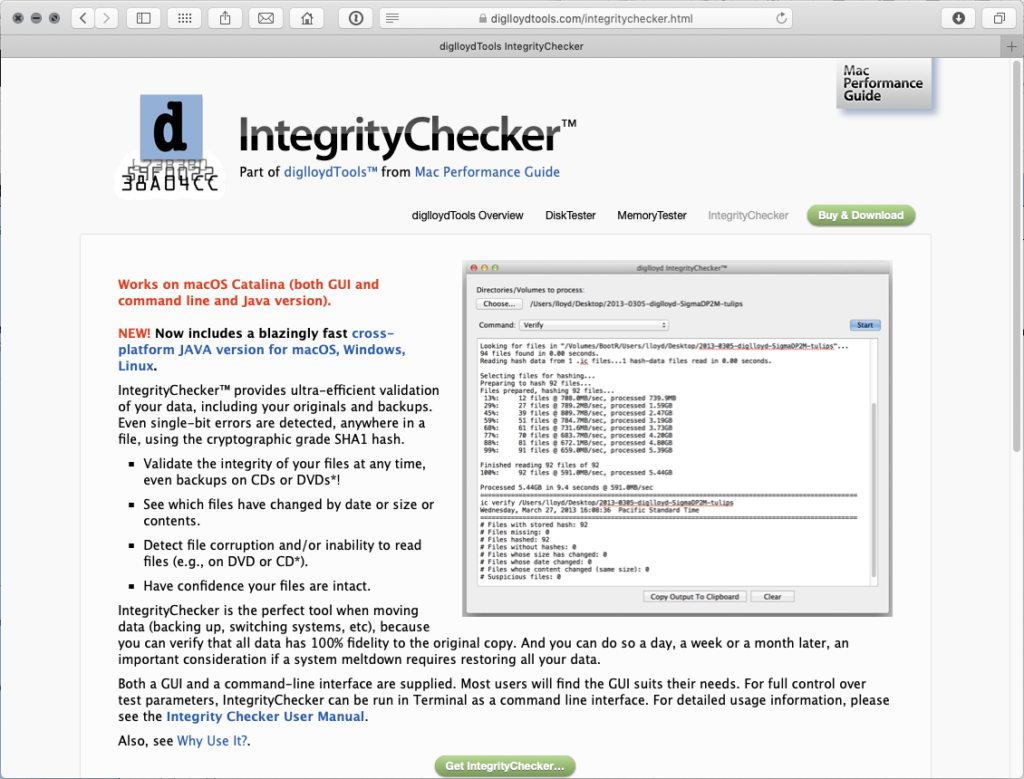
This is a follow up to my April project to check the integrity of my backups as I was moving my files to a larger hard drive.
My objective was to make sure that every single file (about one million) copied exactly to the new drive, and that there were no errors that would prevent me from accessing my data.
To do this I used a software app from Lloyd Chambers called Integrity Checker which is the most efficient tool I’ve found for this unique job. It’s a command line tool that uses the Mac terminal. That in itself was a learning experience as previously I’ve been very afraid of how bad the wrong command in terminal could muck things up.
Thanks to Integrity Checker, I was able to confirm that my two main backup copies are exact duplicates of the “master” hard drive. That’s a very good thing because it means I really do have a useable backup when my main drive fails. (All drives fail, it’s just a matter of when.)
My secondary objective was to verify some bare drives I was using in the past for backups. I had stopped using them because the were throwing errors in CarbonCopyCloner. I suspected that these errors were due to the drive dock I was using them in, but had no way to be sure, so I didn’t trust them. They got shoved into a drawer and were just sitting there as “worst case” backups as a hail Mary play in case I needed it if things every got really ugly.
To try and bring these orphaned drives back into my active backup, I put them into a known good drive enclosure. Then, using Integrity Checker, I was able verify that every file on them matches my “master” and that the drives are trustworthy. That gives me confidence to use them again for backing up new data, and lets them be useful as part of my backup strategy.
The one thing that has surprised me as I completed this project is that everything actually worked. Terabytes upon terabytes of data and multiple copies of a million files that were hashed and read multiple times, and it all worked. Even digital photos from the mid 1990s were still there and readable. I think I found a dozen files that threw an error, but they were all readable so the error was insignificant and they were mostly XMP files. That has made me much more trusting of the process used to backup my data. A sigh of relief, but I’ll still remain vigilant.
Another surprise was how many files I had duplicated on the drives. For a myriad of reasons, I had multiple folders with the same files that built up over the last twenty-ish years of managing my archive. One terabyte of duplicates to be precise. It would be a nightmare to reconcile all those files manually, but Integrity Checker came to the rescue again. One of it’s functions allows you to identify duplicate files…that’s how I discovered the 1 TB of duplicates in the first place.
But just as valuable was Integrity Checker’s ability to “clone” the duplicates and regain that wasted space if you are using a APFS formatted drive.
APFS is a format for storage drives used with a Mac. It’s designed for solid state drives, not spinning disks. It will work with a spinning hard drive, but it can cause a slowdown in transfer speed. That’s something I could tolerate for backups if it let me get back a terabyte of space, so one by one I converted my backups to APFS, re-verified that all the files would read back correctly, then used Integrity Checker to “de-dupe” the drives and reclaim that 1 TB of space back.
The unexpected benefit of this de-duping is that I now have a whole new set of tricks up my sleeve to manage my storage more efficiently.
The end result is that I now know that every copy of my data is good, and I know how to check it as I go forward to ensure it stays good. This gives me more confidence that my files will be there when I need them, which was the whole point of this adventure…and something I wish I had done a lot sooner.
My next adventure is to take one of my offsite backups into the cloud using a Synology DiskStation and Backblaze cloud…more on that in a future post.
Don’t you wish processing could be easier? With all those sliders, it’s so easy to overdo things, but that’s not always the best choice. Let me give you a peek into how simple it can be if you get everything working together.
I process the photo in this video with just one global curve adjustment. Not all my photos process this easily, but when you get just the right light and subject, it’s possible. Watch the video and let me know what you think!
Capturing the feel of a large, wet, and hungry grizzly bear just a few dozen yards away can be challenging. In this video, I’ll show you some of my processing techniques that reveal the characteristics of the animal while holding the viewer’s attention.
I’ve processed many photos of grizzlies over the years, and every time I’m amazed at these huge creatures and the power they have.
My goal with wildlife photos is to help people experience what the photographer saw, and the many qualities of the animal that have to translate into the 2D medium of photography.
Thanks to Dan Brown for letting me show you how I processed his photo.
The Booth Museum has posted an amazing 3D walkthrough of Robert Glenn Ketchum’s latest exhibit.
The picture posted above shows some of the work I and my team at West Coast Imaging helped produce for Ketchum over the years. The three pieces on the back wall are 48×66 inch prints mounted to dibond which really have to be seen in person to appreciate the effect scale has. Big prints like these are time consuming to produce well, technically challenging but immensely rewarding when finished.
What this walkthrough doesn’t show is the many phone calls, back and forth mailing of proofs, and sweating the details to get them just right. Hours and hours often go into these larger prints, inspecting every square inch of the file for defects and working to bring out the artist’s vision.
The walkthrough works chronologically through Ketchum’s many projects, starting with the work of Elliot Porter that influenced Ketchum and his take on color.
You can find a complete list of the photographs that in the display here. The prints marked “Fuji Crystal Archive” were made by WCI.
I want to be sure to acknowledge the contributions of all the West Coast Imaging team members that worked to produce these prints over the years. Master Printmakers Michael Jones, Terrance Reimer, and myself all had a hand in the Photoshop processing at various times. Jeff Grandy did his magic on the Tango drum scanner to turn Ketchum’s original film into high resolution digital data. And of course the many other talented individuals who helped output, inspect, and ship the prints so they could be turned into this exquisite museum show.
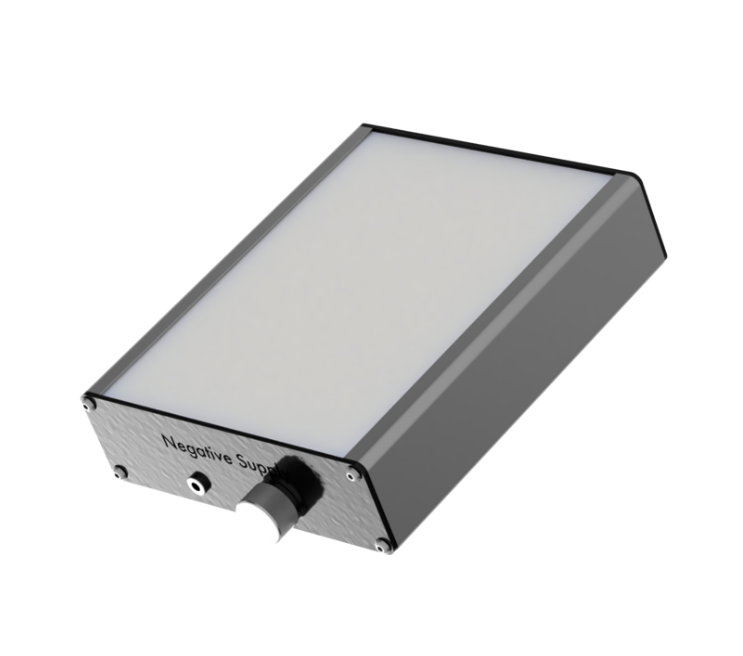
Using DLSRs as a scanner to digitize film has become a thing lately, and something I’ve been actively researching as I still have a sizable archive of film with plans to keep shooting B&W. One of the things you need to make good scans is a good light source. Most light sources do not illuminate across the full visible spectrum, which means that colors in your film may not show up in your scans. So I was really excited to discover Negative Supply offers a 99 CRI light source for scanning, and it’s made my wish list for a new scanning setup. I’m not expecting DSLR scanning to match a Tango drum scan, but I’d like to get the most out of the process and this will be a key component for color scanning.
You might be overexposing your photos without even knowing it. In this tutorial I’ll show you how I use RAWdigger to evaluate my exposures to see how well I did, and to pick the best file for processing.
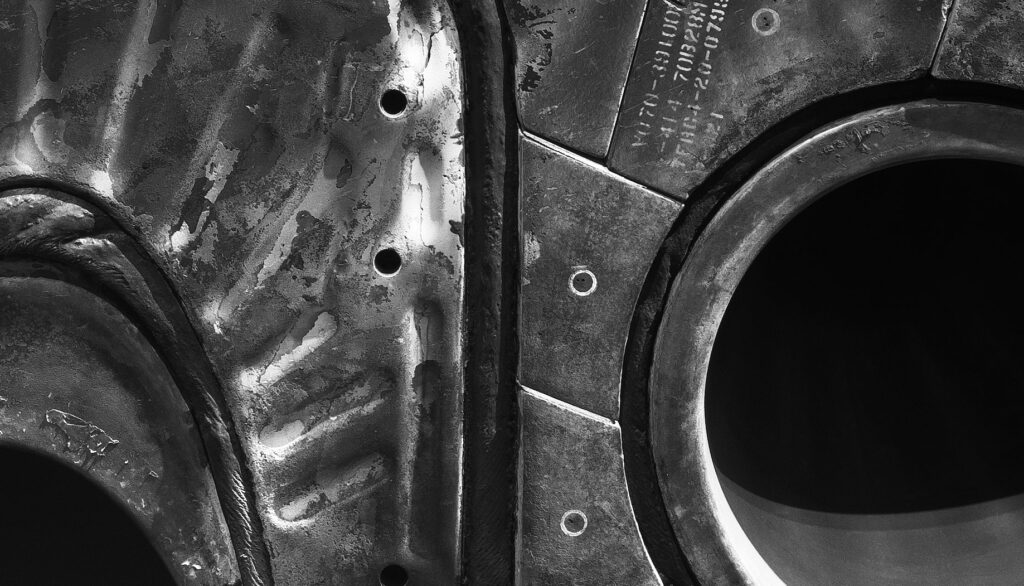
Earlier this month, I had the chance to photograph Space Shuttle Atlantis at Kennedy Space Center in Florida. The space center had just reopened, and because of the ongoing corona virus epidemic, there were very few visitors that day. At one point while photographing, I looked up, and I was the only person there. Just me and this magnificent machine in a space that is normally flooded with people. It was magical.
Having it virtually to myself made this one of the most enjoyable days of photography I’ve experienced. It was a experience I won’t soon forget.
I was able to work slowly and deliberately, using my Sony A7RII like a miniature view camera to capture the intricate detail and work with the incredibly challenging dynamic range of white tiles in spot light and black tiles in shadows.
This photograph shows the forward reaction control thrusters with streaks from the intense heat of re-entering the earth’s atmosphere at ~17,500mph.
I envisioned these photographs in black and white from the beginning, and the photos I made that day halve already inspired more work. I can’t wait to return.